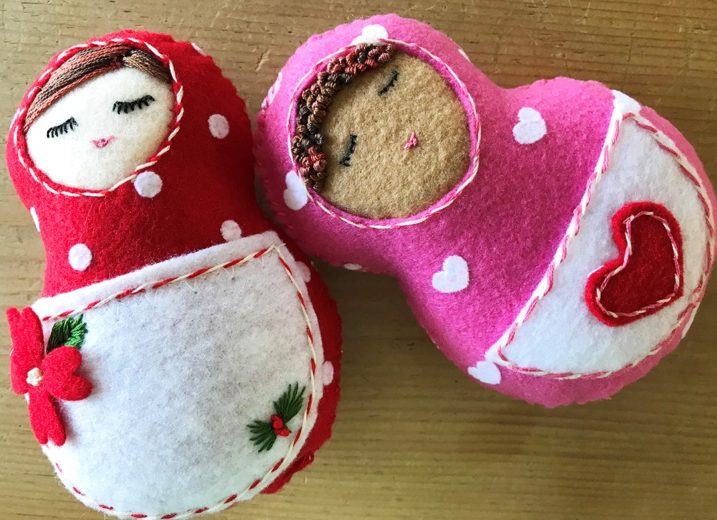
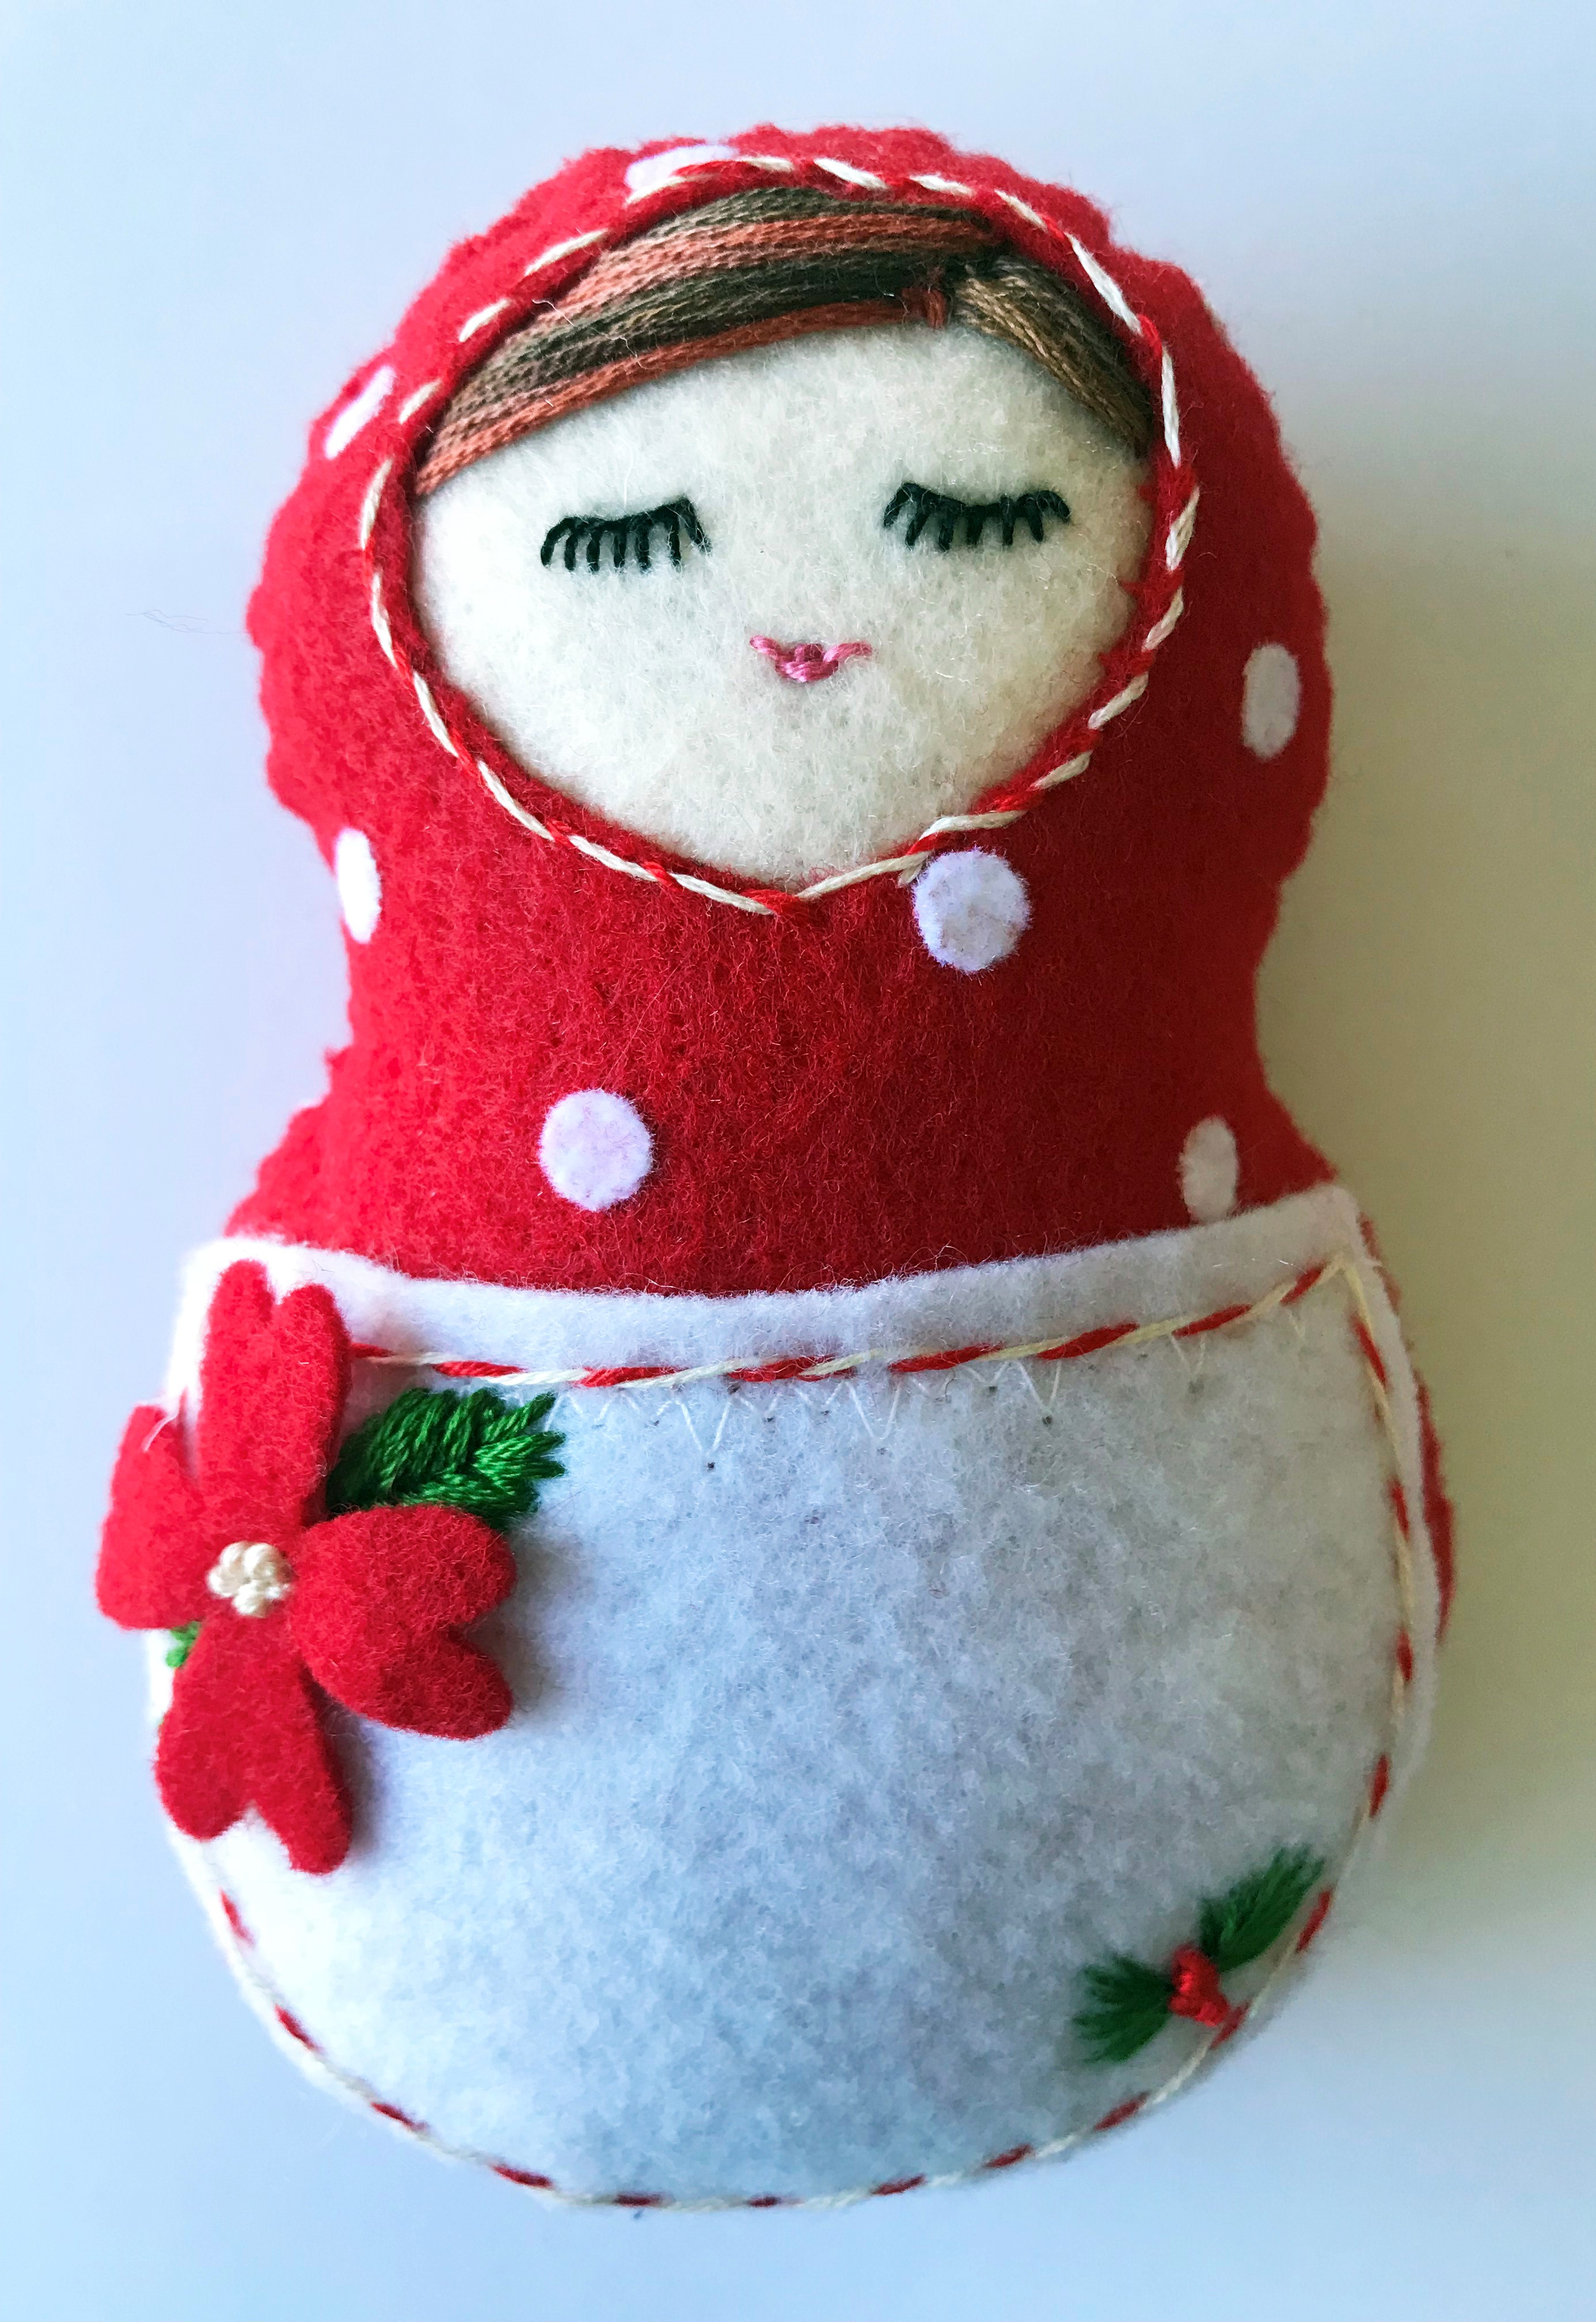
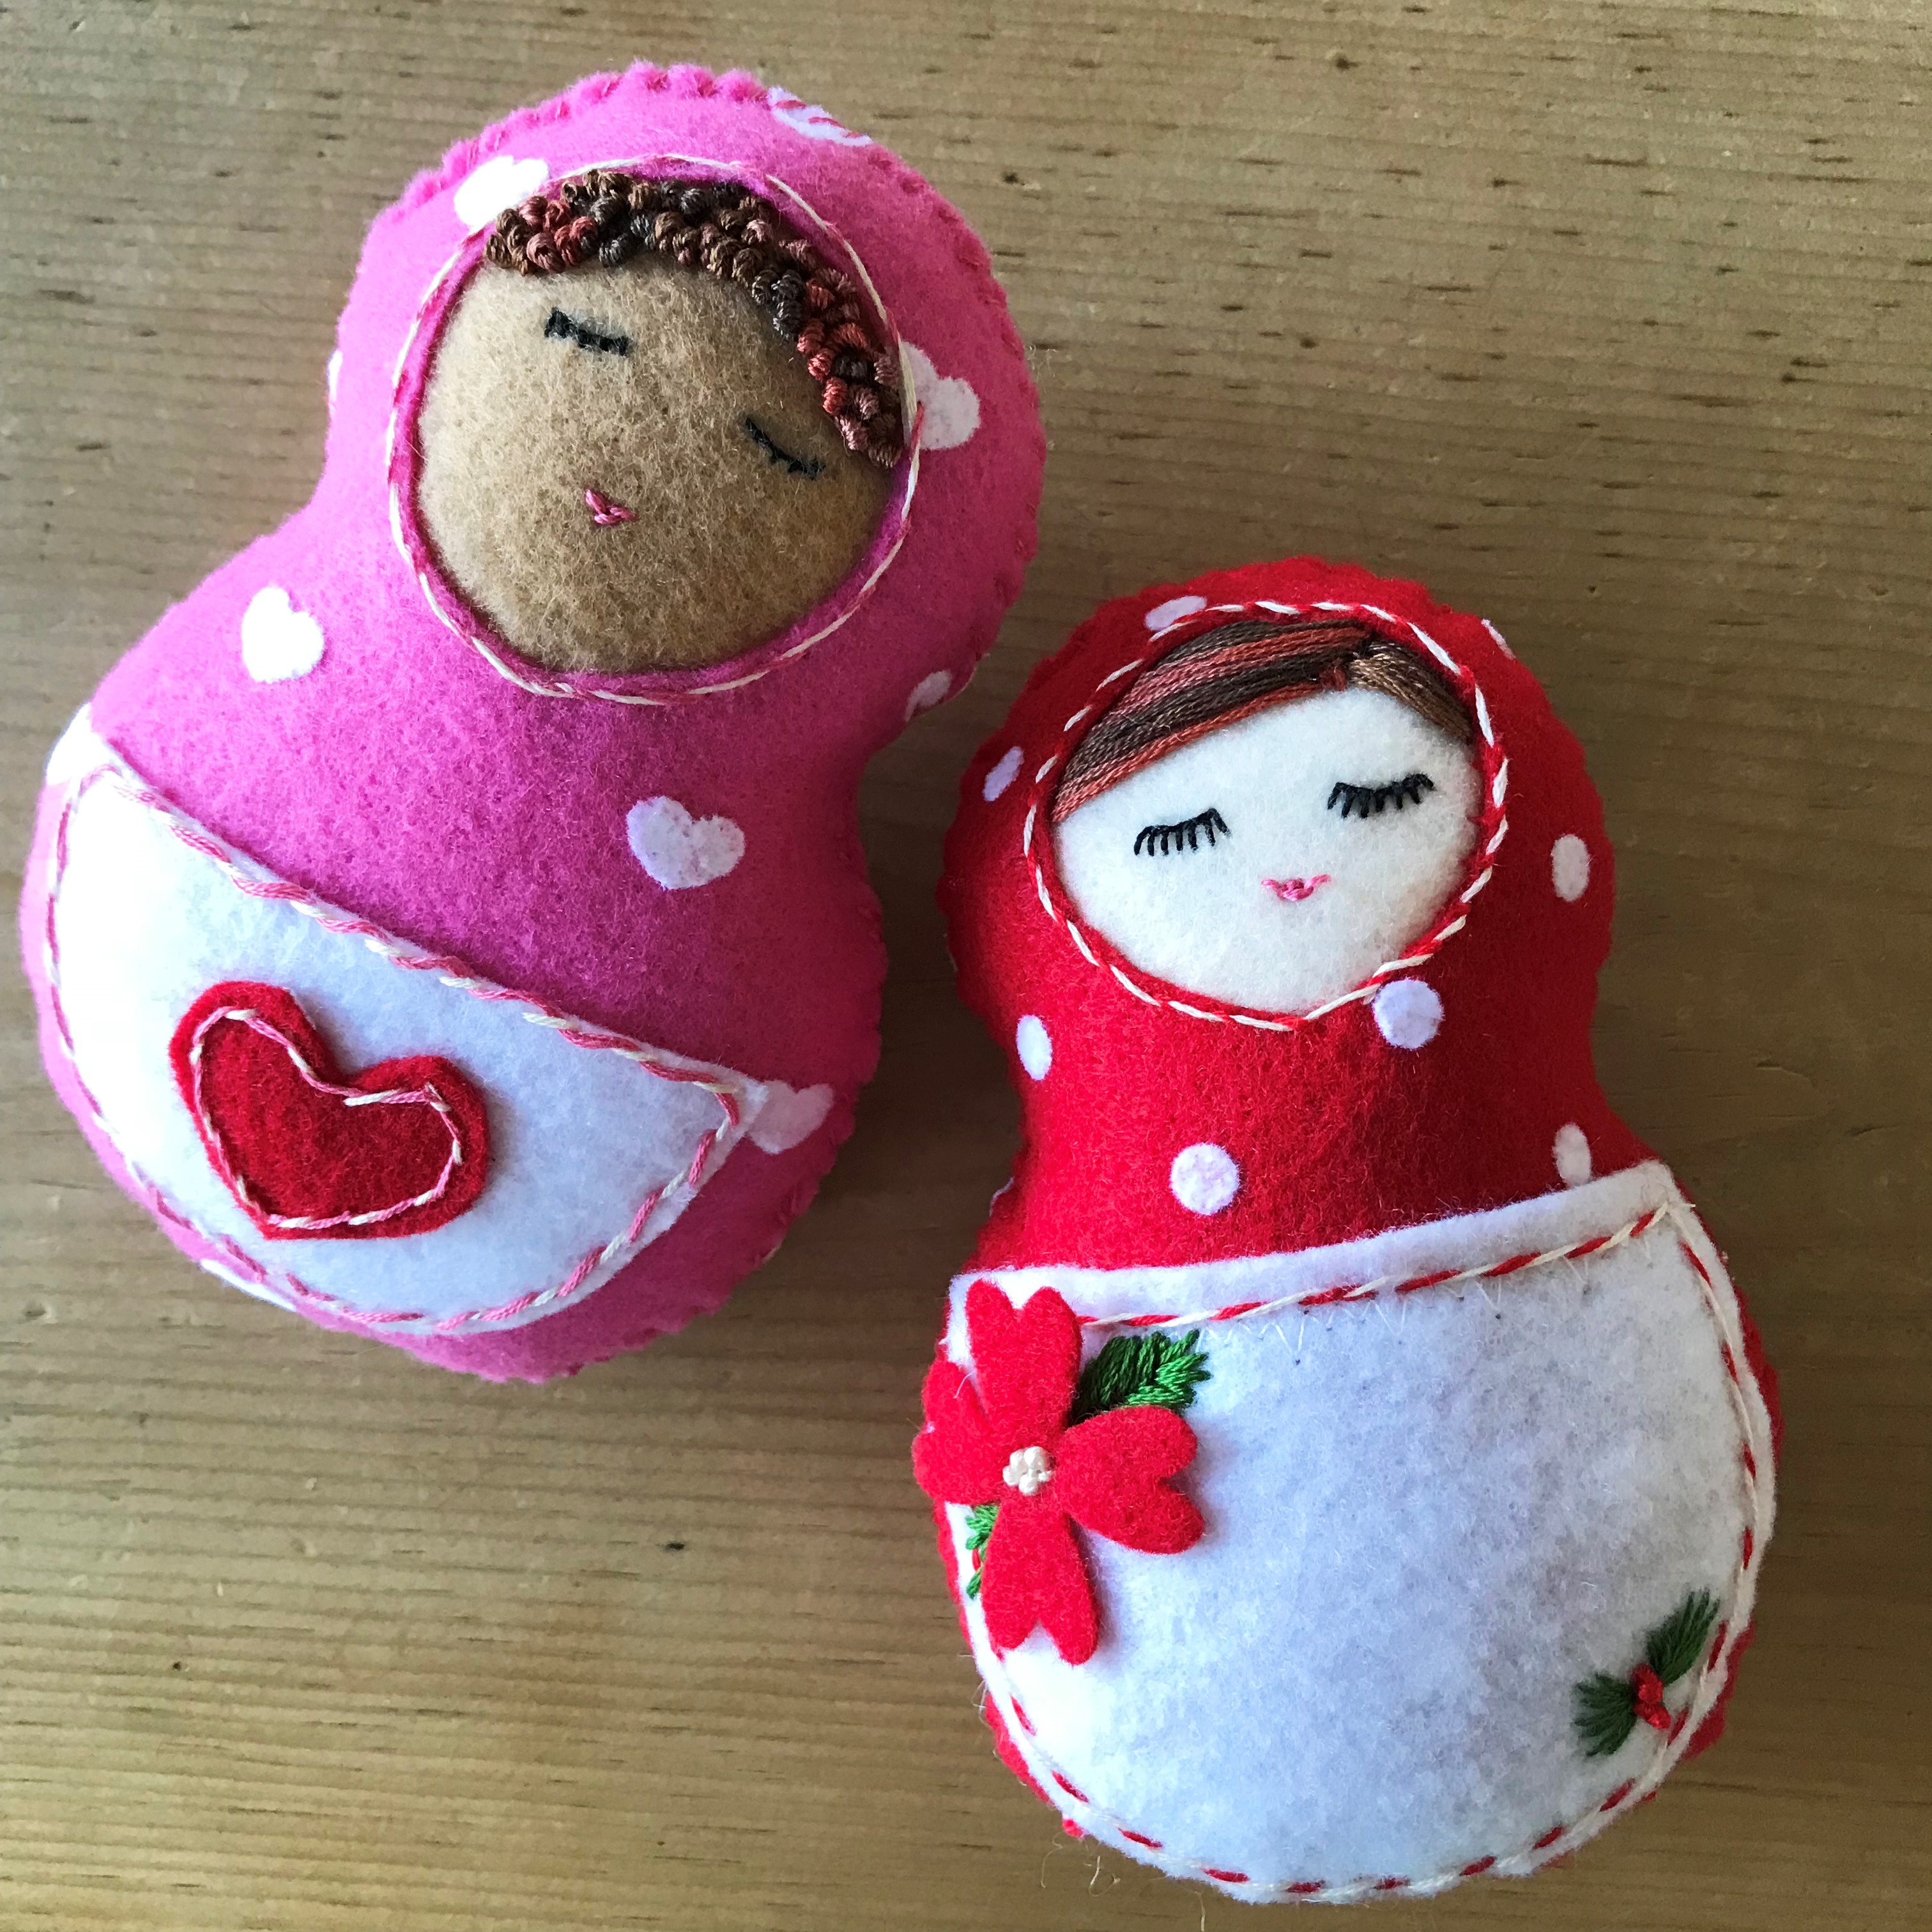
These sweet little felt nesting dolls would make a perfect gift for a little girl. The dolls are customizable. I’m going to show you how to use simple circles to create your own pattern, then it’s up to you to choose from Kunin Felt’s Coordinates line of felt with stripes, polka dots, and hearts. You can match the hair, skin, and eyes to your child. Add a few embellishments like embroidery, buttons, and die cut flowers and you will have a one of kind of kind, heirloom doll.
Skill Level: Intermediate
Completion Time: 2-3 hours
Supplies:
• 9” X 12” Kunin Felt Coordinates
• 9” X 12” Craft Cut of Kunin Classic Felt for embellishments like aprons, flowers, and hearts
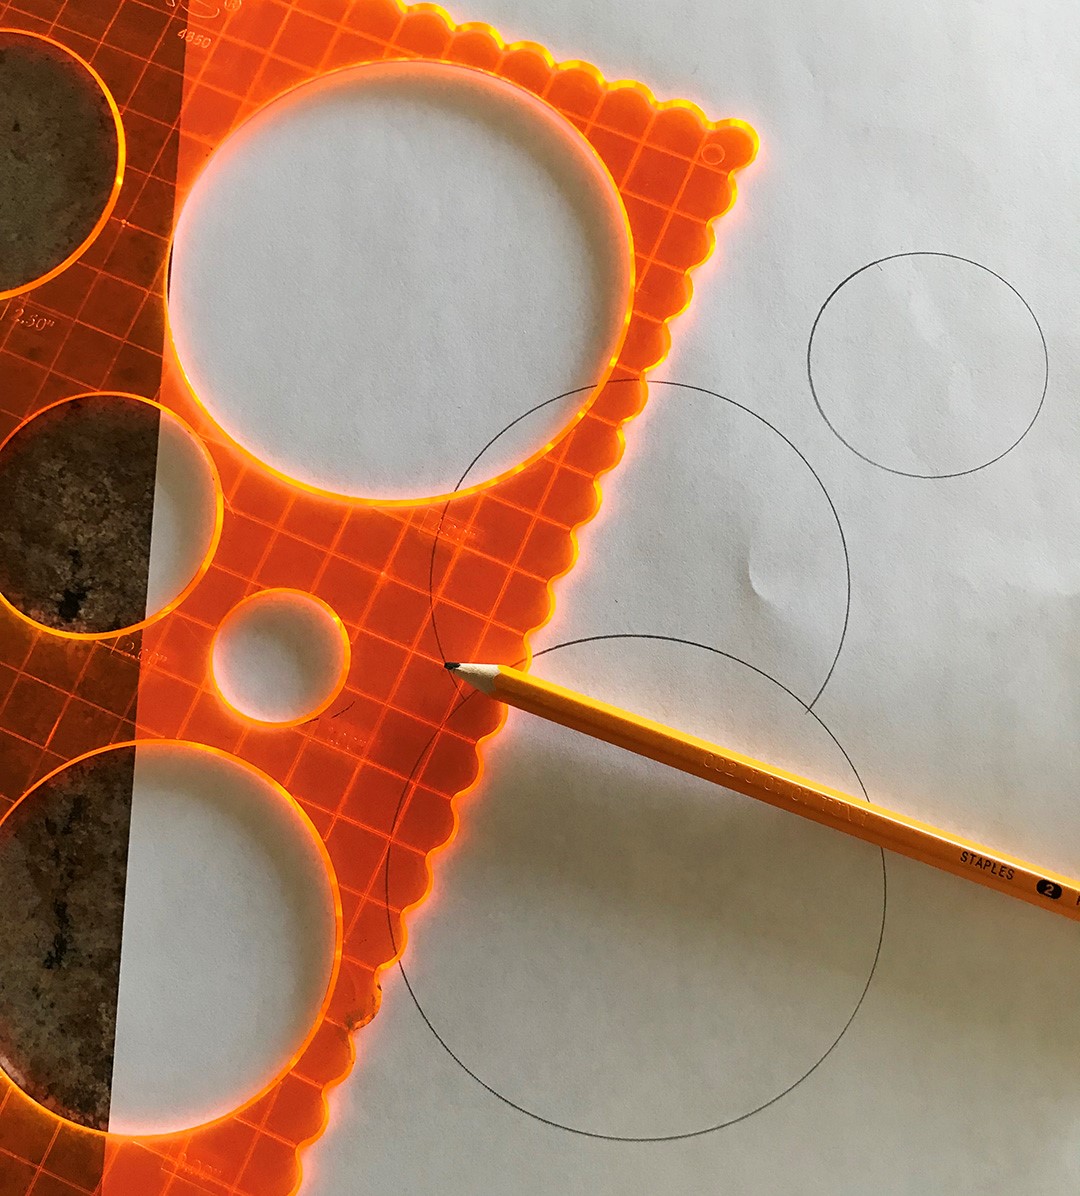
• Circle Templates with various circle sizes
• Polyfil®
• Basic sewing supplies
• Embroidery floss for hair, face details, and embellishments.
Instructions:
1. Use a circle template to create your pattern. Pick a large circle and draw it onto a piece of copier paper. Mine measured 5”. Then overlap a slightly smaller circle on top of the large circle. Mine measured 3.5”. This is the body of your doll. Choose another, much smaller circle to create the face of the doll. For a doll the size of mine, you would want a circle that measures between 1.5-2”.
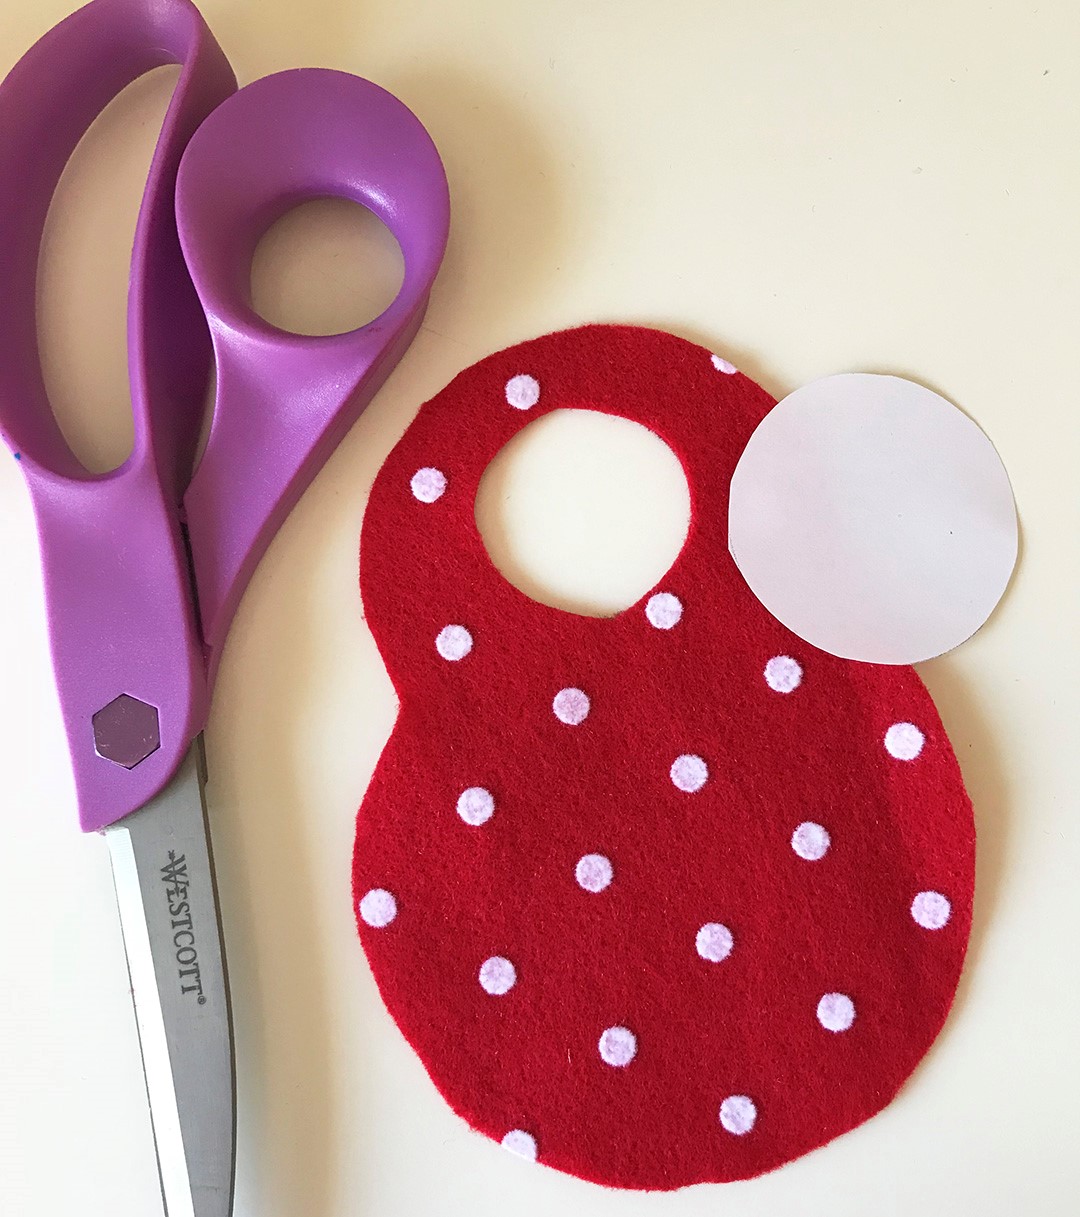
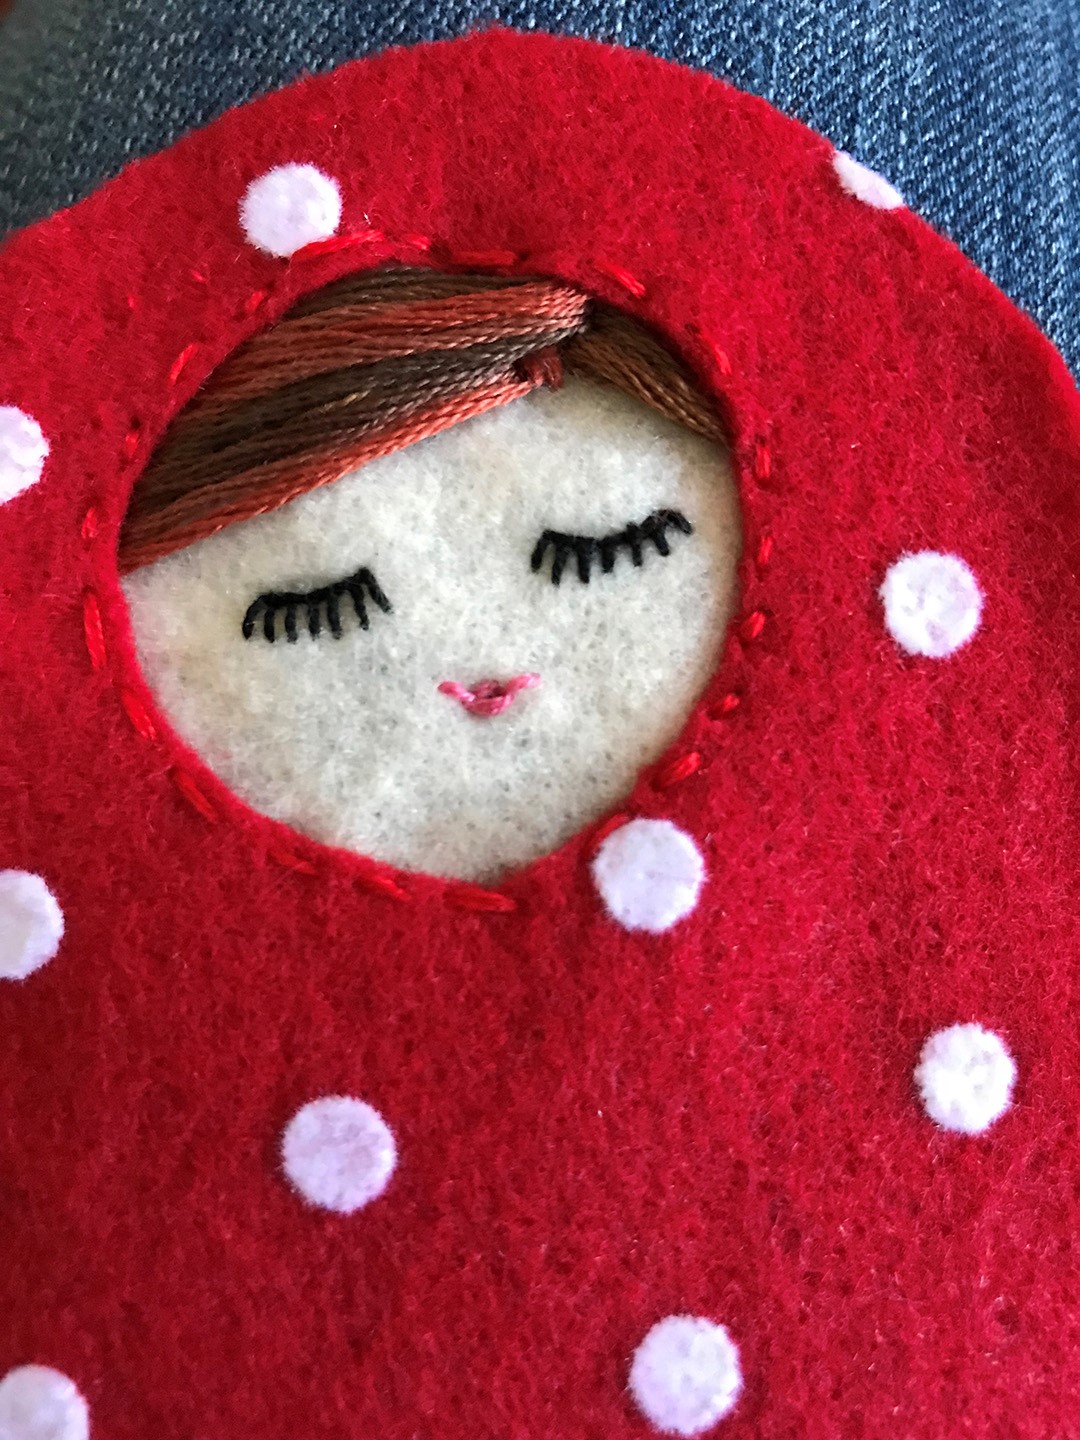
2. Using your pattern, cut out the shapes from your felt. I used Kunin Felt Coordinates for the body. Cut two pieces, one for the front, one for the back. Use your circle template to cut a circle out of one of the body pieces, centered in the smaller “head” area.
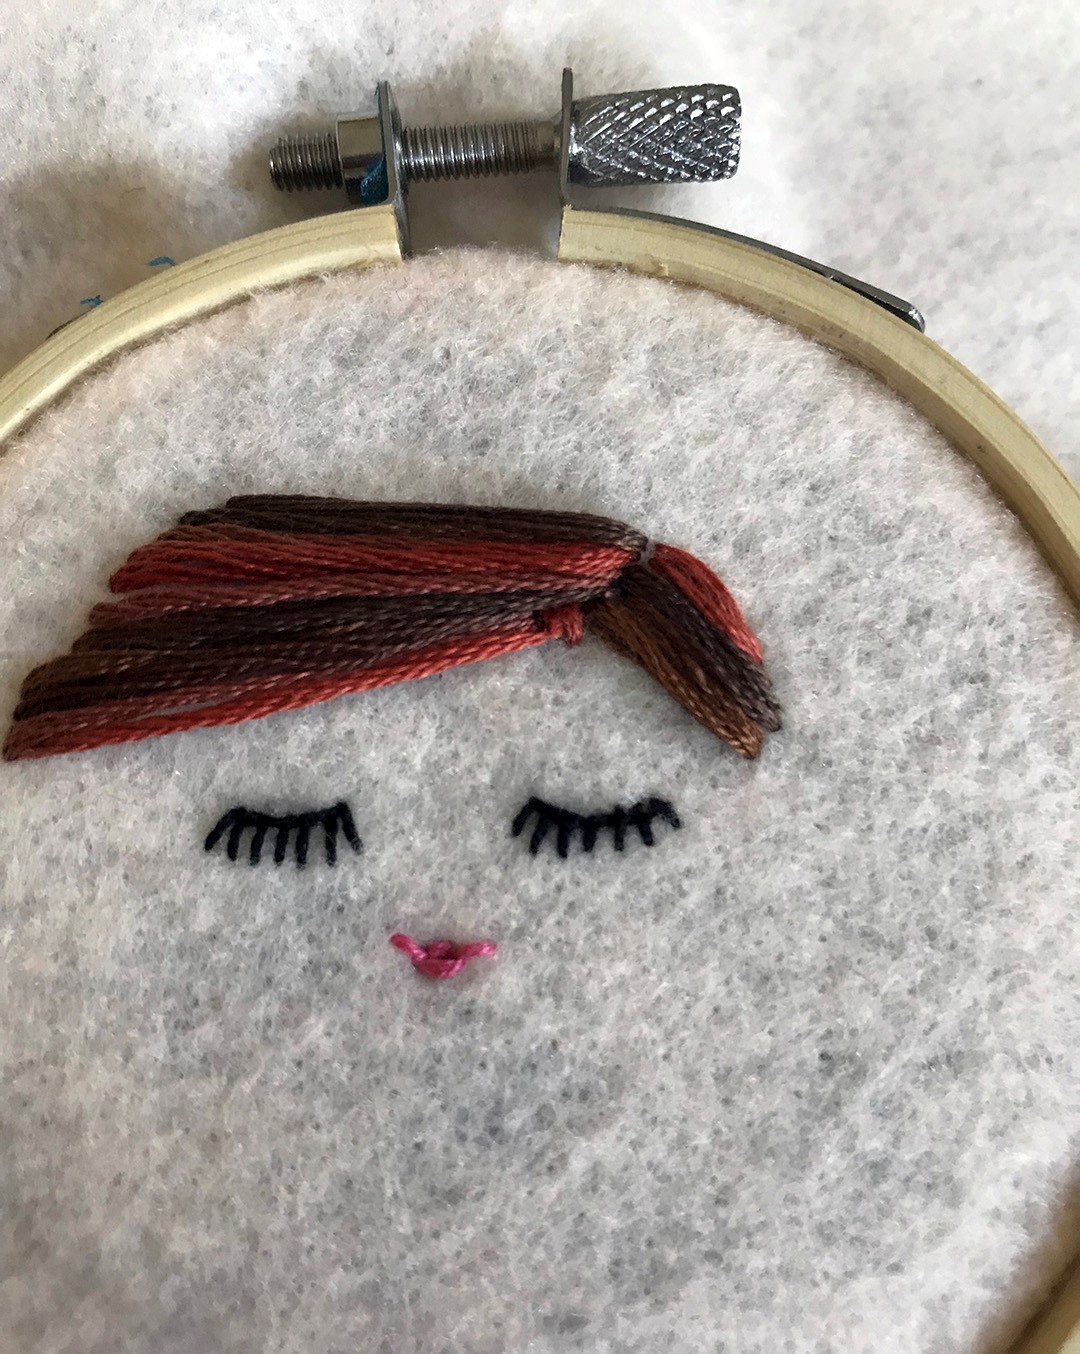
3. For the faces, I used Kunin Classic felt in Cream and Cashmere Tan for the faces. I traced my face circle onto a piece of felt, I loaded it into an embroidery hoop BEFORE I cut out the circle! And stitched on the hair and the face. It’s much easier to stitch on a larger piece in a hoop! Cut out the circle once you are done stitching.
4. Place the body piece (with the hole) design side down on your work surface. Then lay the face piece, with the face you stitched facing down. Pick up the pieces, make sure the face is peering out of the hold and stitch in place.
5. If you want to add an apron or other embellishments to the front piece, do so at this point.
6. Once the front is as you like it, place the two body pieces together, wrong sides facing. Stitch together using a blanket stitch. Leave a small section at the bottom open. Stuff the doll with Polyfil®, and then close the doll up completely.
Designer Note: If you are planning to give the doll to a small child, don’t add embellishments that can come off, like buttons or flowers. Instead, just use embroidery stitches to decorate the doll.
You can now find an expanded color line of Kunin® Classicfelt; Kunin® Premiumfelt and Corduroy non-wovens fabrics in cut by the yard at your local Walmart; please inquire as to what is available in your area.
About Designer Laura Bray
Laura Bray lives in the Pacific Northwest with her husband, their daughter, and a guinea pig named Oreo. She loves to create beautiful and functional projects with felt. To see more of her felt creations, visit her blog at www.laurabraydesigns.com. You can also find her on Instagram at www.instagram.com/laurakbray.