
Hello Crafters!
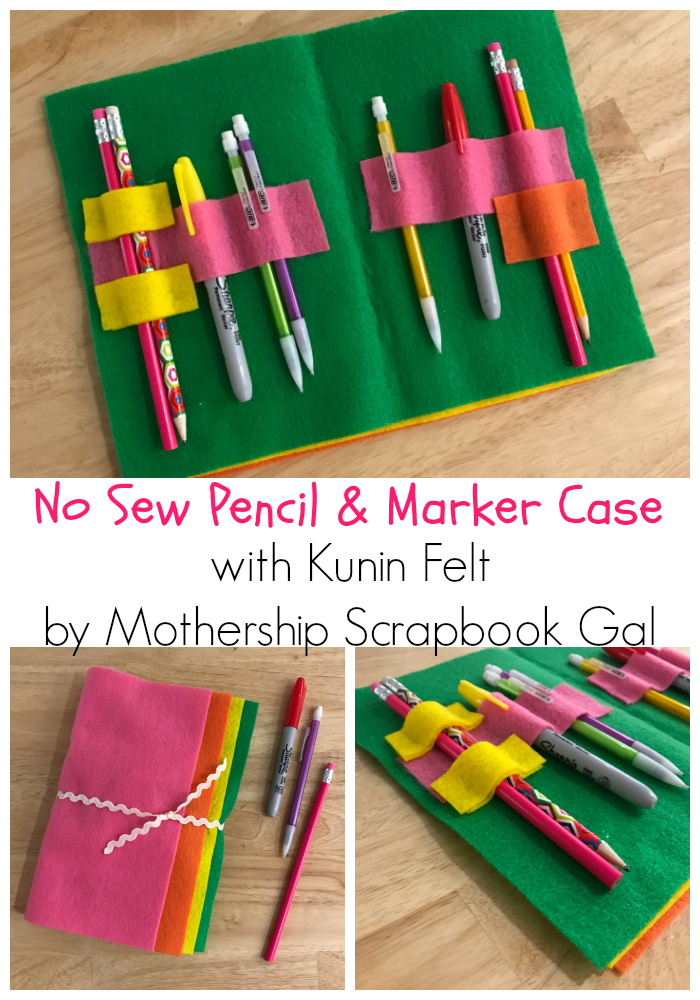
I love pens and markers – do you? If so, I have the perfect craft project for you. It is a “No Sew Back to School Felt Pencil/Marker Case”. This project is great because there are a lot of options to customize with colors, felt pieces and size too. Let’s get started!
Skill Level: Basic or Everyone
Completion Time: 60 minutes
Supplies:
- Kunin Classicfelt in Candy Pink (2 – 9”x12” pieces are needed)
- Kunin Classicfelt in Orange (1 piece)
- Kunin Classicfelt in Yellow (1 piece)
- Kunin Classicfelt in Apple Green (1 piece)
- Additional felt can be used to decorate your pencil case
- Fiskars rotary cutter
- Cutting mat with ruler/grid
- Ruler
- Aleene’s Turbo Tacky Glue
- Hot glue gun and sticks
- Small fabric Scissors
- Ribbon or ric rac
Step 1
First you will need to cut your 9” by 12’ Craft Cuts of felt, the felt needs to be trimmed down according to the order you want it to display. Use your cutting mat, rule and rotary cutter to easily and evenly cut your felt.
- Candy Pink – piece 1: Trim off approximately 1.5 inches (from short side of felt) and save the remnant piece.
- Orange: Trim off approximately 1 inch.
- Yellow: Trim off approximately .5 inches and save the remnant piece.
- Apple Green: Do not trim this piece.
- Candy Pink – piece 2: Trim off approximately 1 inch (from the long side of the felt) for the inside of the pencil case portion of this project).

Step 2
Stack and arrange your cut felt pieces. Next you will hot glue these pieces along the center of the case. TIP: I recommend hot glue for this project as it will adhere quickly. However, with hot glue you must be precise and work quickly.
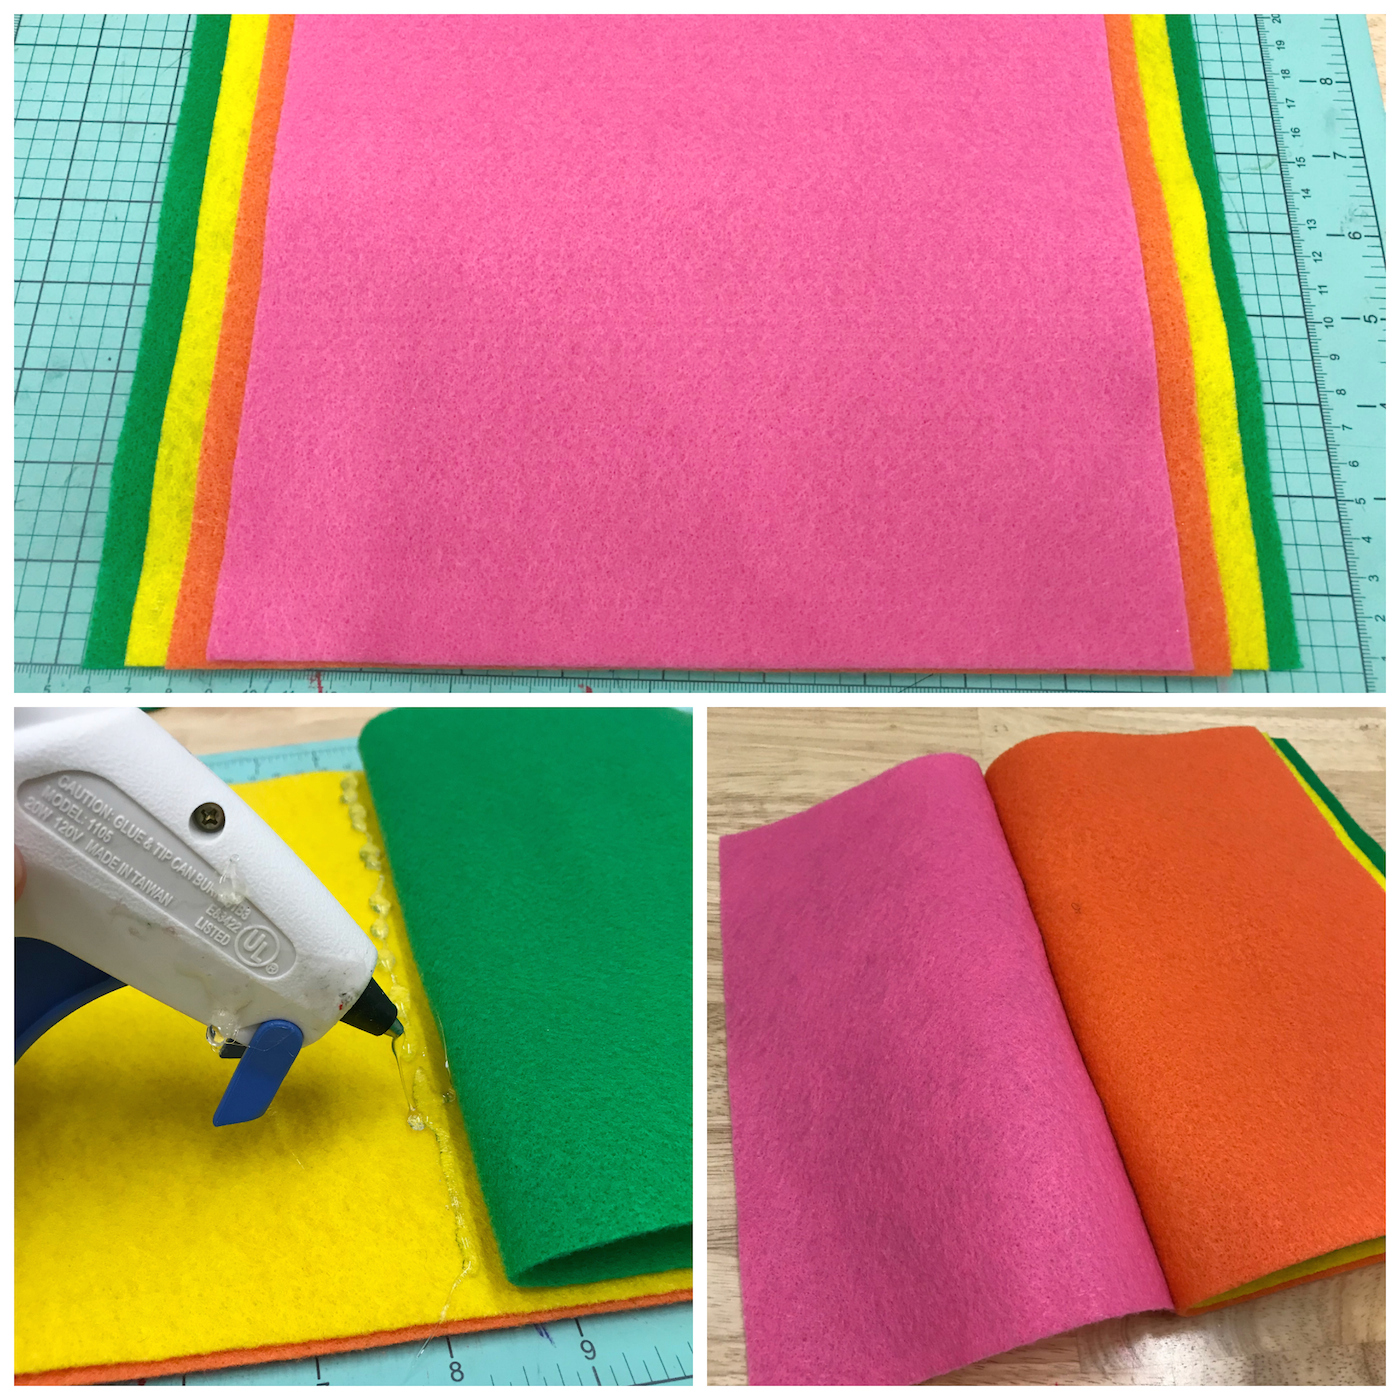
Now, you can arrange your pencils and markers in the order that you want them on the green piece of felt. This will help to give you an idea of the size of felt pieces you need to glue onto the green piece. I used the long pink piece as a center strip for the case and the yellow remnant piece to help secure the pencils in the case. In the photo you will see I used tacky glue to provide a line for where I would use my hot glue to adhere my felt strips. With the hot glue, you must be precise and use care to not burn your fingers!
TIP: You can design the inside of the pencil case however you like and create small pockets for your pencils and markers. I highly recommend that you arrange the pencils and pens and then adhere the felt pieces to secure them. For the pencils, I doubled up on the yellow felt to provide a more finished look to my project.

Step 3
Next you can work on embellishing the front pages of your pencil case, you can add die cut felt pieces and paper so you can make notes to yourself. You will fold up your case and can add a ribbon to tie it up. I selected a piece of off-white ric rack that I can easily tie up. You can choose to glue the ribbon onto your pencil case or you can keep it loose in case you want the option to change it up in the future.
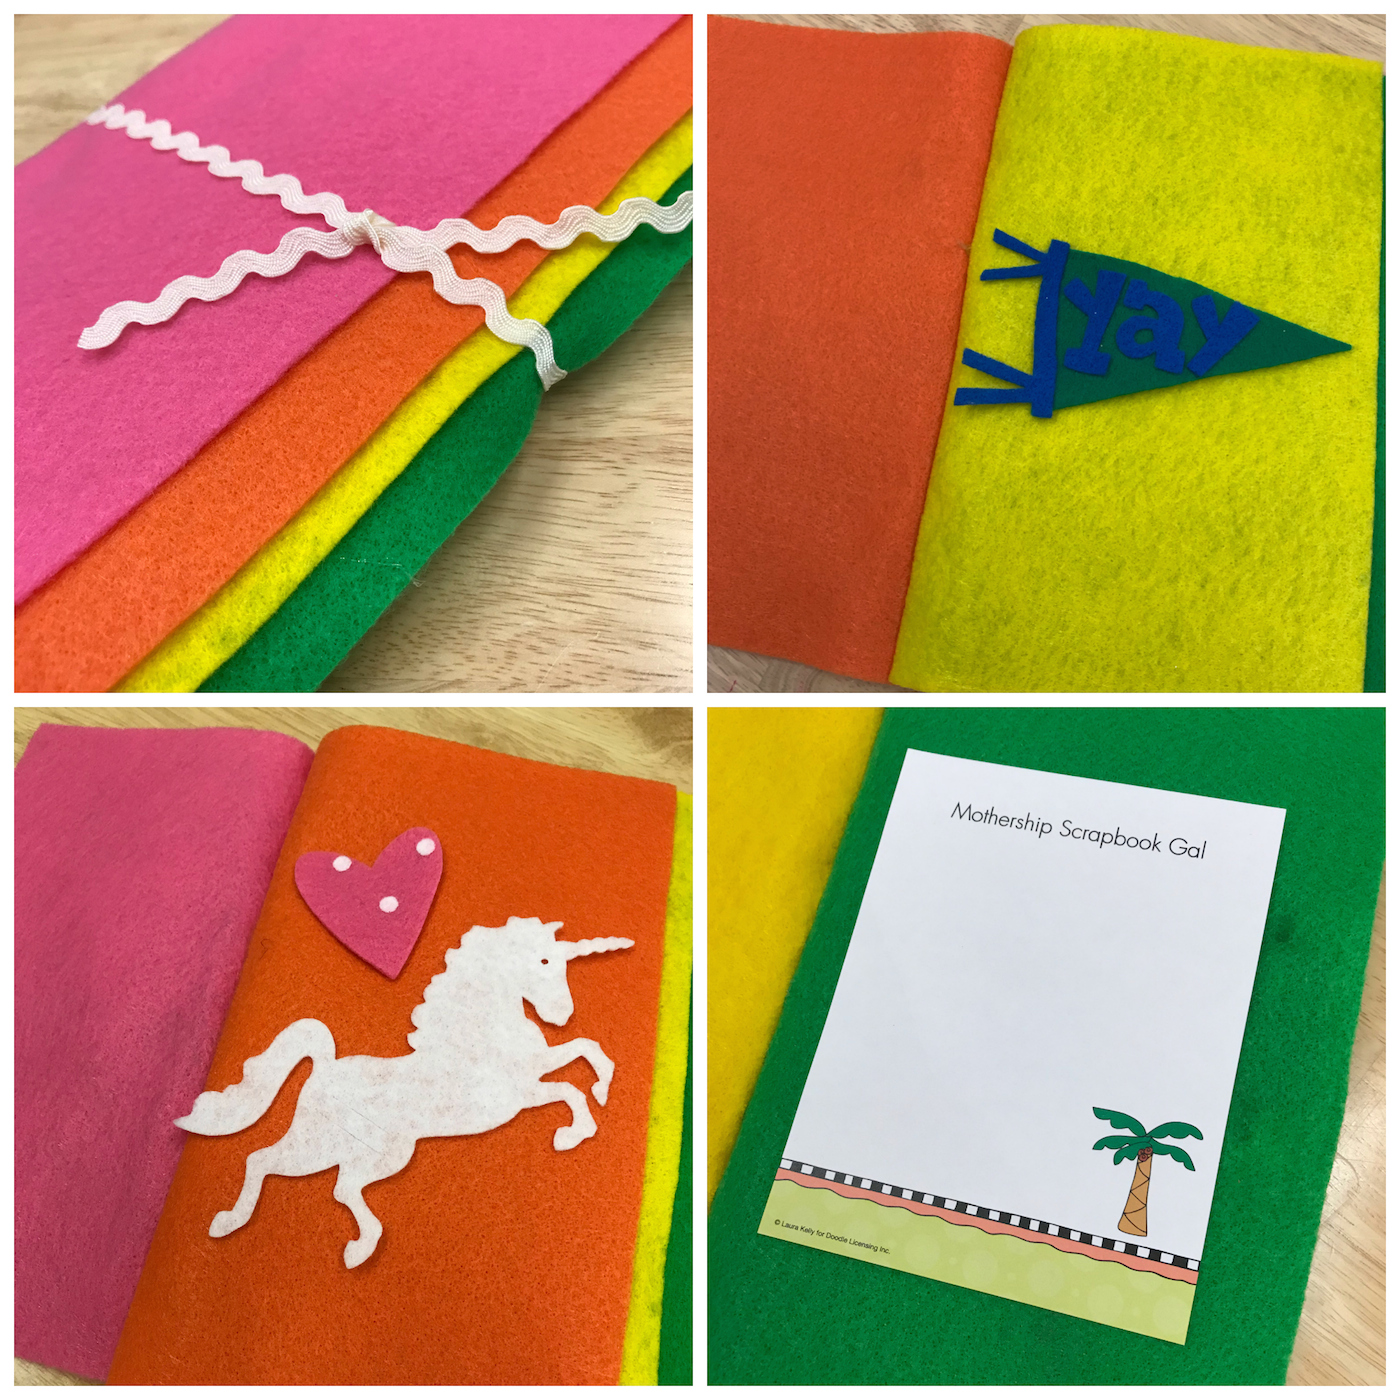
Thank you for visiting the Kunin Blog and I hope you are enjoy my latest project, I had a lot of fun making it.You can now find an expanded color line of Kunin® Classicfelt; Kunin® Premiumfelt and Corduroy non-wovens fabrics in cut by the yard at your local Walmart; please inquire as to what is available in your area.
Happy Back to School Crafting!
Rina Gonzales
Owner of Mothership Scrapbook Gal
Founder of Crafty Happy Hour
Facebook: www.facebook.com/mothershipscrapbookgal
Instagram: www.instagram.com/mothershipscrapbookgal
Website: www.mothershipscrapbookgal.com
Wow, It’s looking awesome.I want to make this for my baby. Hope so your tips are helping me when I am going to make this. Thanks for the sharing such an informative article.
You’re welcome! Be sure to take pics and tag us on Instagram and Facebook to show us how your project turned out!