
From wall art, home décor textiles and fashion, applied words and messages continues to be a hot trend. Stencilling on felt to achieve this popular trend look is very easy. I was asked to teach a workshop at the AFCI (Association for the Creative Industries) Canada Retreat and knew this technique would be a perfect one to teach. I chose a hoop as the base, another hot and ongoing look.
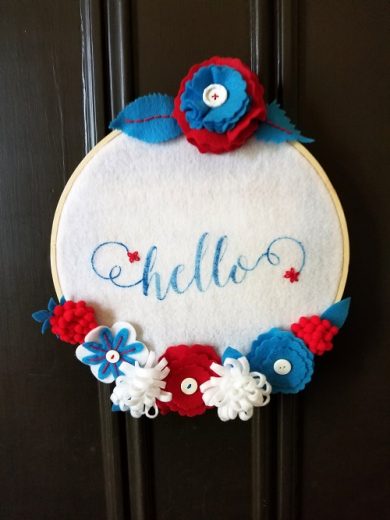
This is a welcoming accent for the front door and the felt is fade resistance. With a dark door I wanted a lighter look for summer and chose white accenting with the popular red, white and blue color palette.
You will need:
- 10” Wood hoop TIP: If choosing larger hoop, increase white felt yardage and stencil size.
- 9” x 12” craft cuts of Kunin® Classicfelt: 1 Red, 1 Royal Blue
- 1/3 yard of Kunin® Classicfelt: White
- 4-6 White buttons: 1/4”-1/2”
- Red, Blue embroidery floss and needle
- 8” Hello stencil or other phrase
- Acrylic paint, Sapphire Metallic paint by Decoarts
- Fabric adhesive, Fabri-tac by Beacon
- Flower and leaf dies by Eileen Hull for Sizzix
- Big Shot or similar die cutting machine
- Scissors, ruler, pins, stencil brush, paper plate, paper towel, tape

1. From white felt yardage cut a circle 2” larger all around. TIP: Use hoop as guide.
2. Insert felt into hoop leaving excess felt. Place stencil inside hoop. This gives a stationary surface to stencil in and when finished the hoop will be flipped.
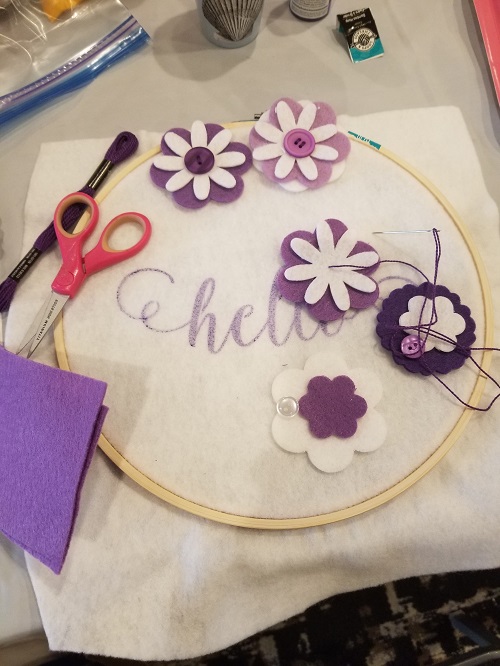
3. Place a small amount of sapphire paint on the paper plate.
4. Dip the round stencil brush into the paint. Use the paper towel to remove most of the paint. (Stencilling is done with this dry brush technique.) Begin by stencilling with a circular motion along the edges of the stencil moving towards the center. Repeat step with paint to complete the whole word. Let dry. If you want letters more pronounced repeat and place a second layer of paint. If gives a dimensional appearance to the letters.
5. Remove felt from hoop and flip over. Insert felt back into hoop as shown in completed photo. Tighten hoop. Trim excess felt from edge.
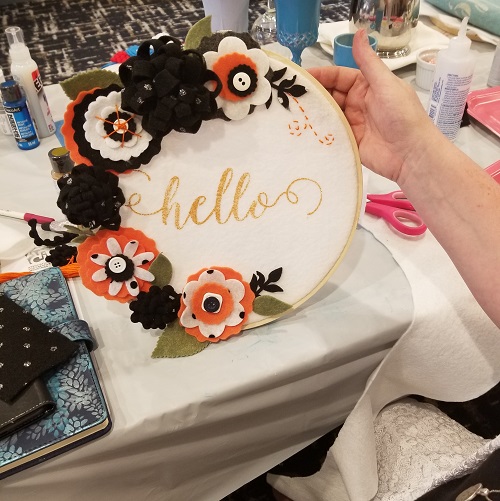
6. Die cut a variety of flower shapes and leaves or free hand in red, white and blue. Layer the flowers. Add straight stitches of embroidery floss to embellish. Sew two or three layers with a button in center. Play with combinations. “Audition” and arrange around hoop. When you are pleased with the look. Take a photo. Use this as guide to glue flowers in place.
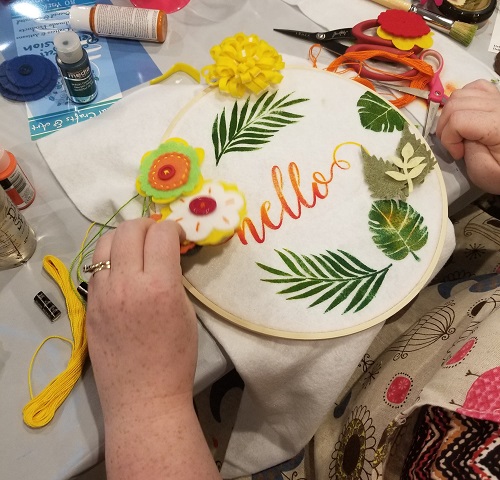
As you can see the attendees at the retreat all used different color palettes and each one was striking. Have fun and play with your favorite colors and flower combinations. This is a very portable summer project so enjoy crafting in the sunshine. TIP: Die cut a large group of flower and store in a small container, so you can just play with combinations.
You can now find an expanded color line of Kunin® Classicfelt; Kunin® Premiumfelt and Corduroy non-wovens fabrics in cut by the yard at your local Walmart; please inquire as to what is available in your area.
Follow along with us on Instagram @kuninfeltbrand!
Debra