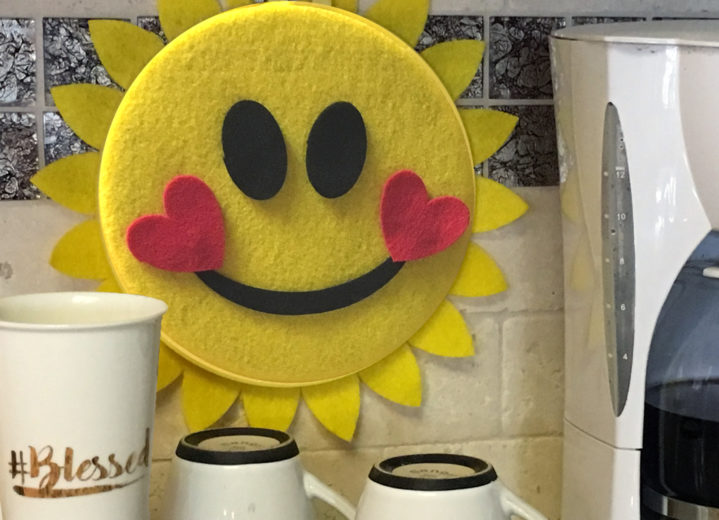
Hang your felt hoop near the coffee pot or tea kettle and you’ll be sure to start every day with a smile!

Skill Level for this project: Beginner
Time to complete: 2 hours
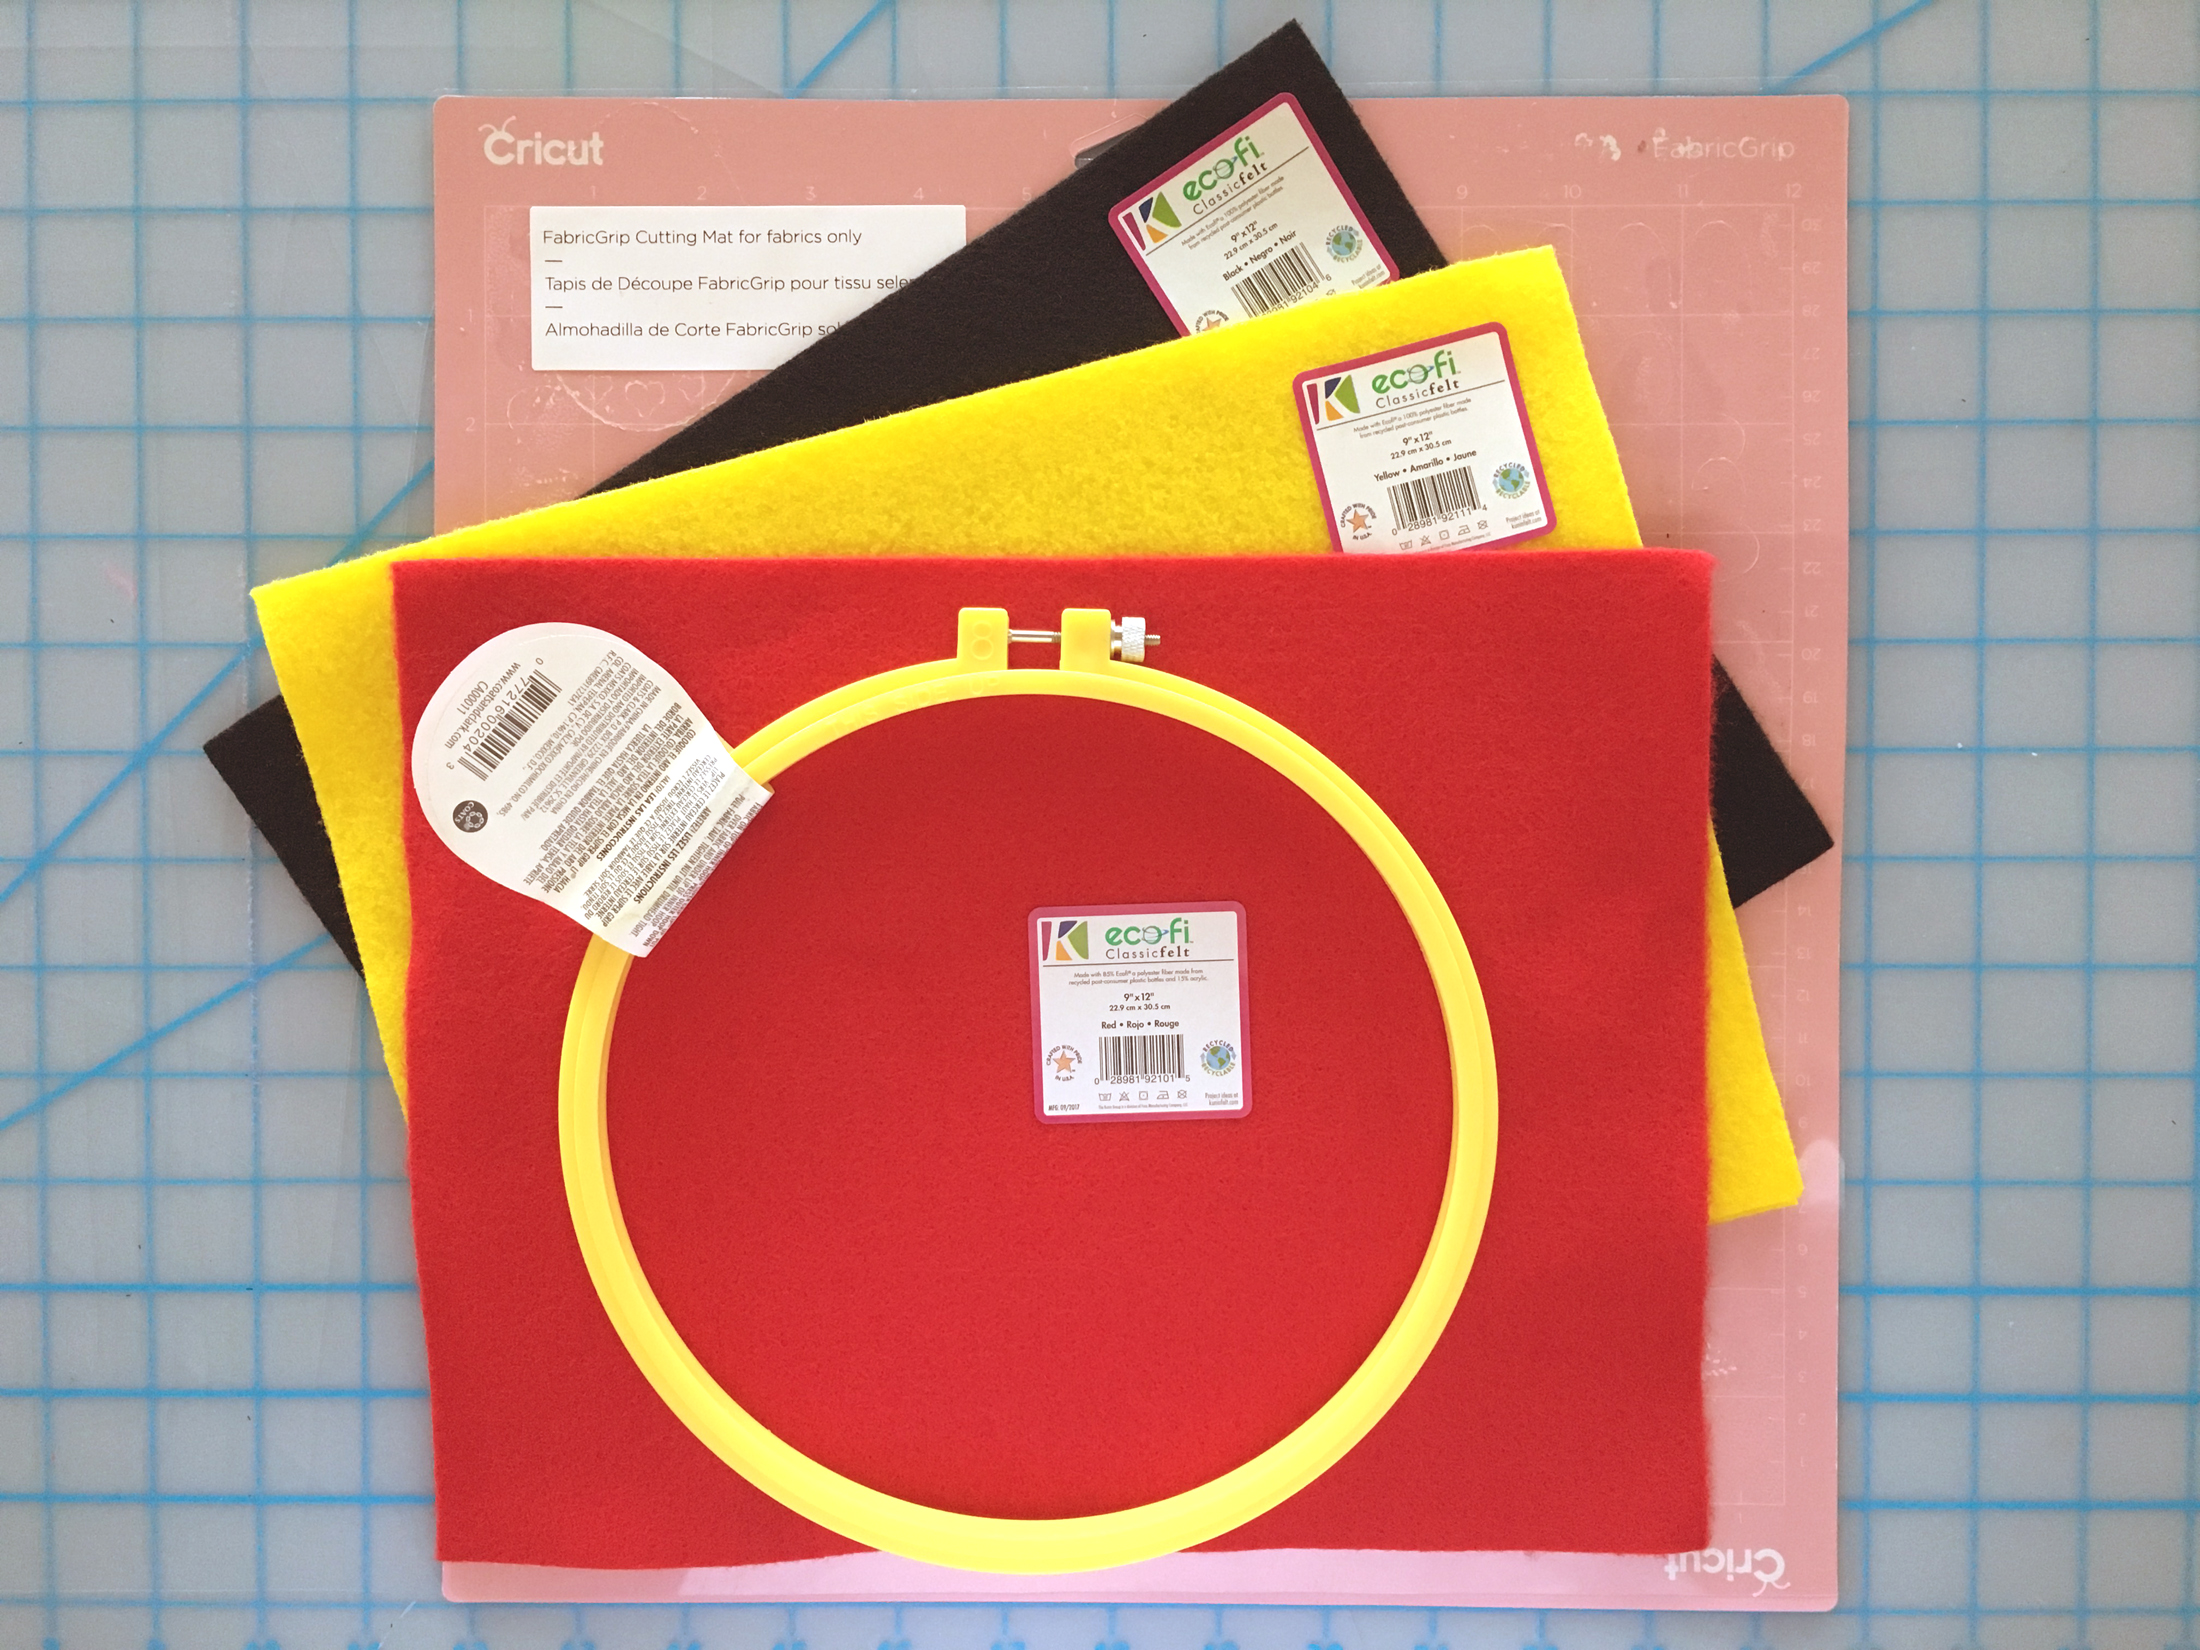
You will need:
• Kunin® Classic Felt 9” x 12” – Red, Black and Yellow x 2
• Cricut® Maker™ with Rotary blade
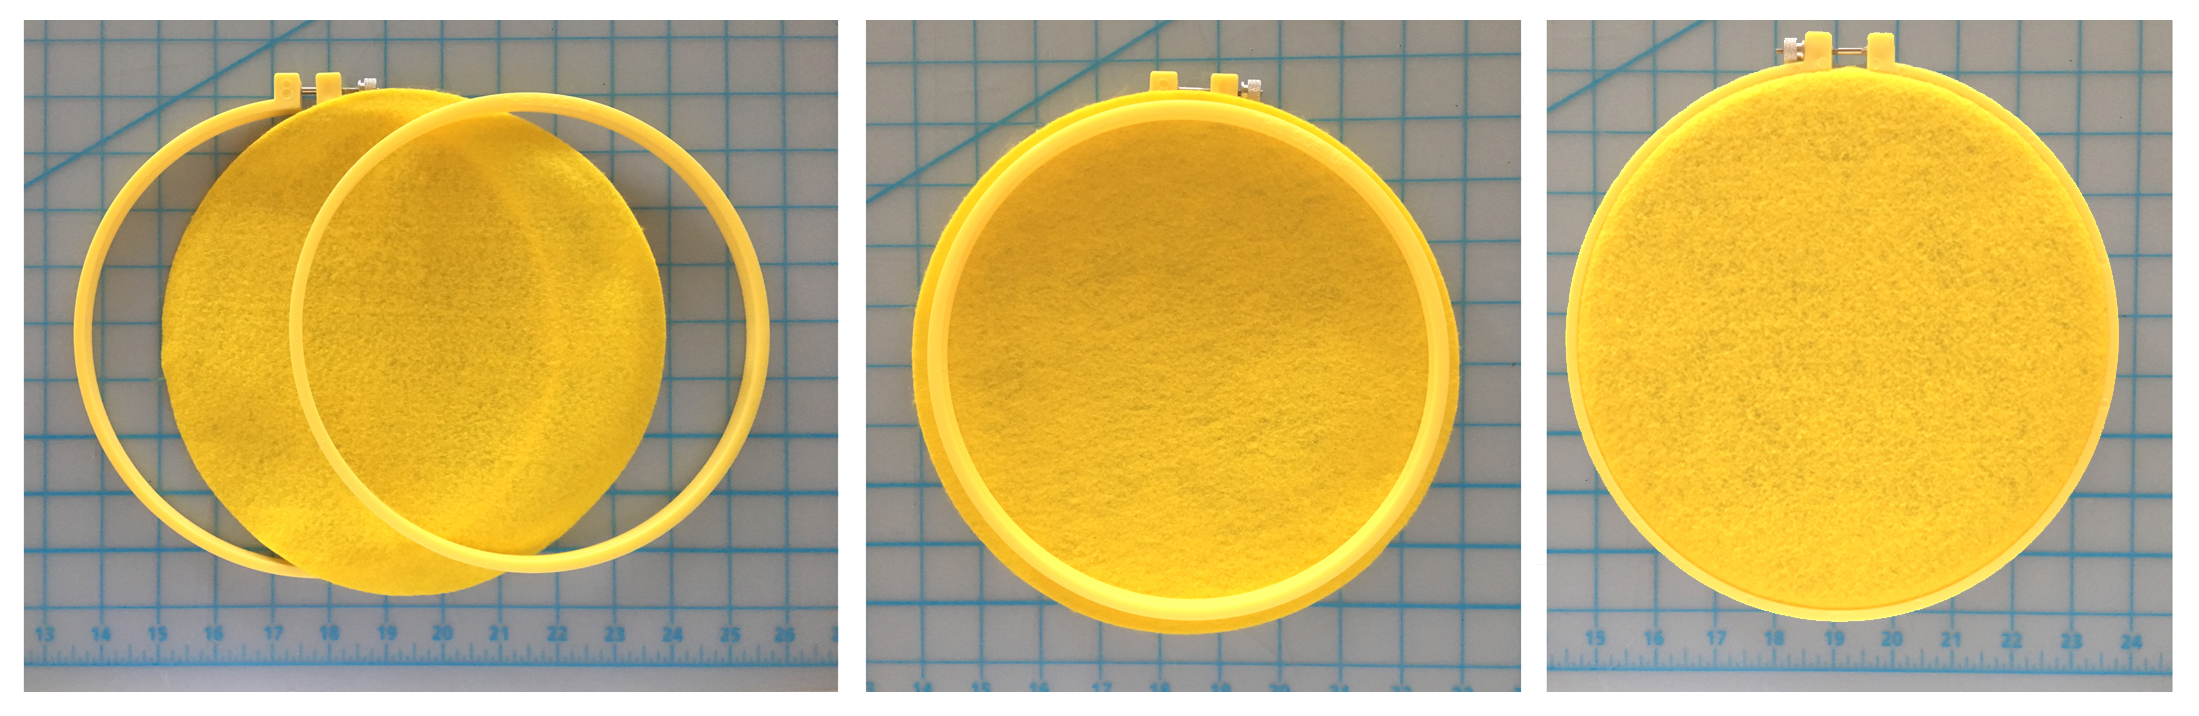
• 8” Embroidery Hoop
• Tacky glue
Instructions:
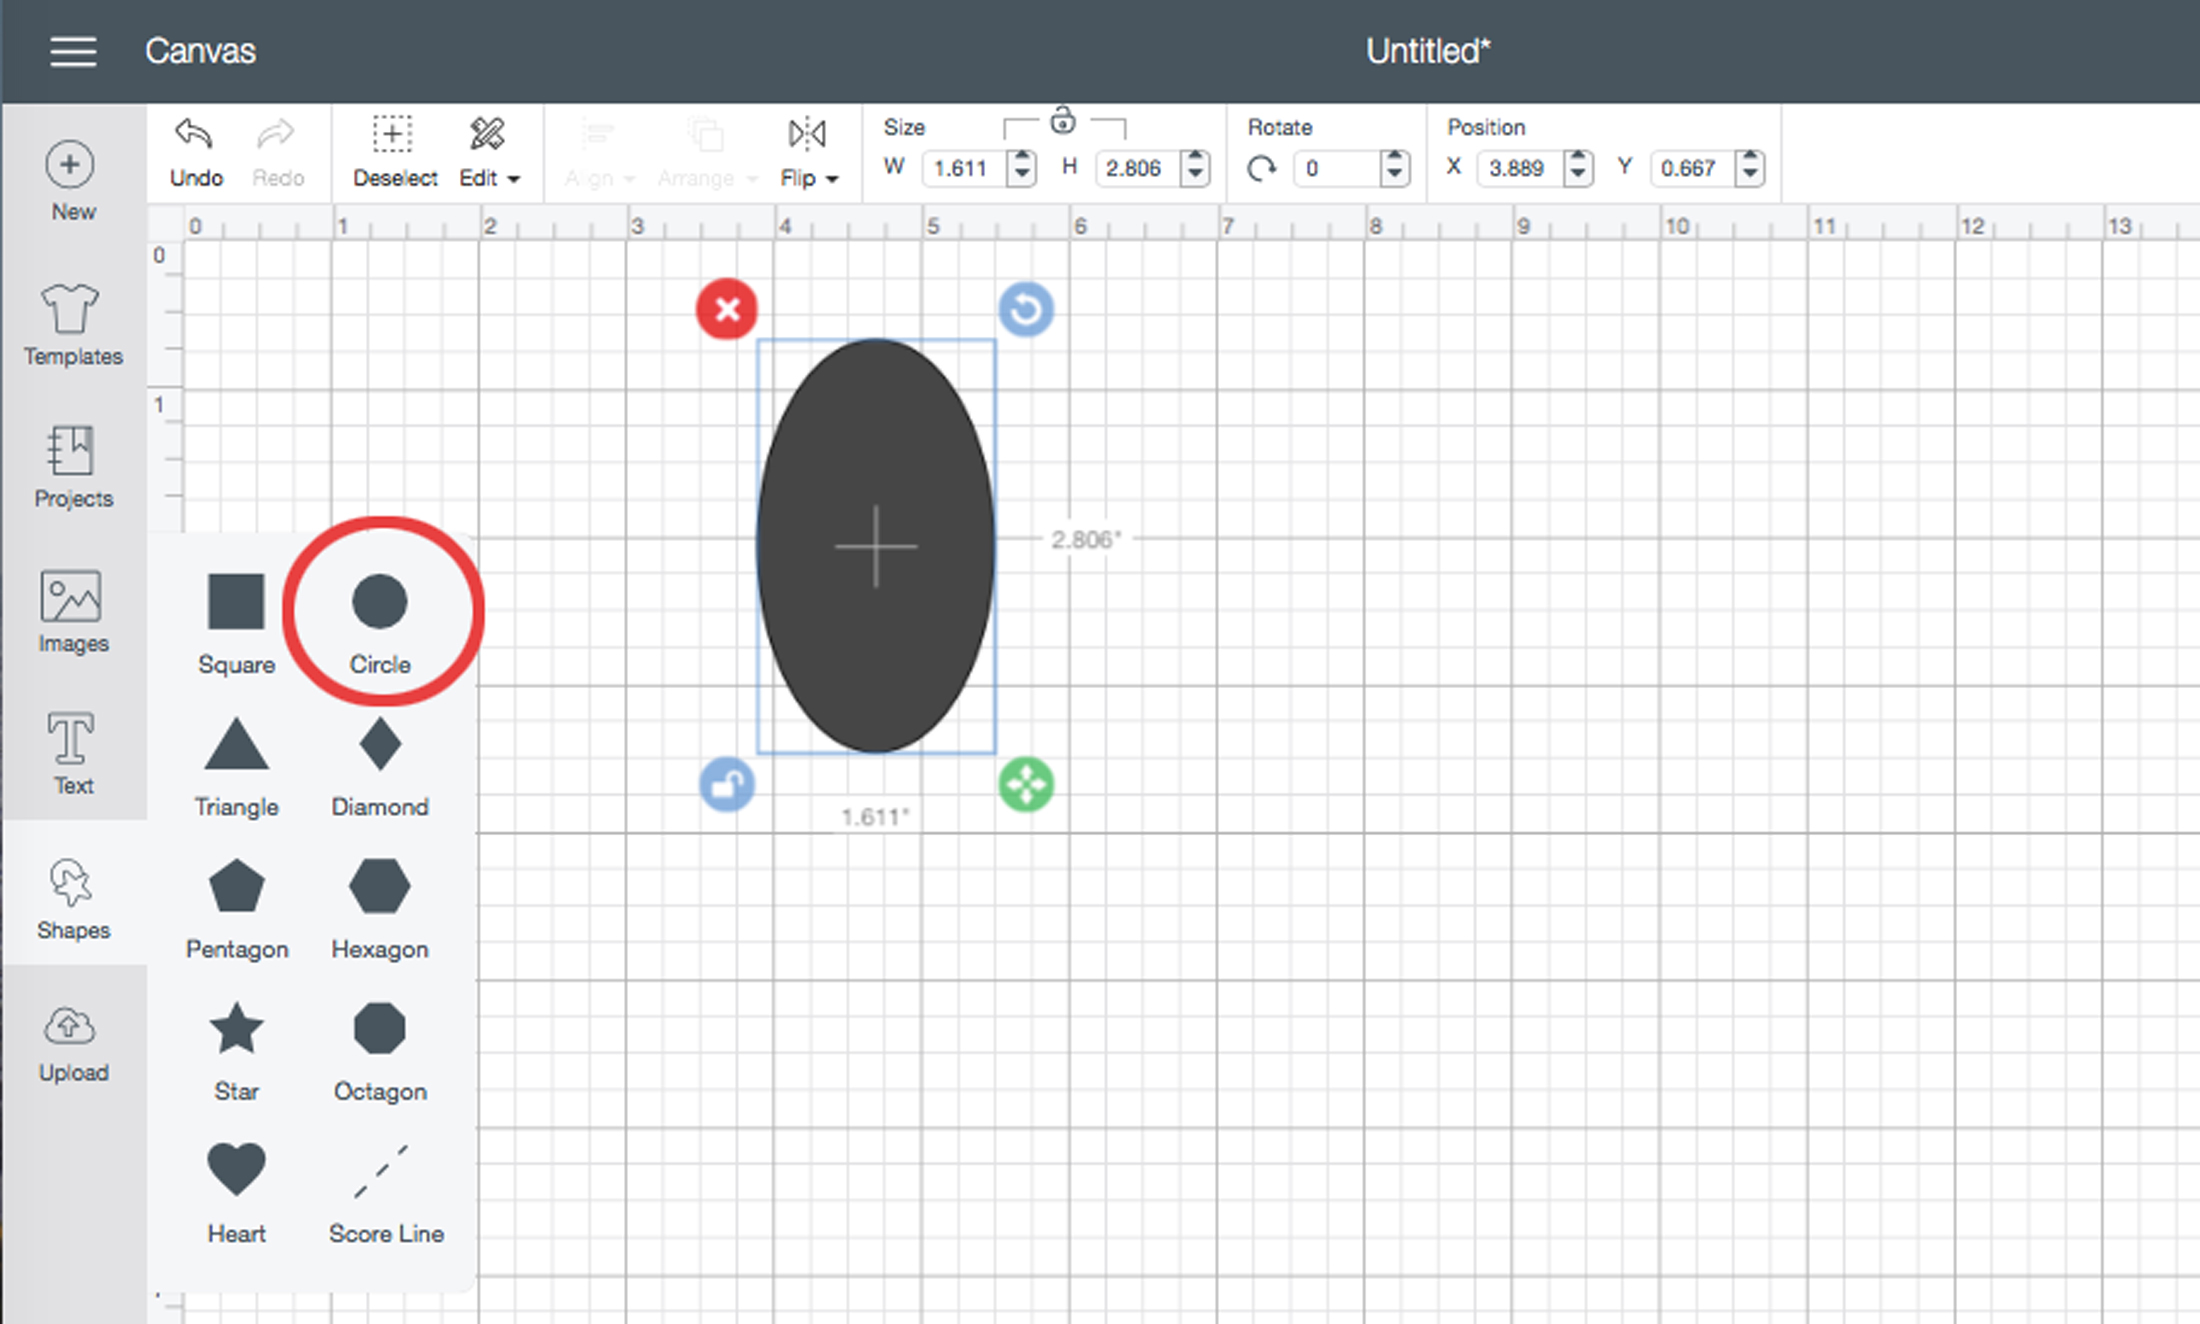
1. Using the “shapes” feature in Cricut Design Space, select then cut the following felt shapes:
Circle, 9” – Yellow
2 Hearts, 2” x 2” – Red
24-32 Hearts, 1 ¼ x 2” – Yellow
2 Ovals, 1 ¼” x 2” – Black
Download the “Smile” shape using the following link. Upload to Cricut Design Space and size to 6” wide.
bit.ly/2LG5K2N

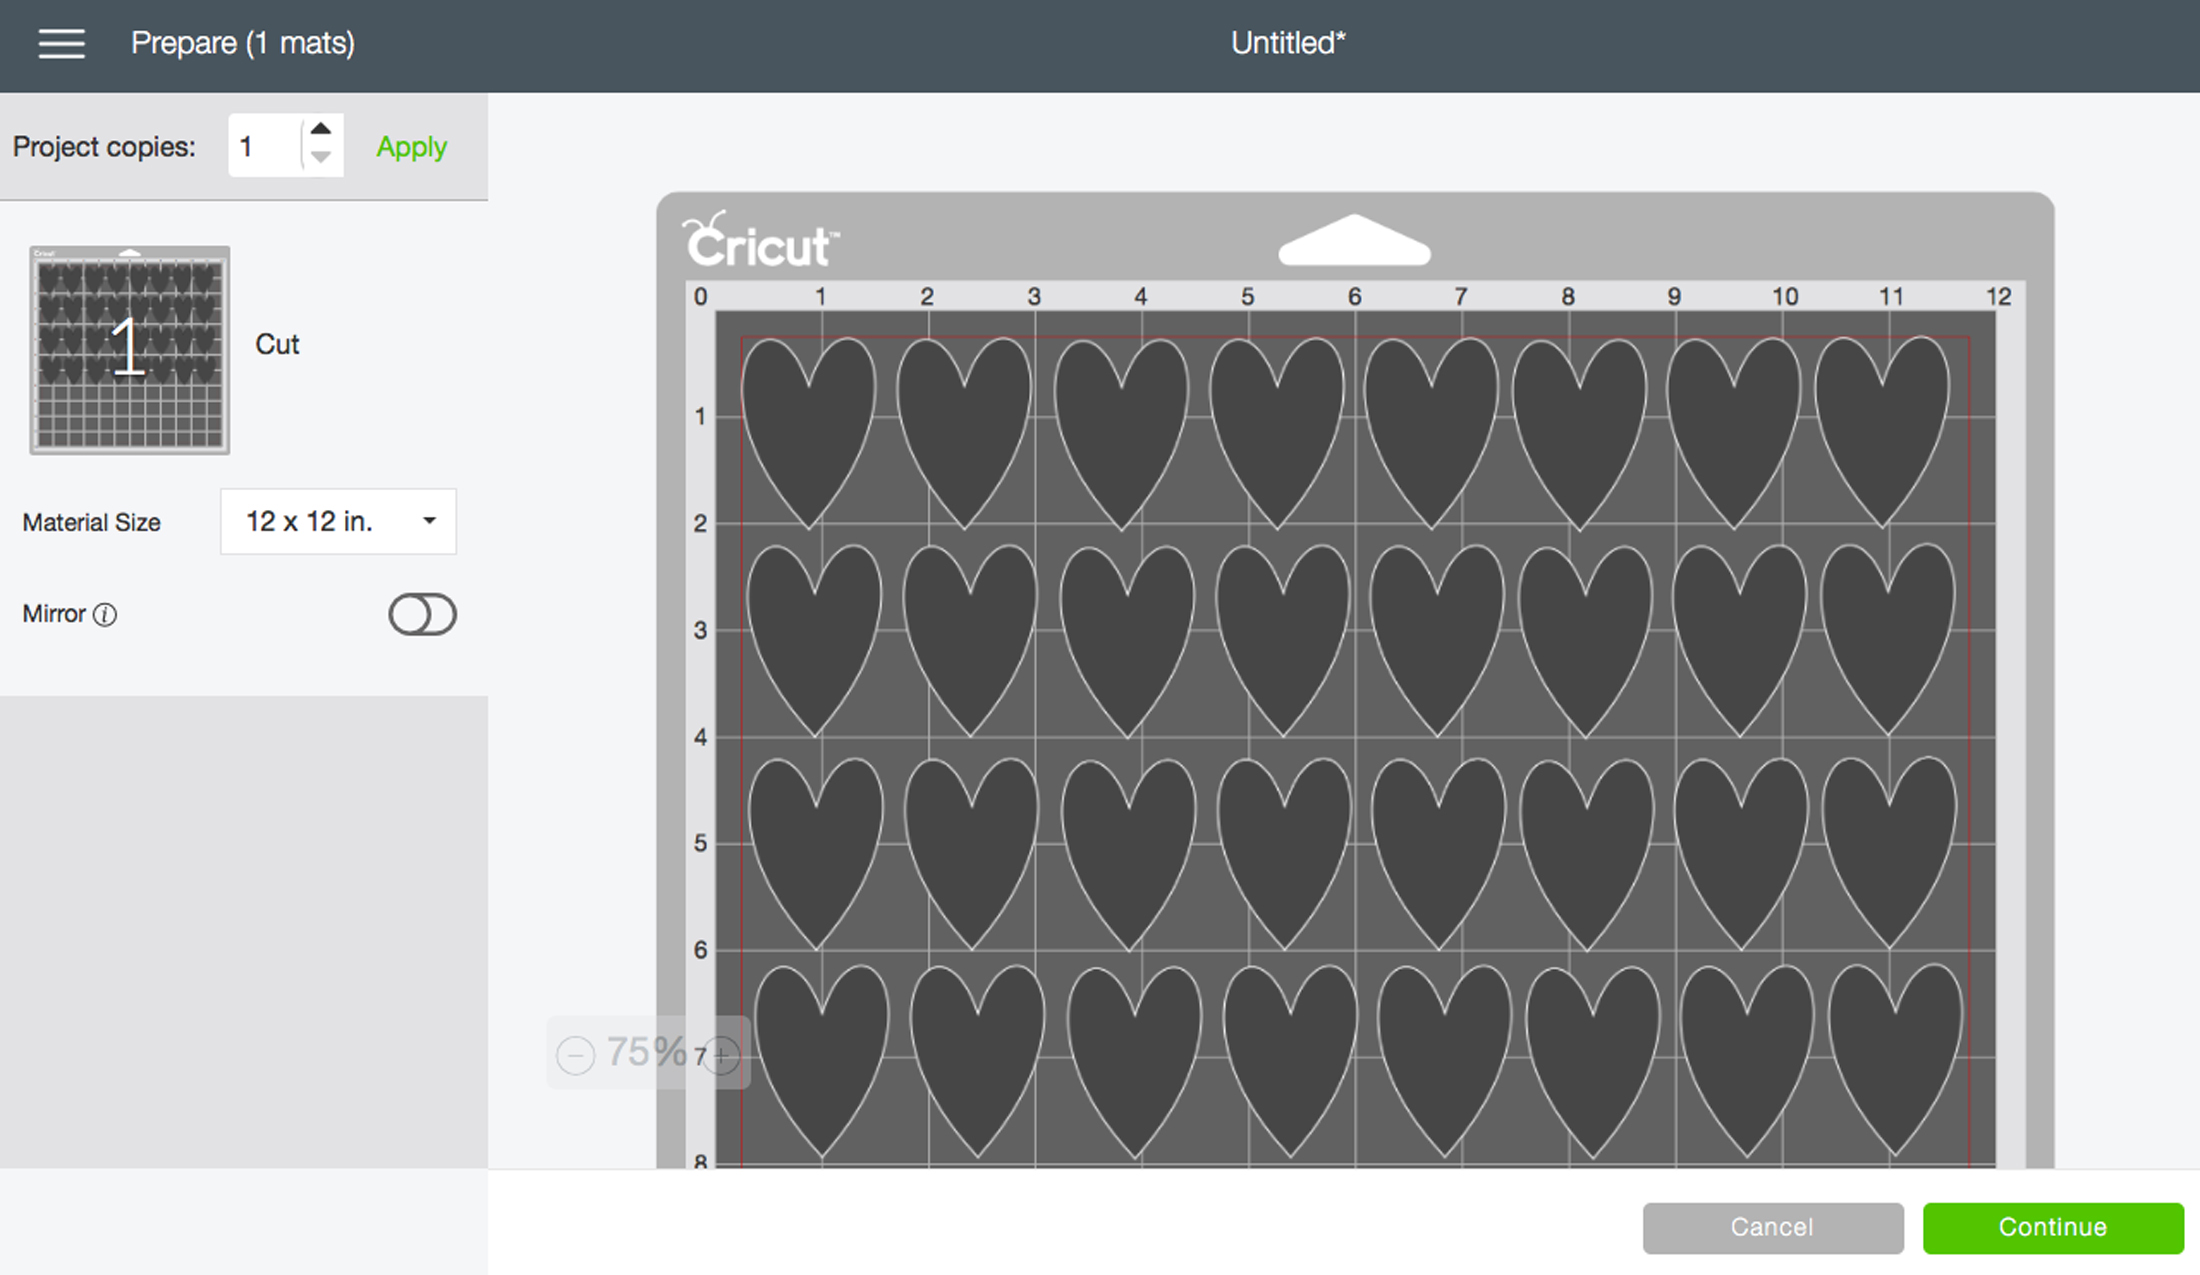
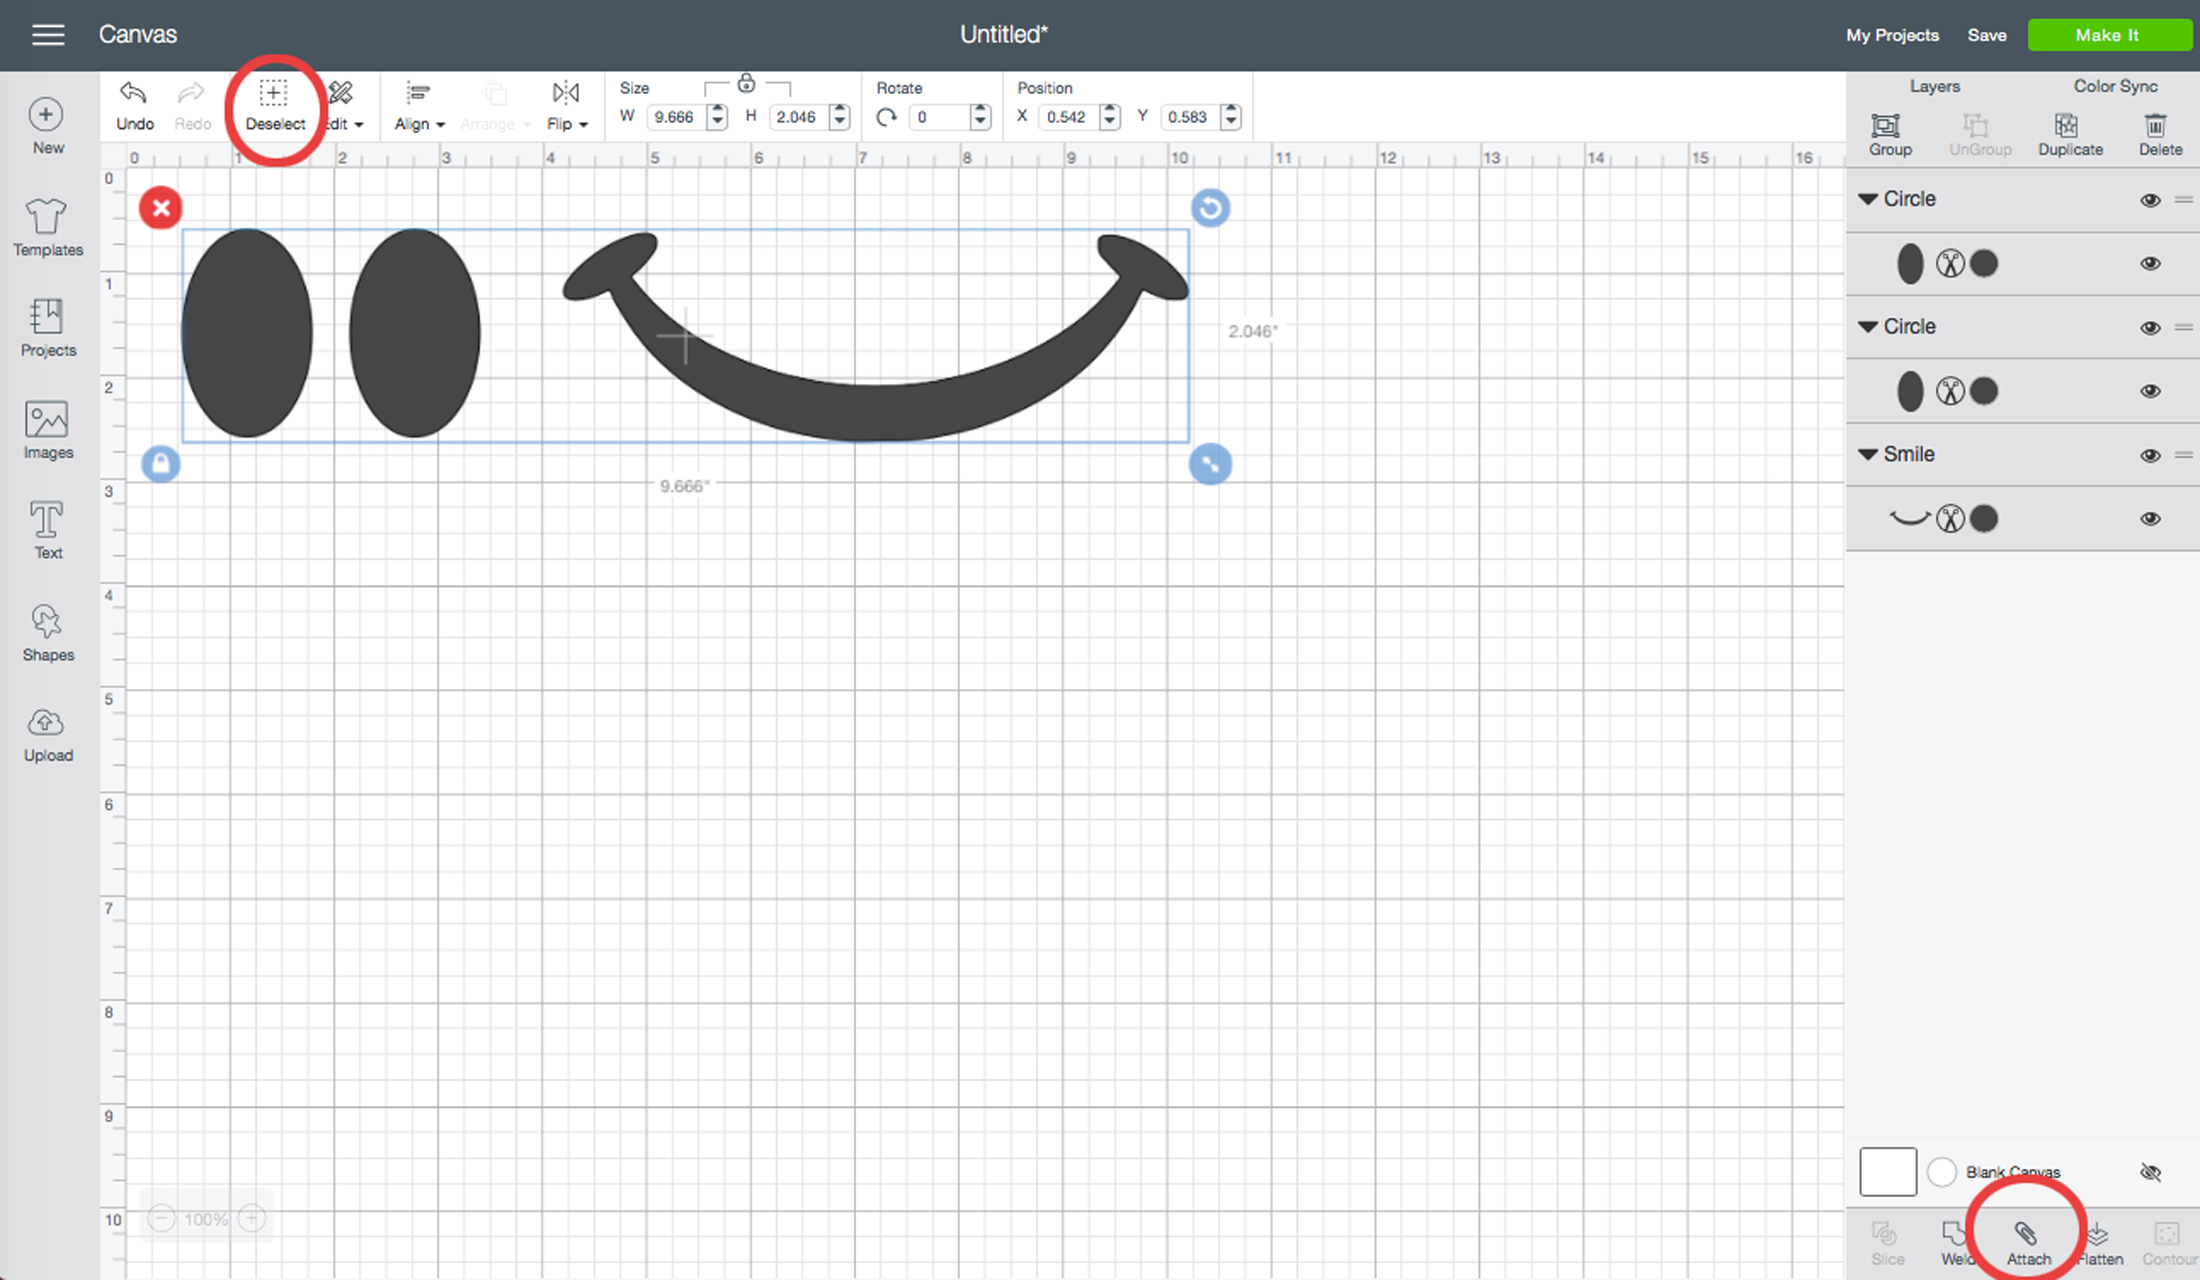
2. Size each shape then copy and paste the number of shapes needed on the canvas. Select “make it”. Create one canvas for each shape, or group of shapes at a time.
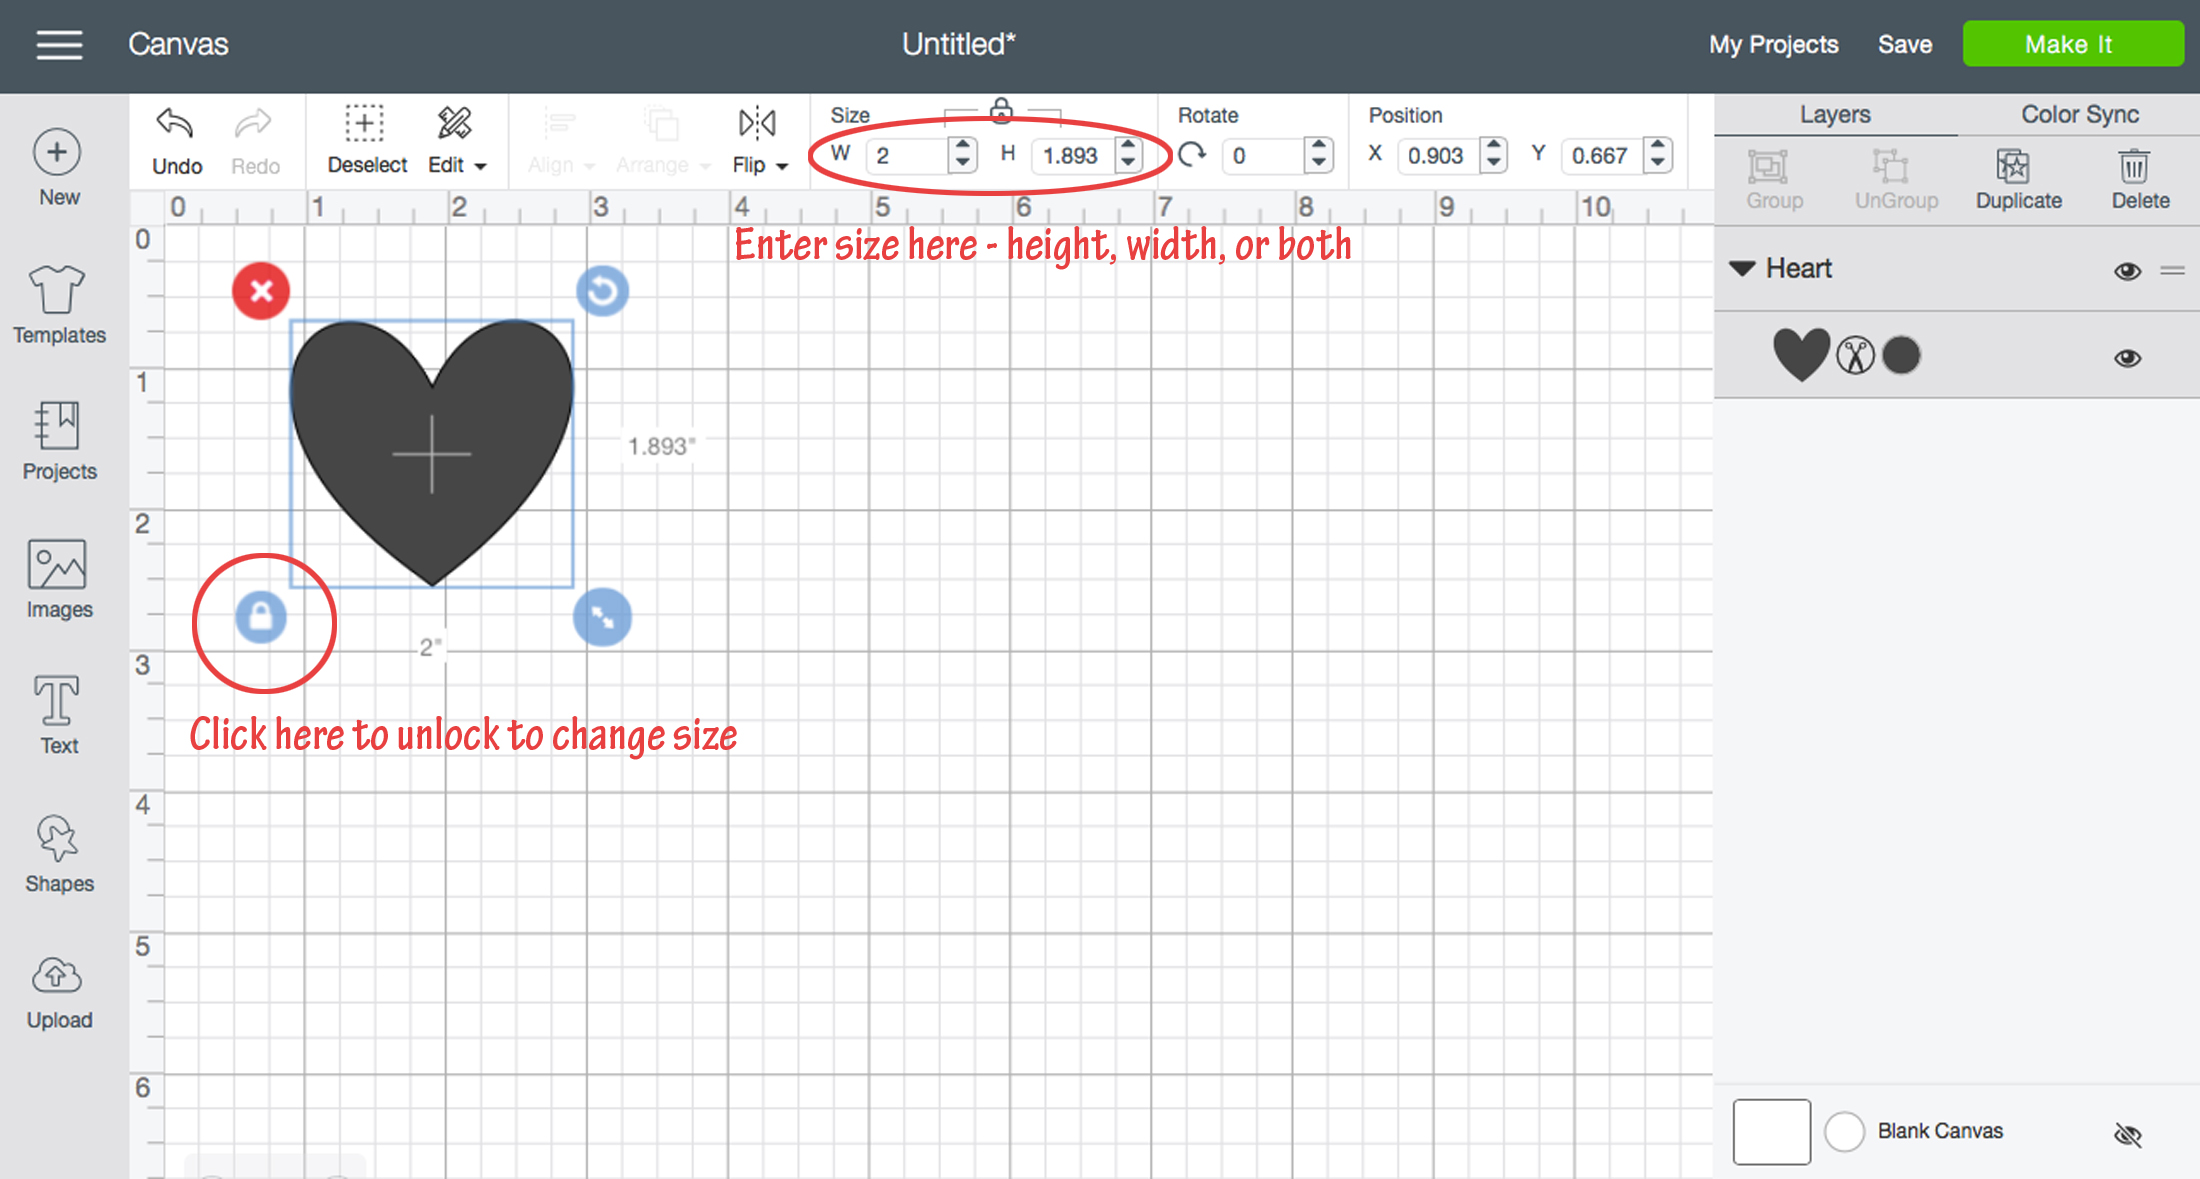
NOTE: Create the 2 ovals by selecting the circle shape. Unlock then add the size. Upload the “smile” at the same time then “select all” and attach. Cut from black felt.
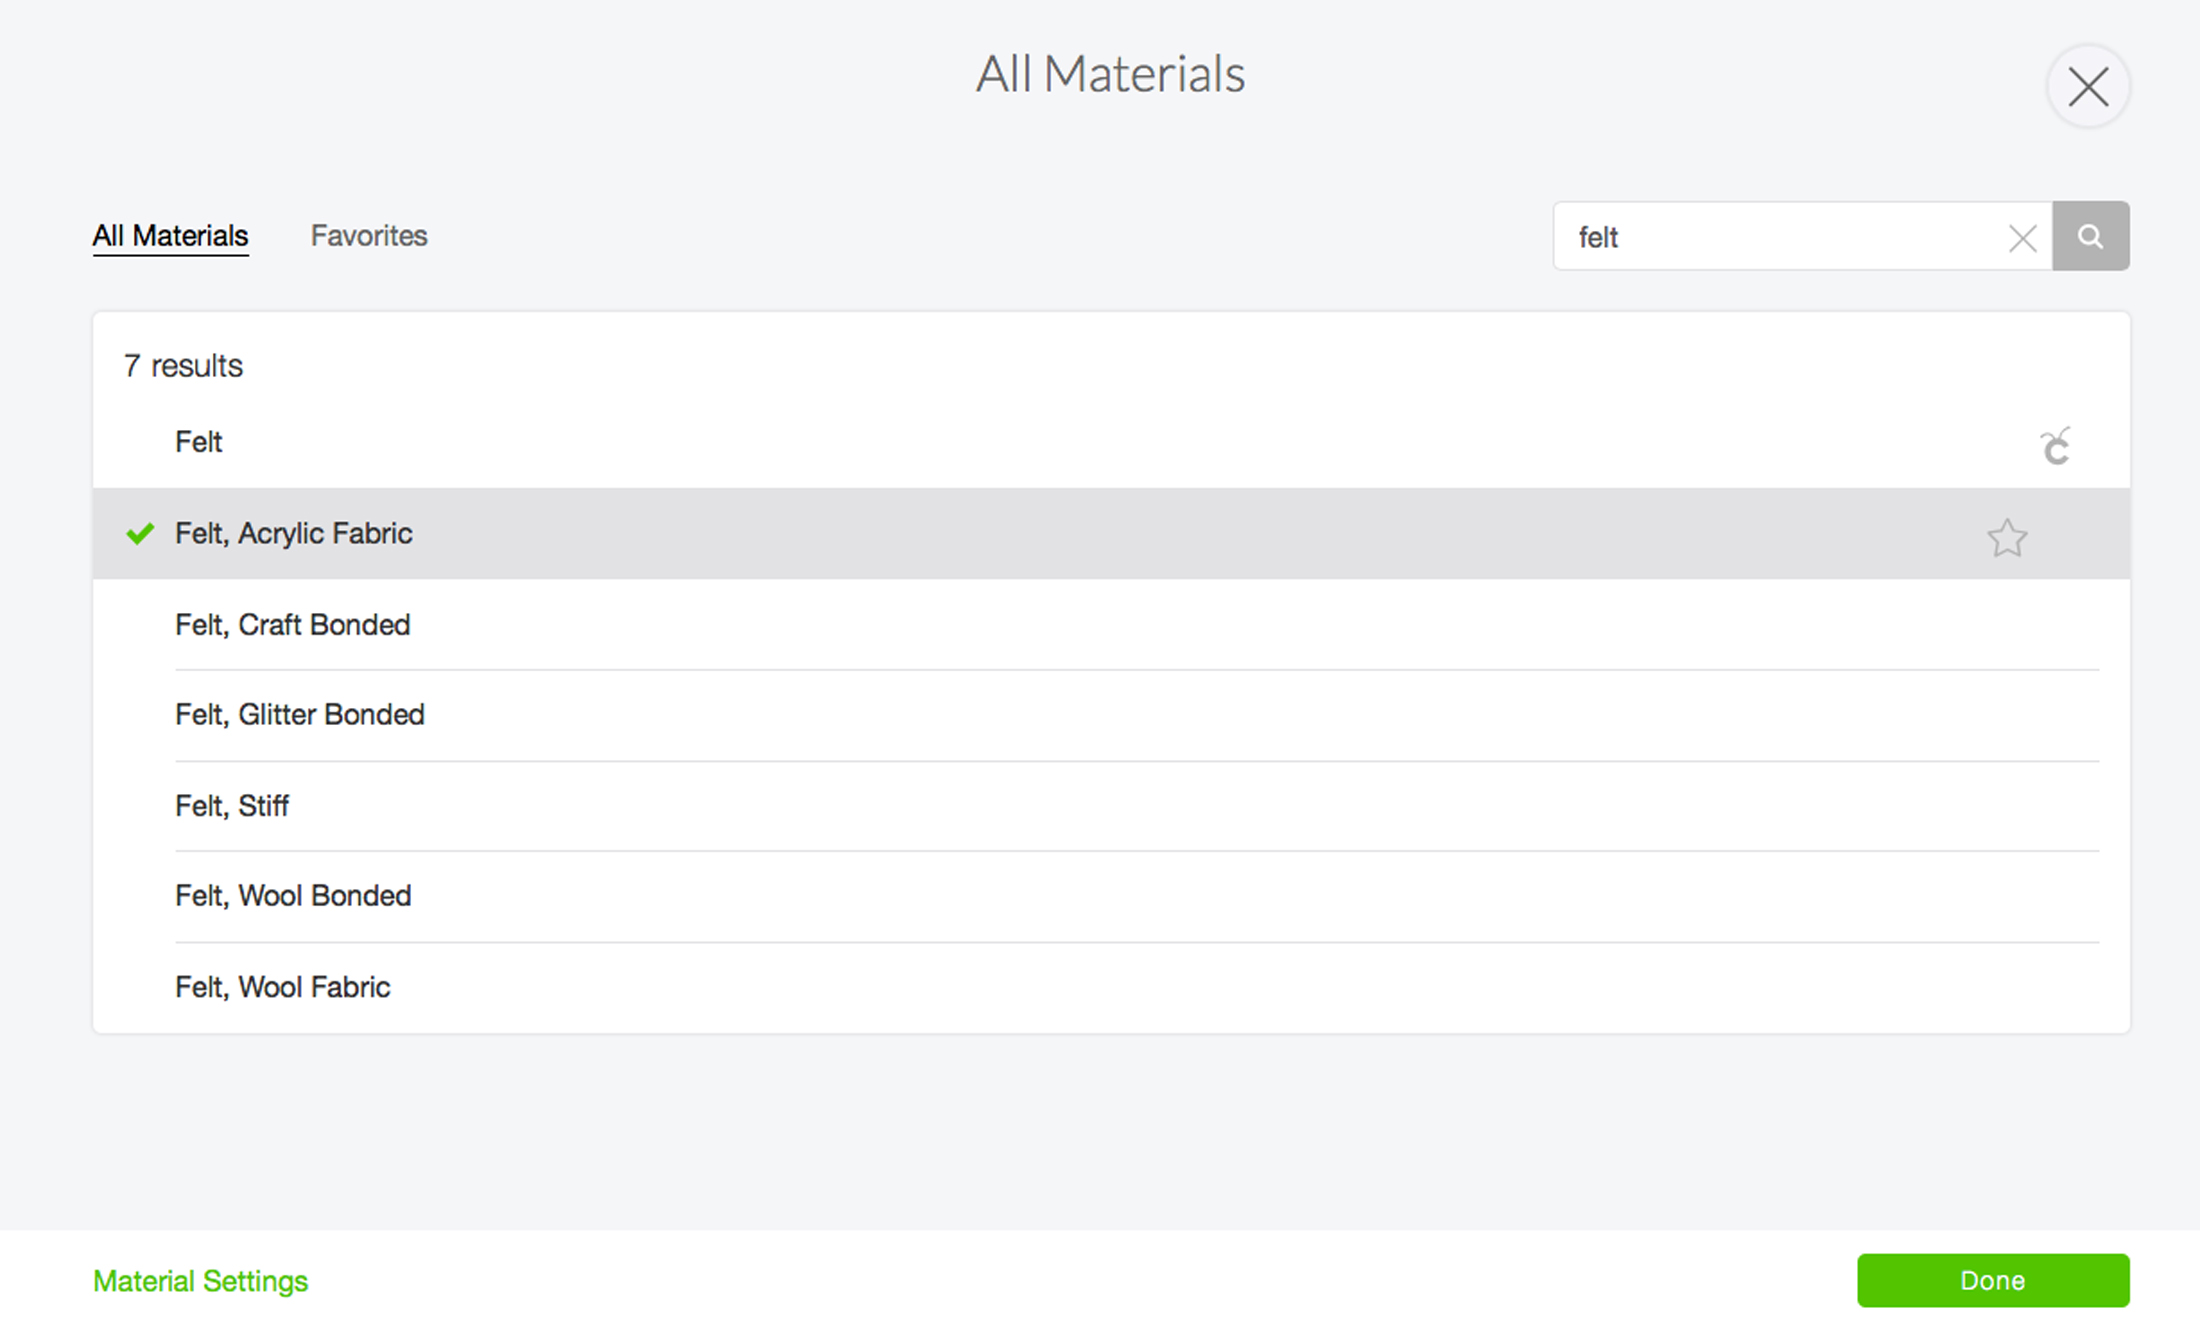
3. After completing a canvas for each shape, or group of shapes, select “make it” then continue to material. Select “Browse all materials”. Enter “felt” in the search field and select “felt acrylic fabric”.
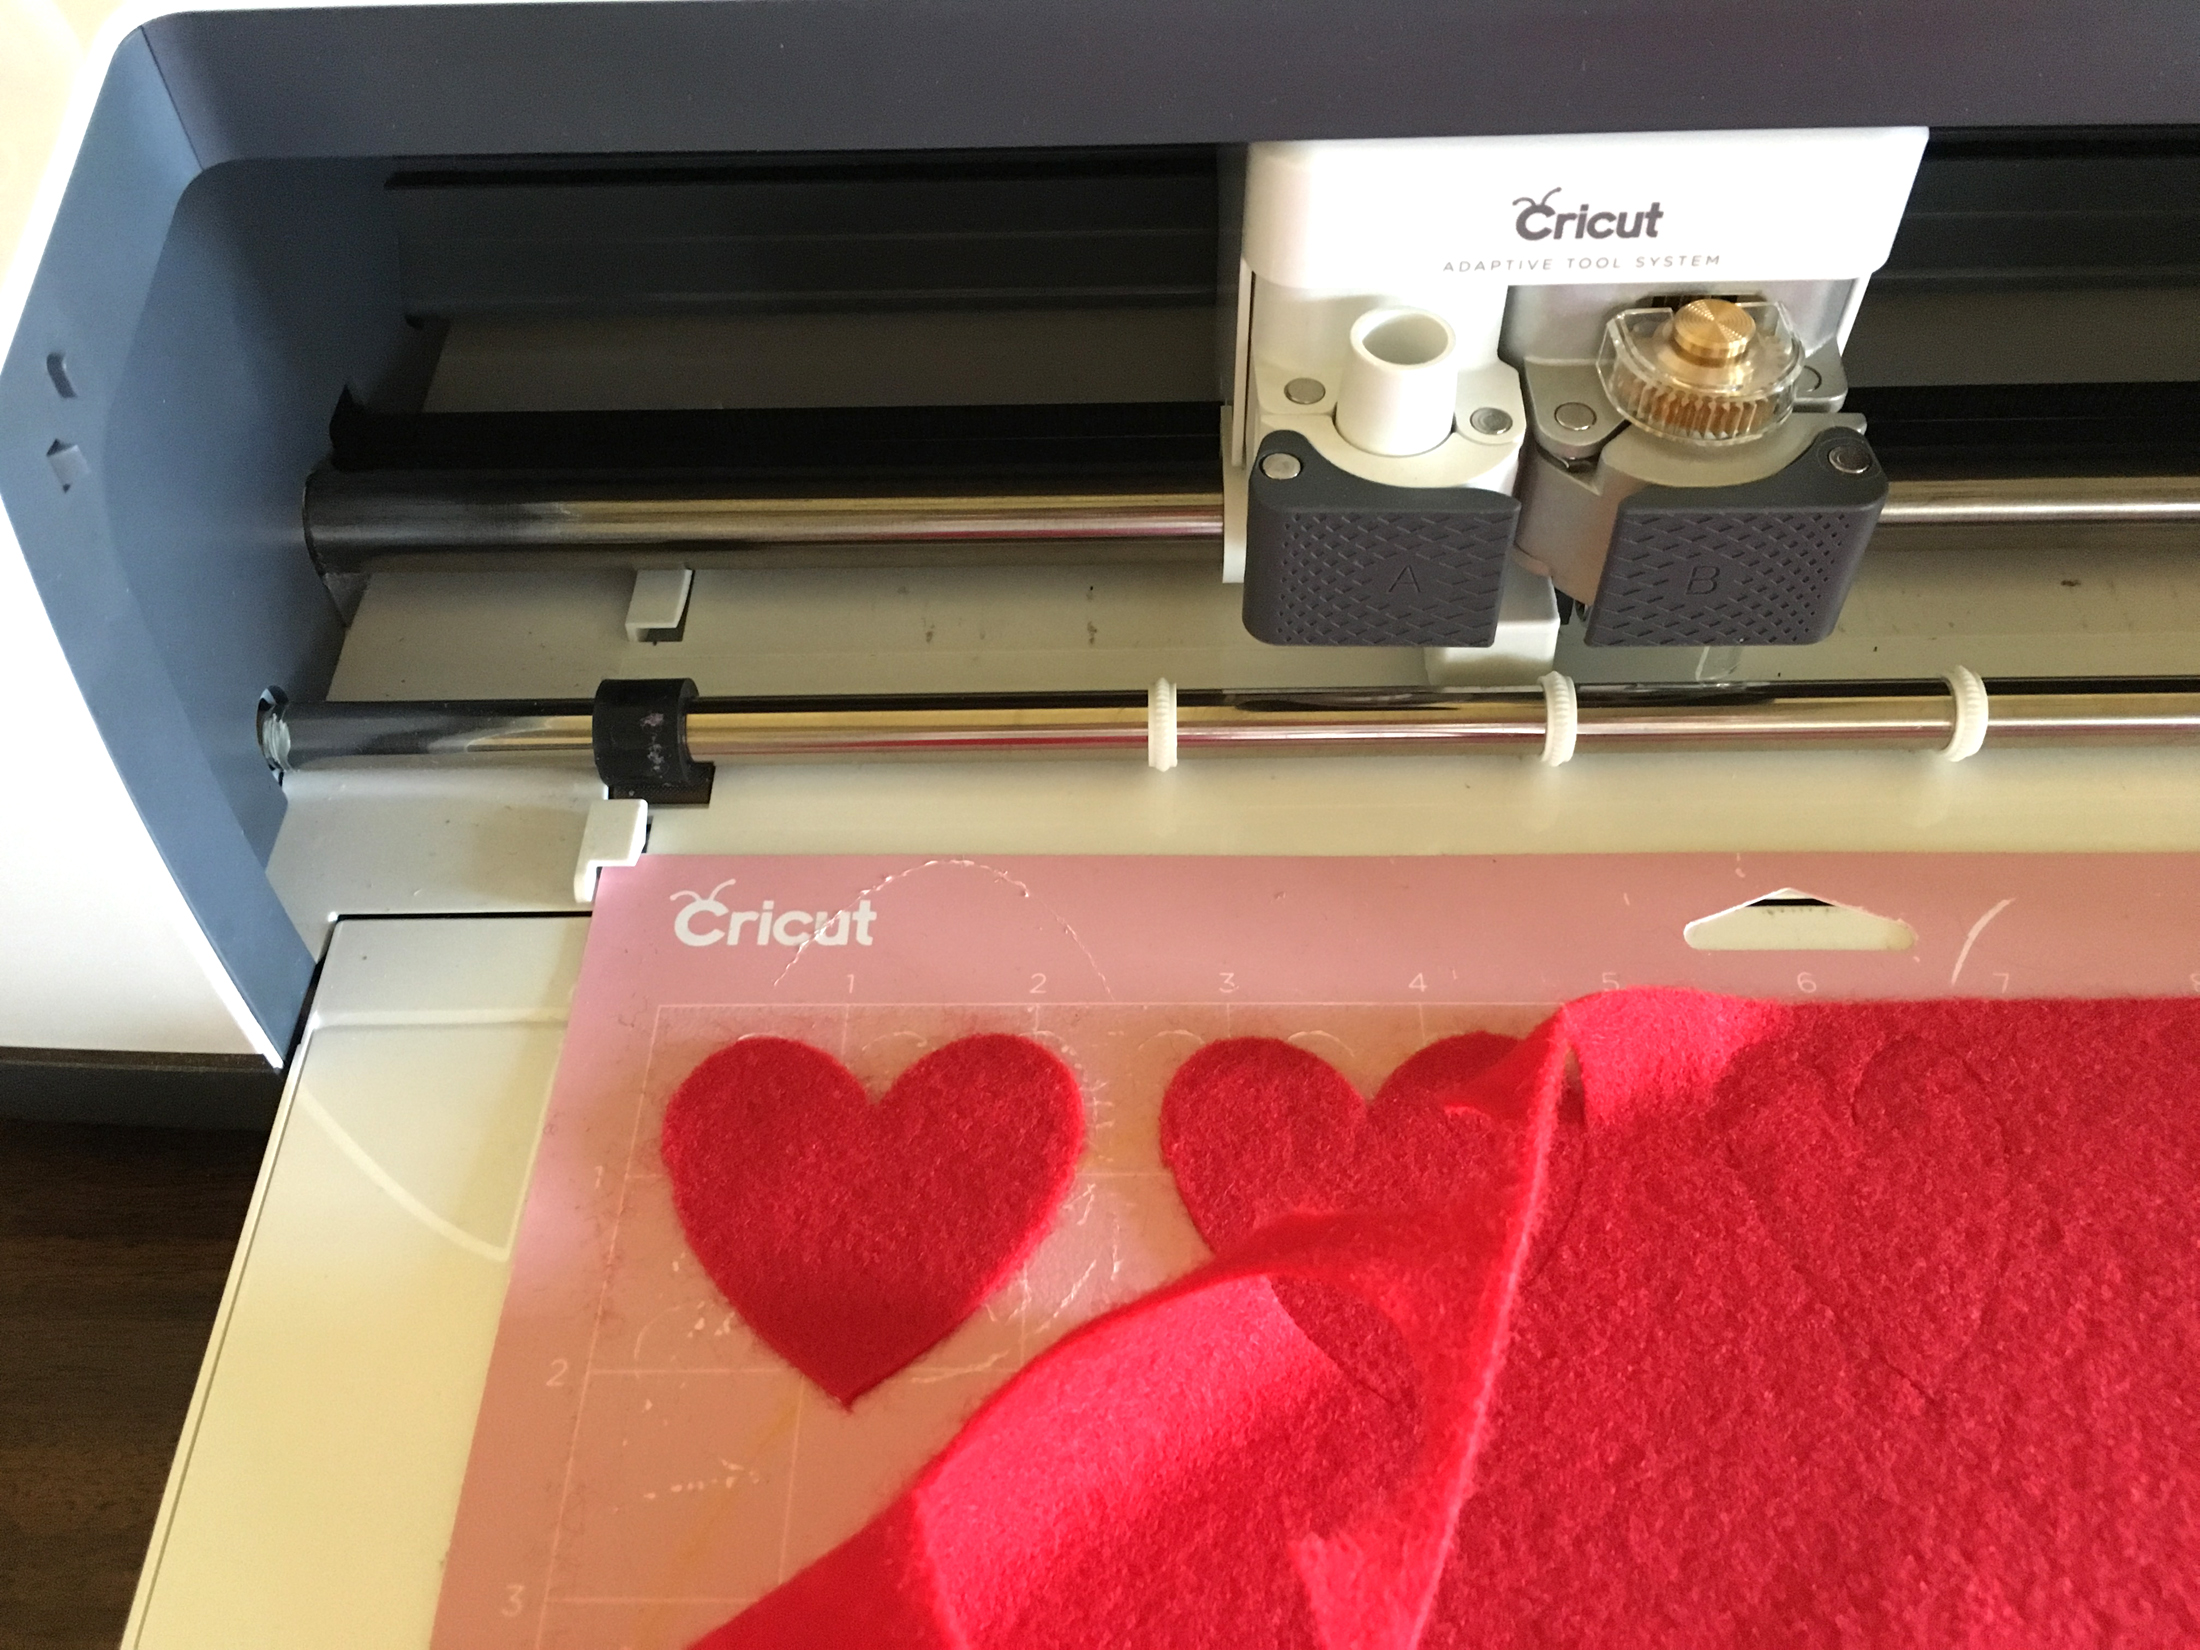
4. Select “more” under the “pressure” menu.

5. Place one piece of felt horizontally on the mat then cut.
6. Create the Felt Hoop:
Separate the hoop rings then center the felt circle on top of the small, inner ring. Place the large ring over the felt, sandwiching the felt between the 2 rings. Tighten the outer ring.
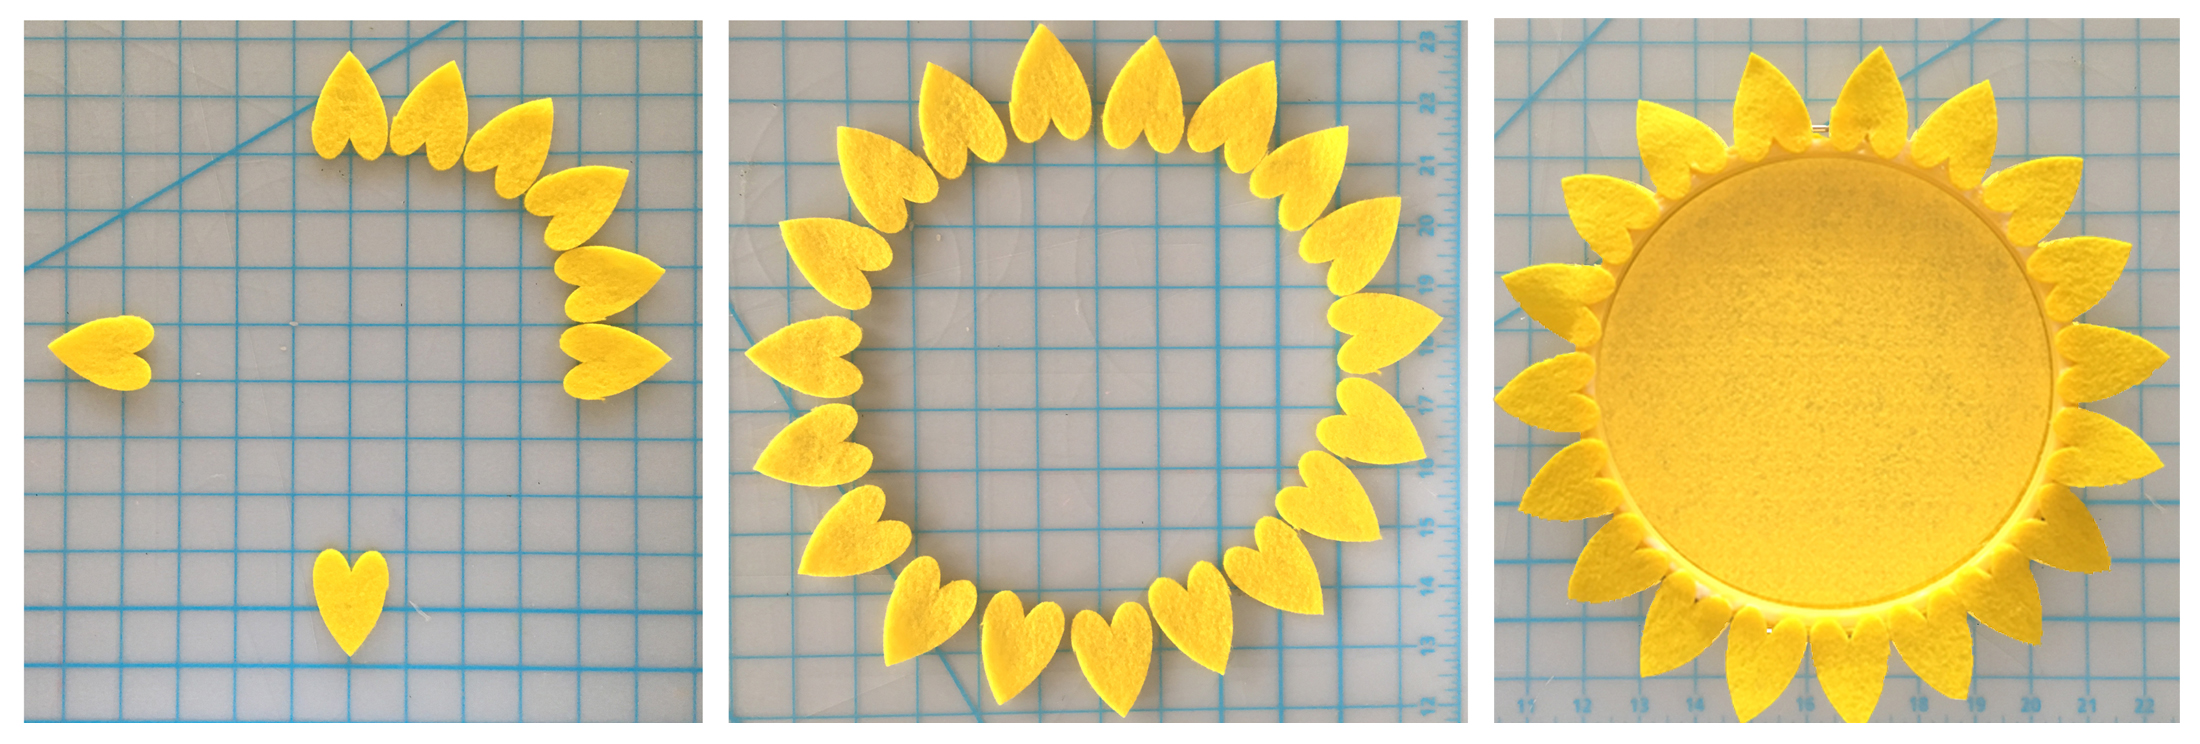
7. Add the small yellow hearts to the back of the ring:
Arrange the hearts in a circle. TIP: Working on a mat with a 1” grid is helpful when arranging the hearts. You can also draw a circle on paper for a guide. Spread the glue on the back of the hoop rings then place the hoop, glue side down on top of the hearts. Adjust the hearts as needed then flip the hoop over to prevent it sticking to the surface. Let dry.
8. Depending on where you hang your hoop, the felt embellishment pieces will easily stick to the front of the hoop without glue, so you can re-arrange them every day. If you need them to be more secure, add a small piece of the “hook” side of hook and loop tape to the back.


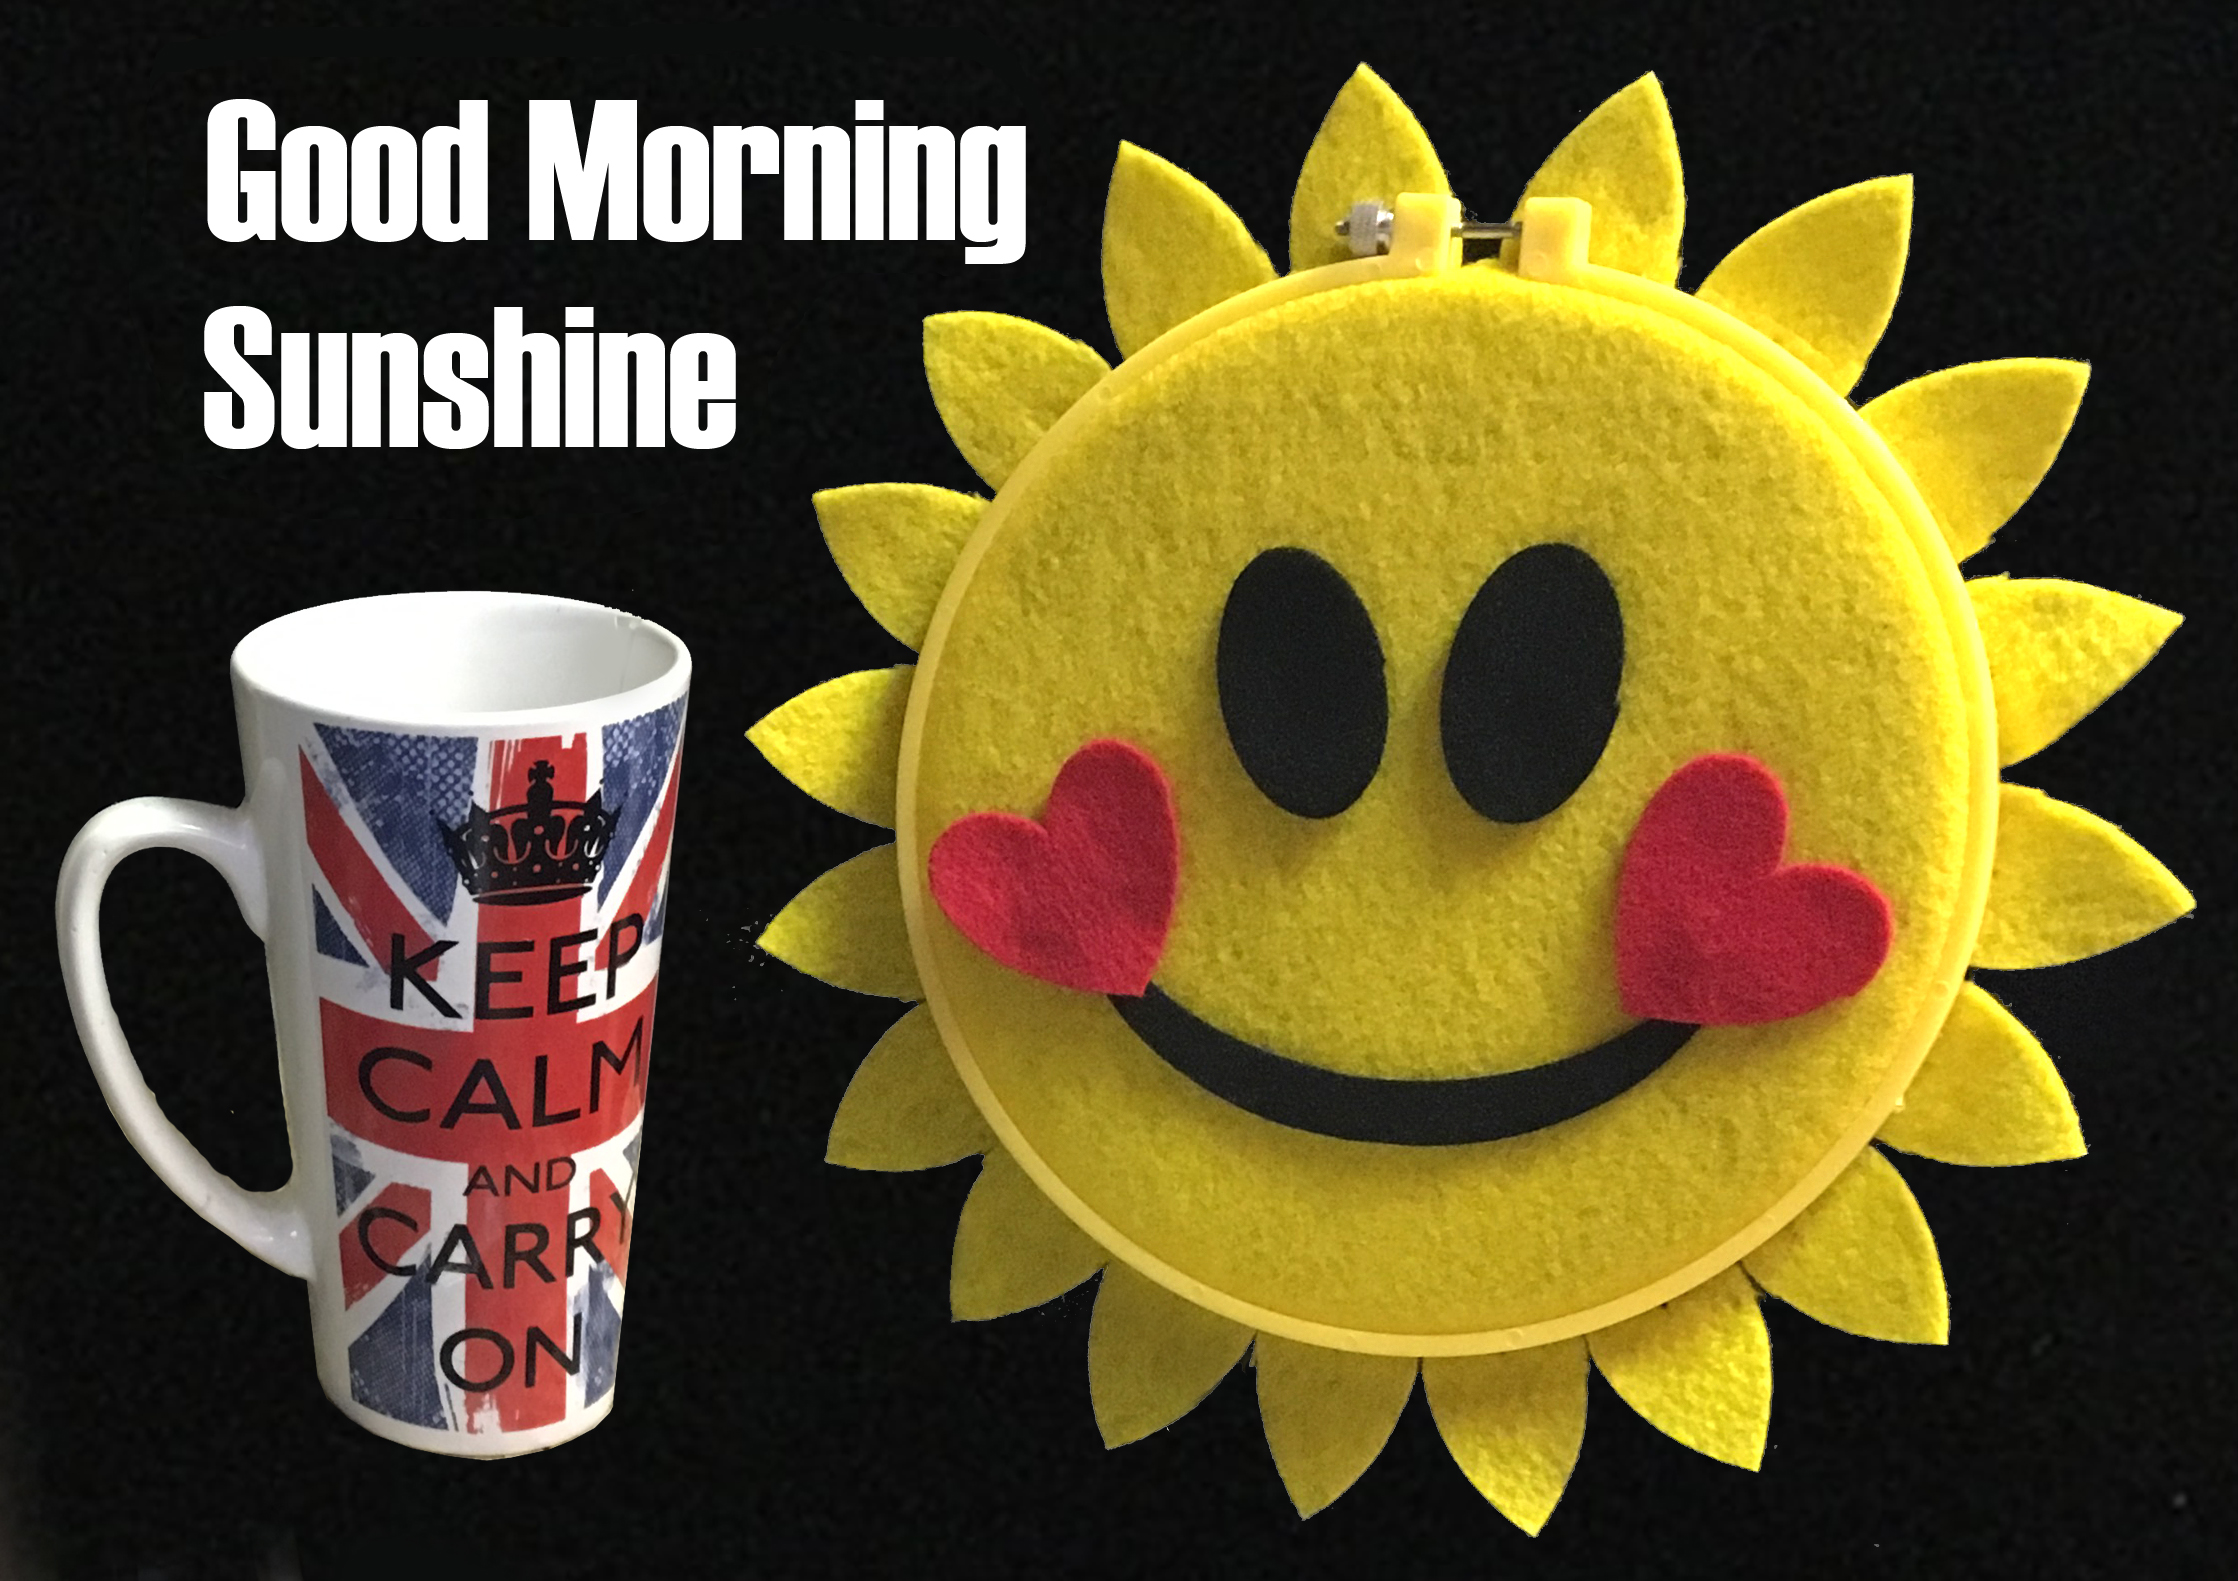
Have fun arranging the additional felt pieces to express your mood for the day and share a smile with everyone you meet! And yes, you’re allowed to turn the smile upside down every once in a while, but no longer than 10 mins……
Love this project. Starting everyday with a smile, so cute!