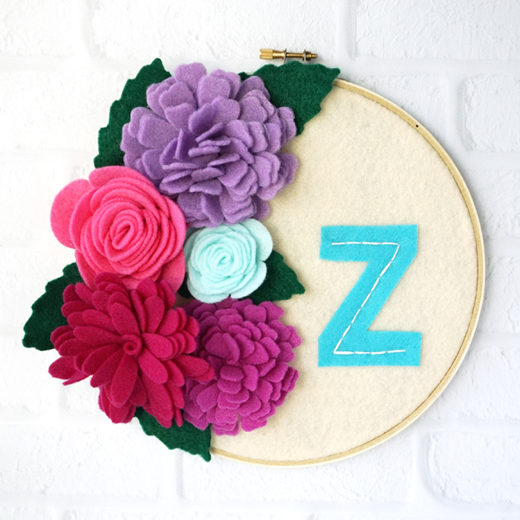
Hello, friends! I’m Lindsay from Artsy-Fartsy Mama, and I’m so excited to be here sharing this Felt Flowers Monogram Hoop Art to celebrate National Craft Month! I love using the Kunin Felt Brand to make creative decor, and this Felt Flowers Monogram Hoop is a simple craft that looks beautiful on display practically anywhere in your home. This is also a fun no-sew project to make as a gift for a new mom to hang in the nursery.

Time: 30 Minutes
Skill Level: Beginner
YOU WILL NEED:
8” Embroidery Hoop
Kunin® Classic™ Felt Craft Cuts 9” by 12”: Antique White, Fuchsia, Candy Pink, Purple Pizazz, Bright Lilac, Peacock, Minty, Kelly Green
Cutting Machine (optional)
Scissors
Glue Gun & Glue Sticks
Embroidery Floss & Needle (optional)

Step 1:
Separate the embroidery hoop, and lay the piece of antique white Kunin® Classic™ felt over the center hoop. Fit the top of the embroidery hoop over the felt, pull the felt taut from the back, and tighten the screw at the top of the hoop.

Step 2:
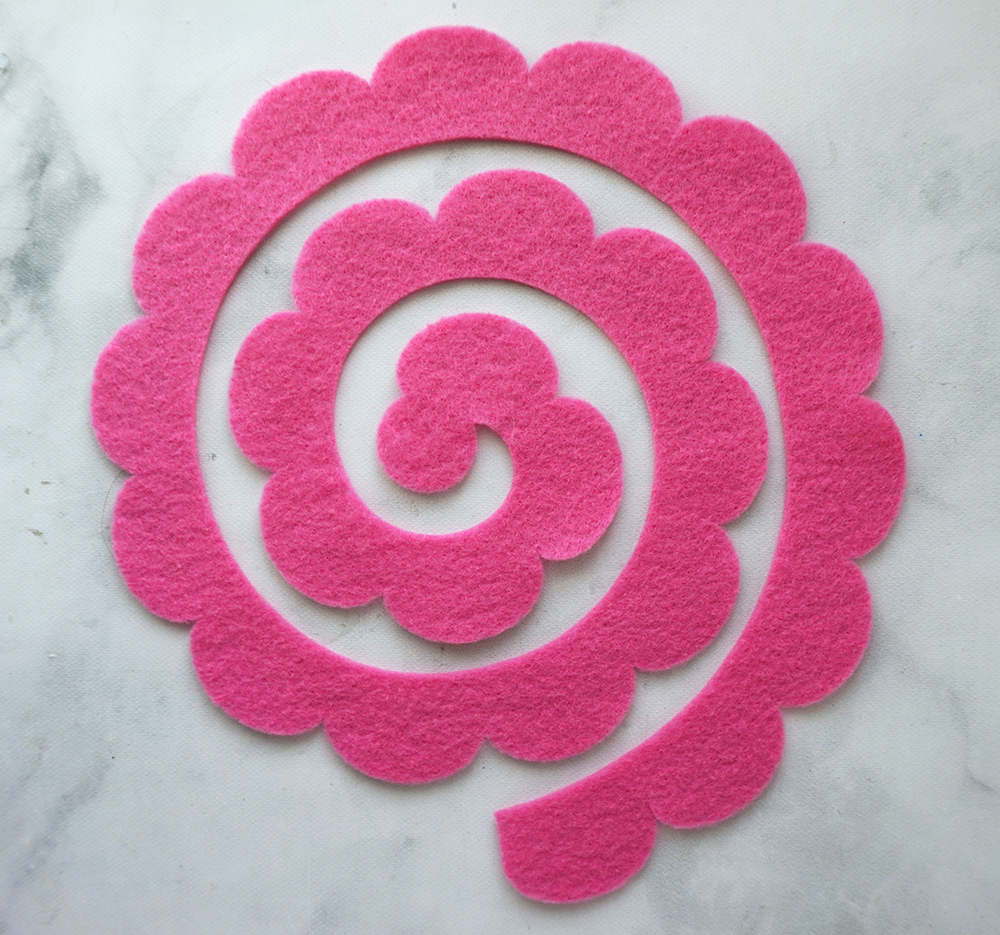
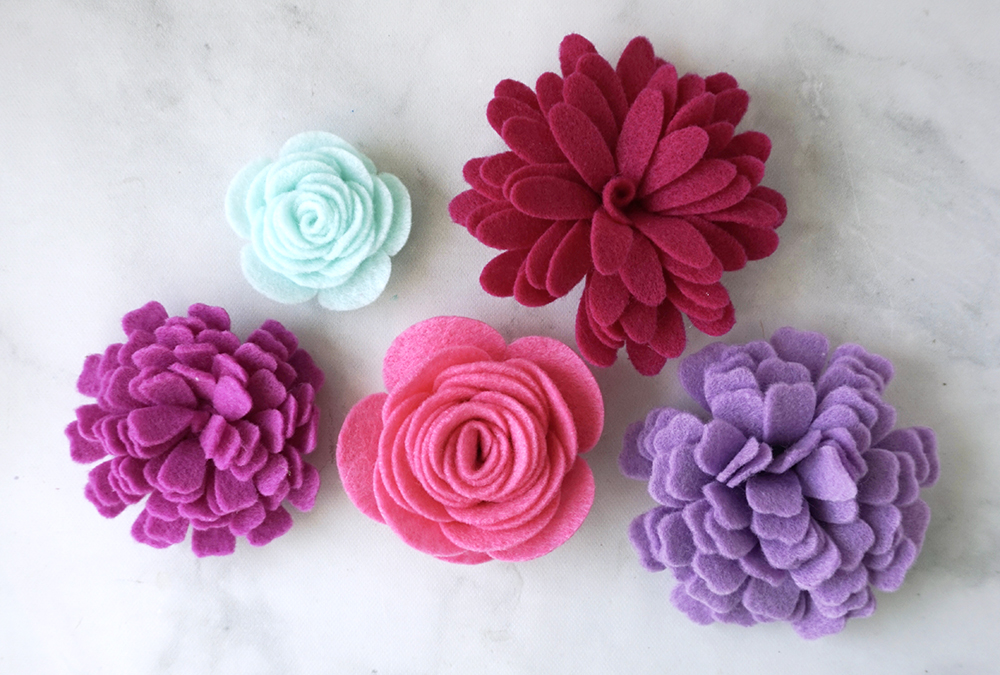
Choose a variety of Kunin® Classic™ felt colors for the flowers and a coordinating color for the monogram. Use a cutting machine or scissors to cut multiple flower spirals in different shapes, and sizes. You will also need to cut some leaves out of the Kelly Green Kunin® Classic™ felt.
For your letter/monogram, I would recommend using a thicker font that is easy to read.
Step 3:
If you are new to felt flower making, you’re in luck! I’m going to quickly show you how easy it is to make rolled felt flowers. There are so many varieties of spiral flower patterns out there, which is great for this kind of project. You can find free flower patterns to cut with a cutting machine, or you can create your own flowers by hand-cutting a spiral, with a shape (half-circles, points, etc) on one side of the spiral, and keeping the other side straight (as seen in image above).
Step 4:
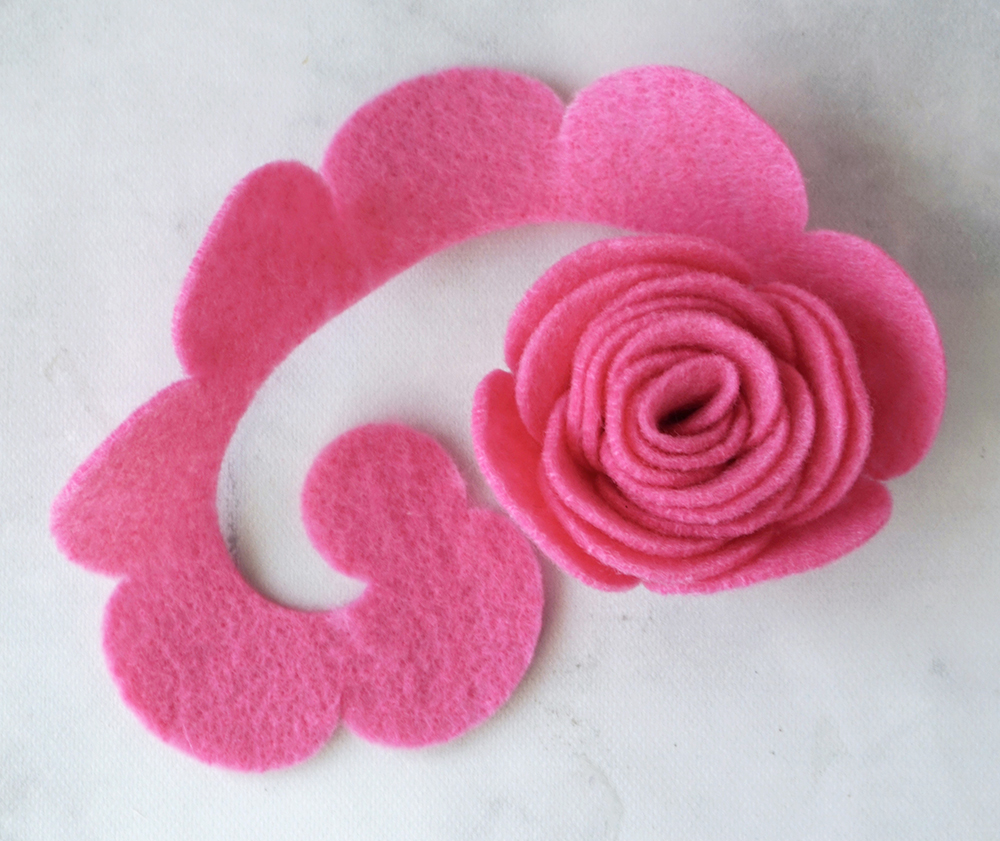
Roll the spiral flower starting at the outer end. It may take a few times to get the hang of it and to know how tight or loose to keep the roll, but keep trying! If you are having a hard time holding the roll in place, add a tiny drop of glue every few rolls to hold the felt in place.
Step 5:
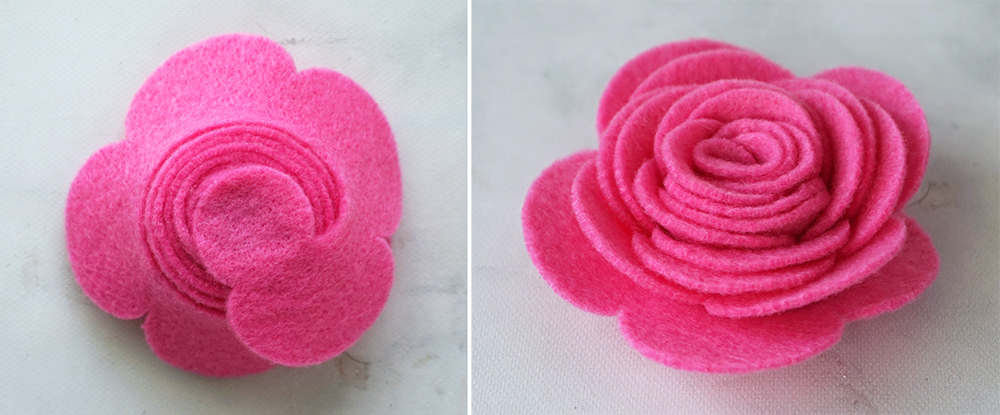
Once you get to the end, add some hot glue to the circle attached to the end of the spiral and place it over the spiraled center at the bottom of the flower to hold everything in place. If necessary, you can cut the circle off the end and place it on the center instead. Once the glue has set on the bottom, turn the flower over and “fluff” out the petals.

Step 6:
Have fun experimenting with different flower patterns, and cutting them into different sizes and colors to make your hoop art look amazing!
It might sound obvious, but the larger the spiral, the larger the flower will be. This larger flower was cut about 9” wide as a spiral, and measured about 4” wide once it’s been rolled. Both of the flowers shown in the image above are the same flower pattern, but cut in different sizes and colors.
Step 7:
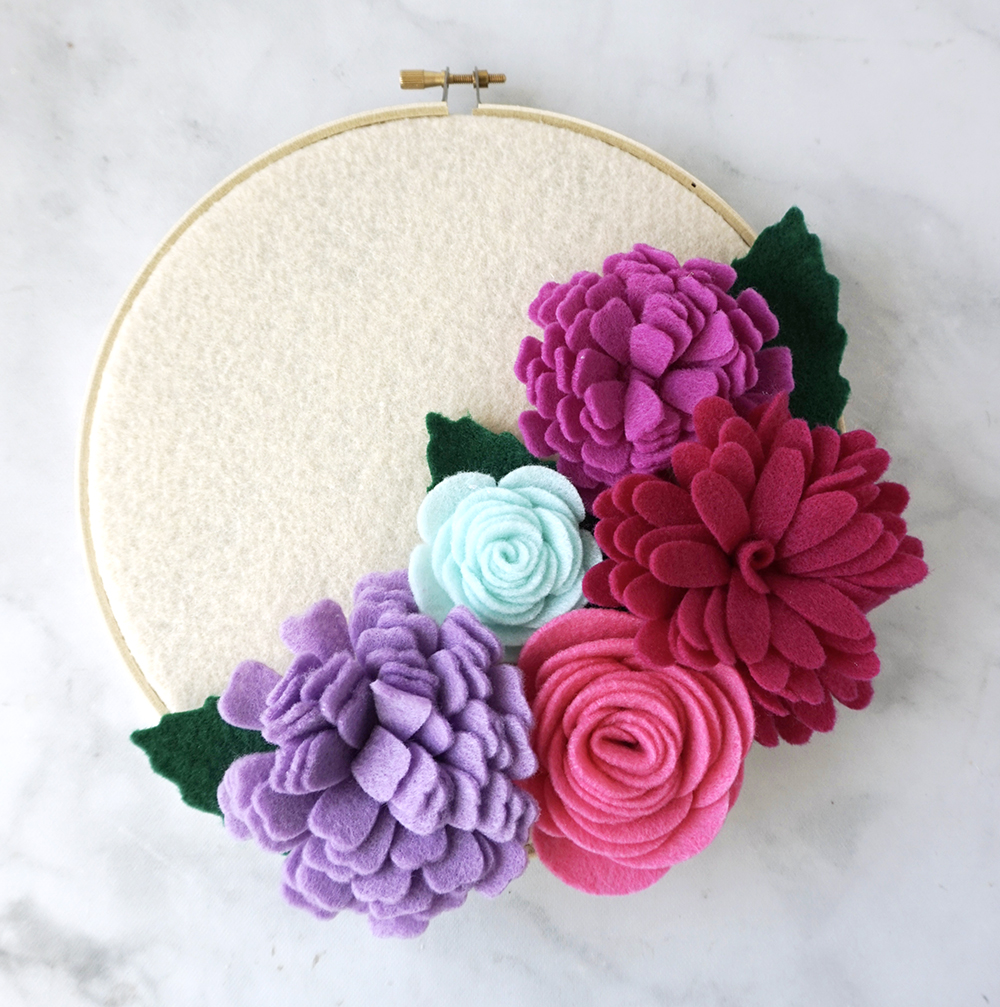
Cut and assemble all of the felt flowers and leaves for the project. Personally, I prefer making an odd number of flowers. The good thing is that if you end up making too many flowers, you can always use them for another project! You could make a Felt Flowers Monogram Hoop Art for the whole family!
Step 8:
Arrange the flowers and leaves on the hoop to your liking. Once everything is set up, use a glue gun to carefully put each of the pieces into place. If you are nervous about using a glue gun, fabric adhesive would also work really well!
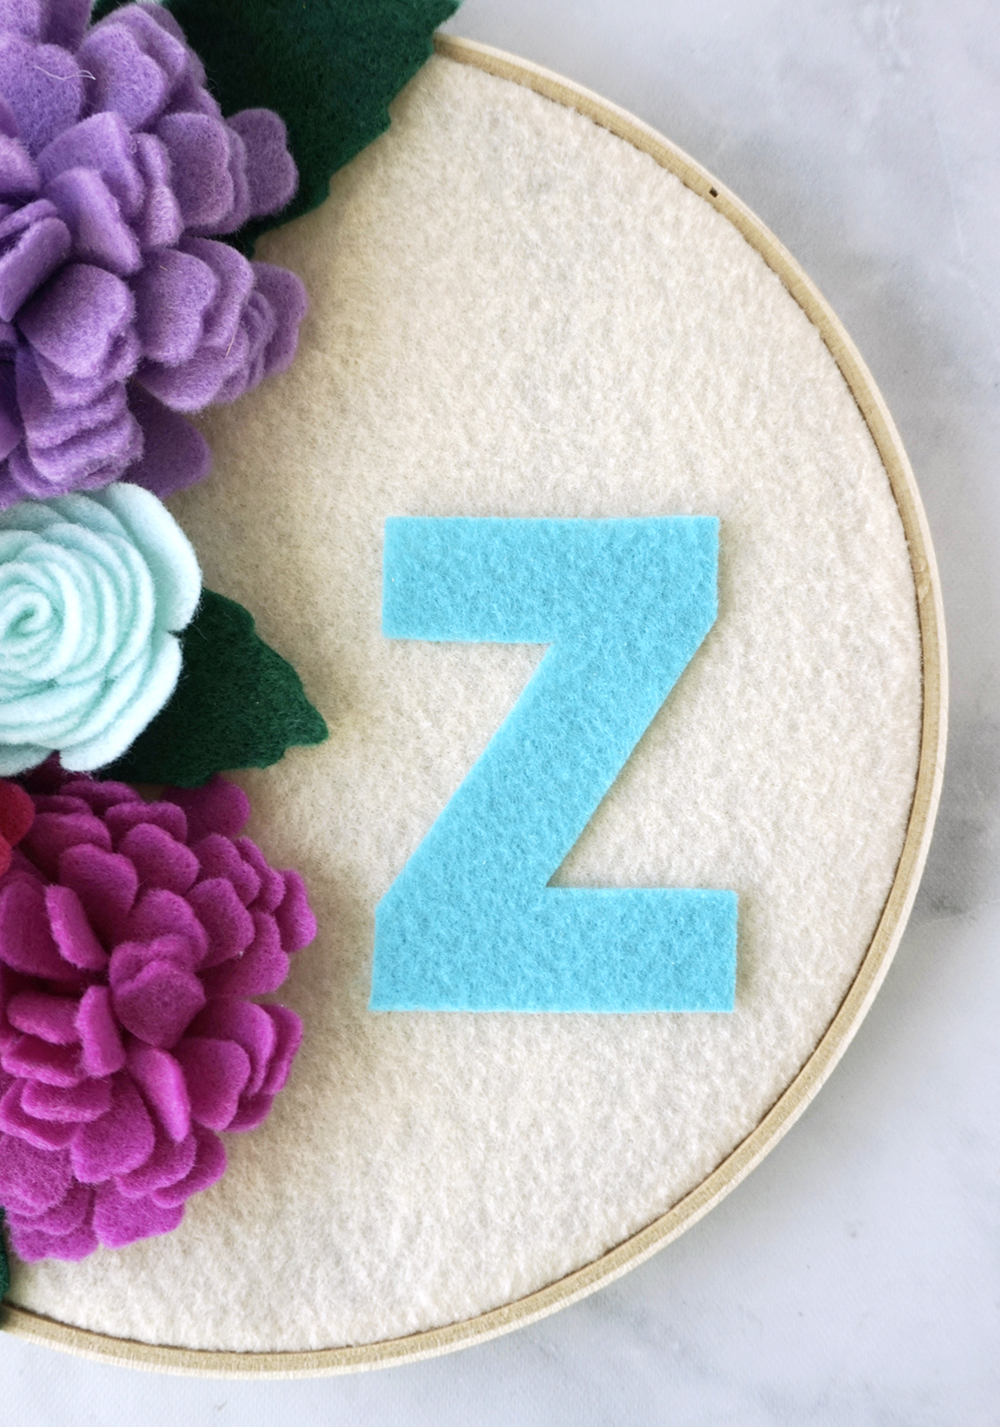
Next, place the monogram letter on the front of the hoop and glue it into place. If you want, you can add embroidery to the letter before or after gluing it down. If you want to embroider after gluing, be sure to put the glue onto the felt where you won’t be adding stitches to make it easier!
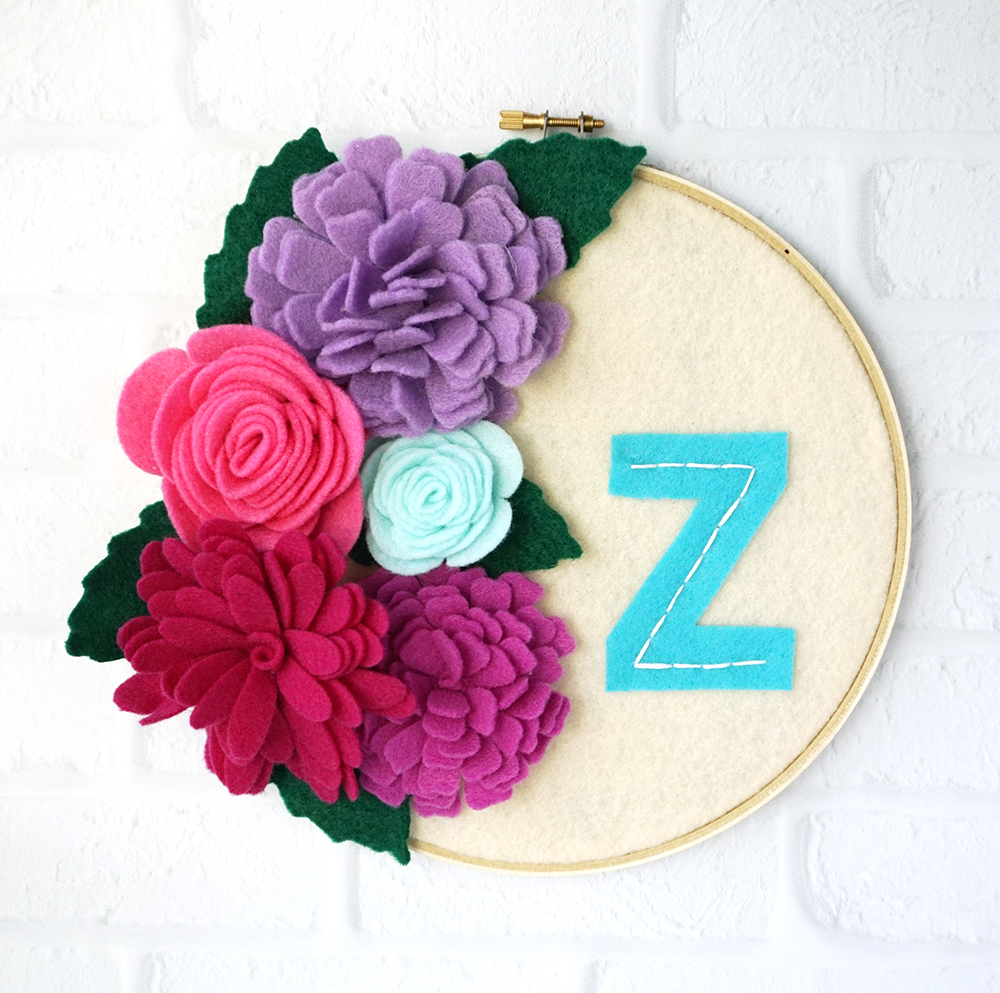
Now that the Felt Flowers Monogram Hoop Art is complete, it’s ready to hang on the wall or to give as a gift. Felt is such a fun, affordable, and easy material to work with that allows you to create so many things! I hope you enjoy this tutorial and we would LOVE to see what you create! Be sure to tag us #CreateWithKunin on social media.
For more creative felt crafts and inspiration, follow Kunin Felt Brand on Facebook, Instagram and Pinterest for daily creative inspiration and crafty projects!
Thanks for stopping by!
Lindsay aka Artsy-Fartsy Mama