By Laura Bray
Skill Level: Beginner
Completion Time: 2-3 hours
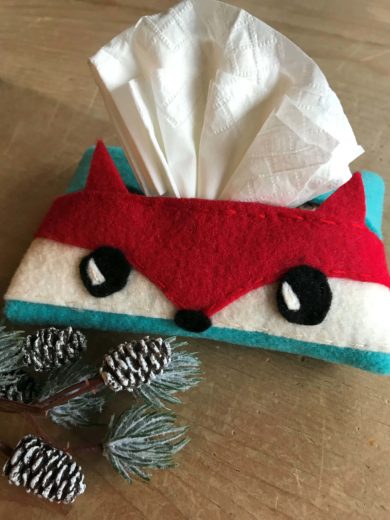
Cold and flu season is here. Sniffle in style with this cute Fox Tissue Holder, a perfect fit for travel tissues. The cuteness is sure to make you feel better!
Supplies
• 9” X 12” Craft Cuts of Kunin Premium Felt in:
o Red, Black, White, and Lagoon
• Basic sewing supplies
• Embroidery floss
• Woodland Fox Pattern
Instructions:
1. Cut (1) 6” X 7” rectangle of Lagoon felt.
2. Cut out Fox Face A from White felt. Sew on one end of the rectangle. You can either sew on by hand or by sewing machine.
3. Cut out Fox Face B from Red felt. Sew on top of cream felt, with the ears hanging over the edge.
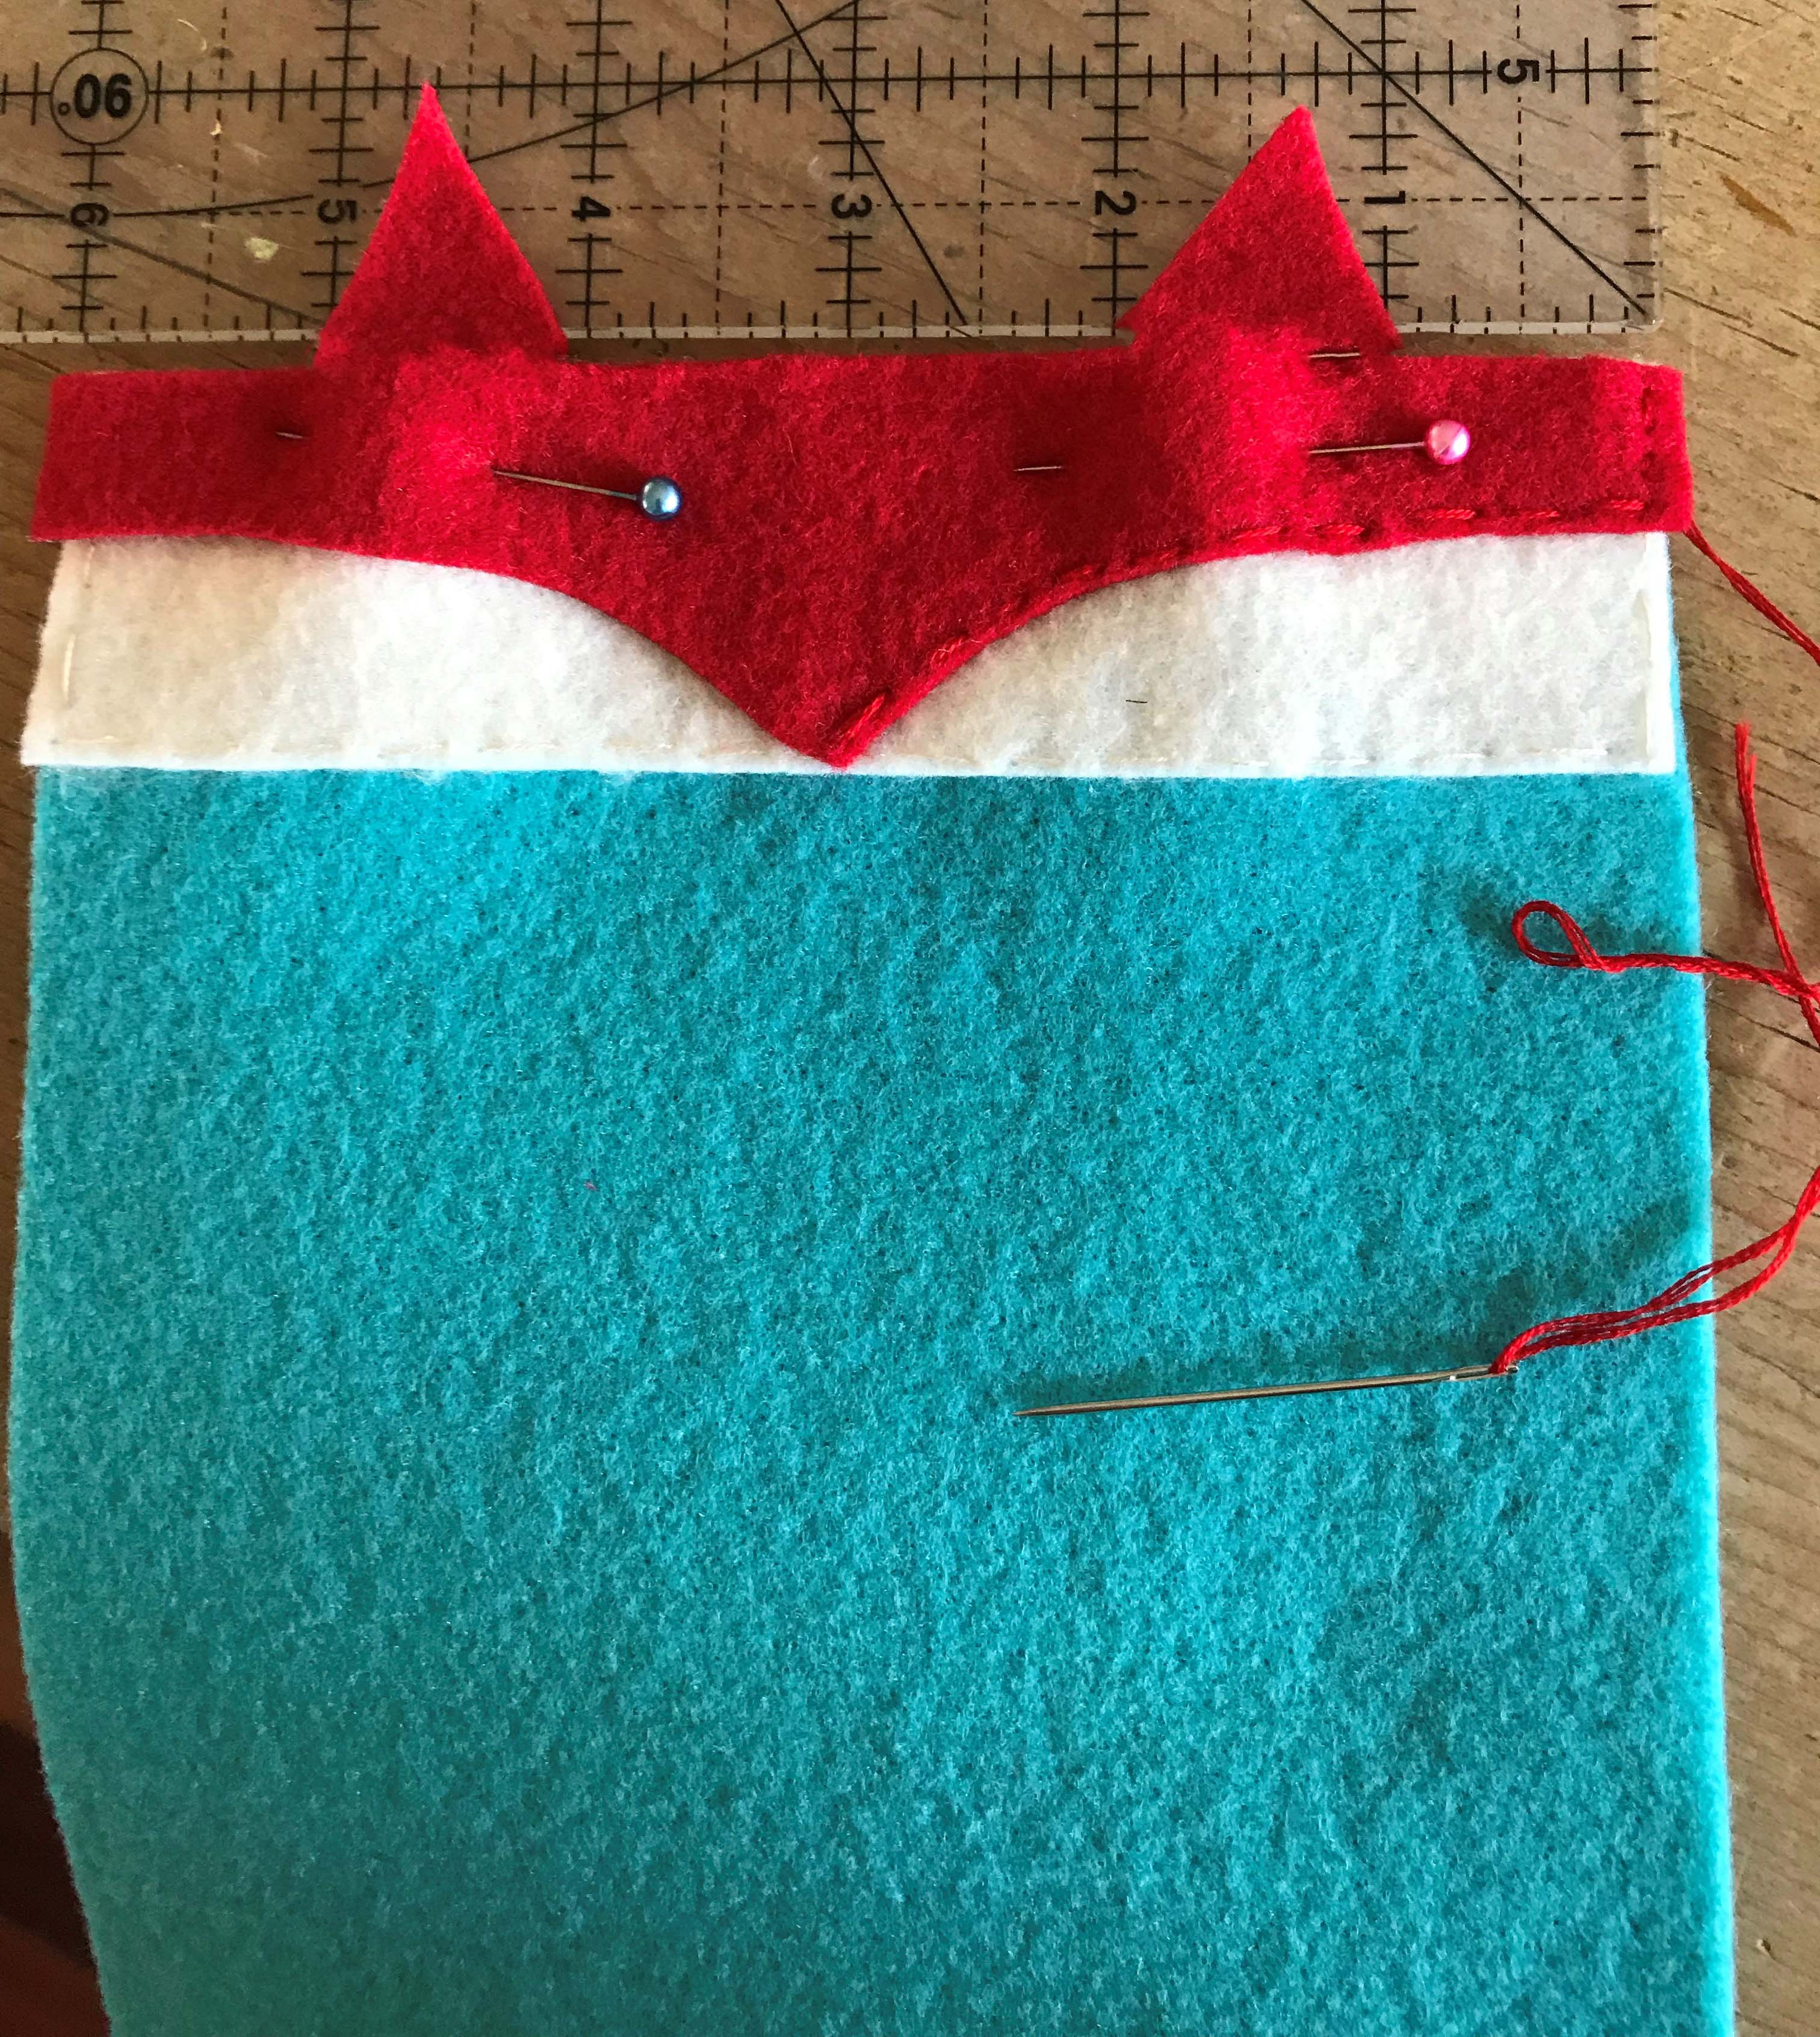
4. Cut out eyes and nose from pattern in black felt. Sew or glue onto face.
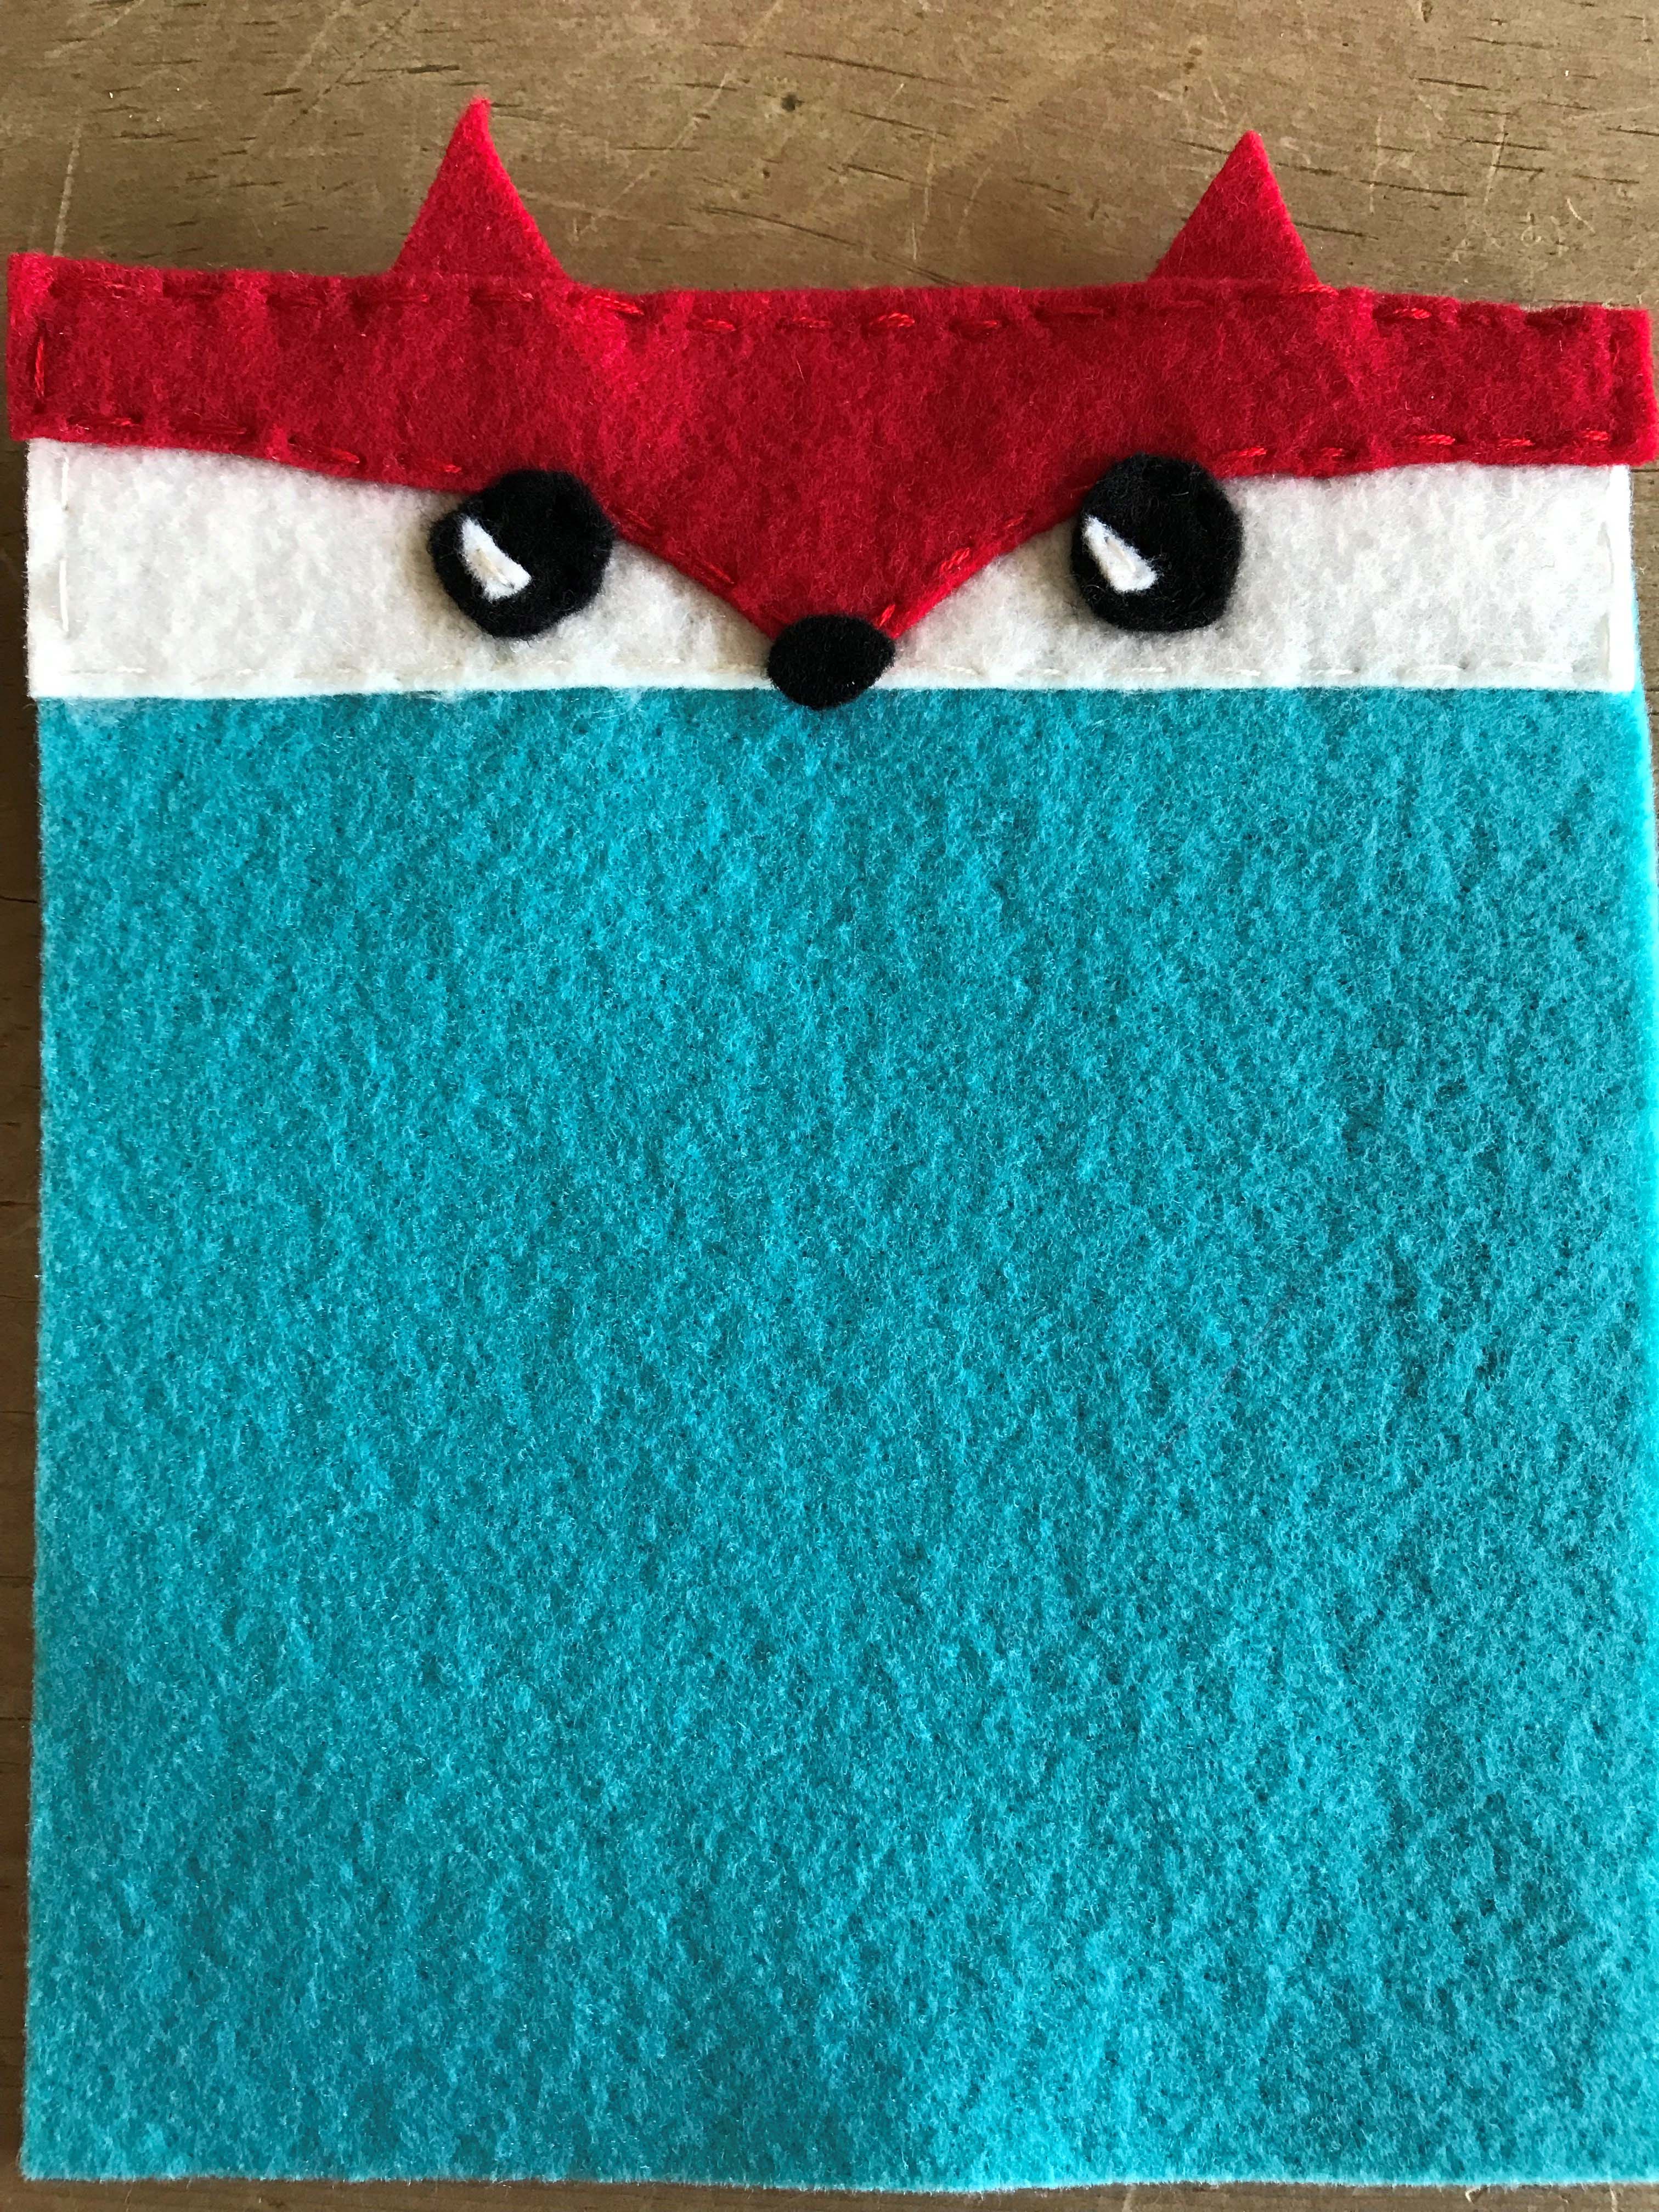
5. If you want to add a “glint” to your fox’s eye, cut a small rectangle or circle from the cream felt and attach to the black eye.
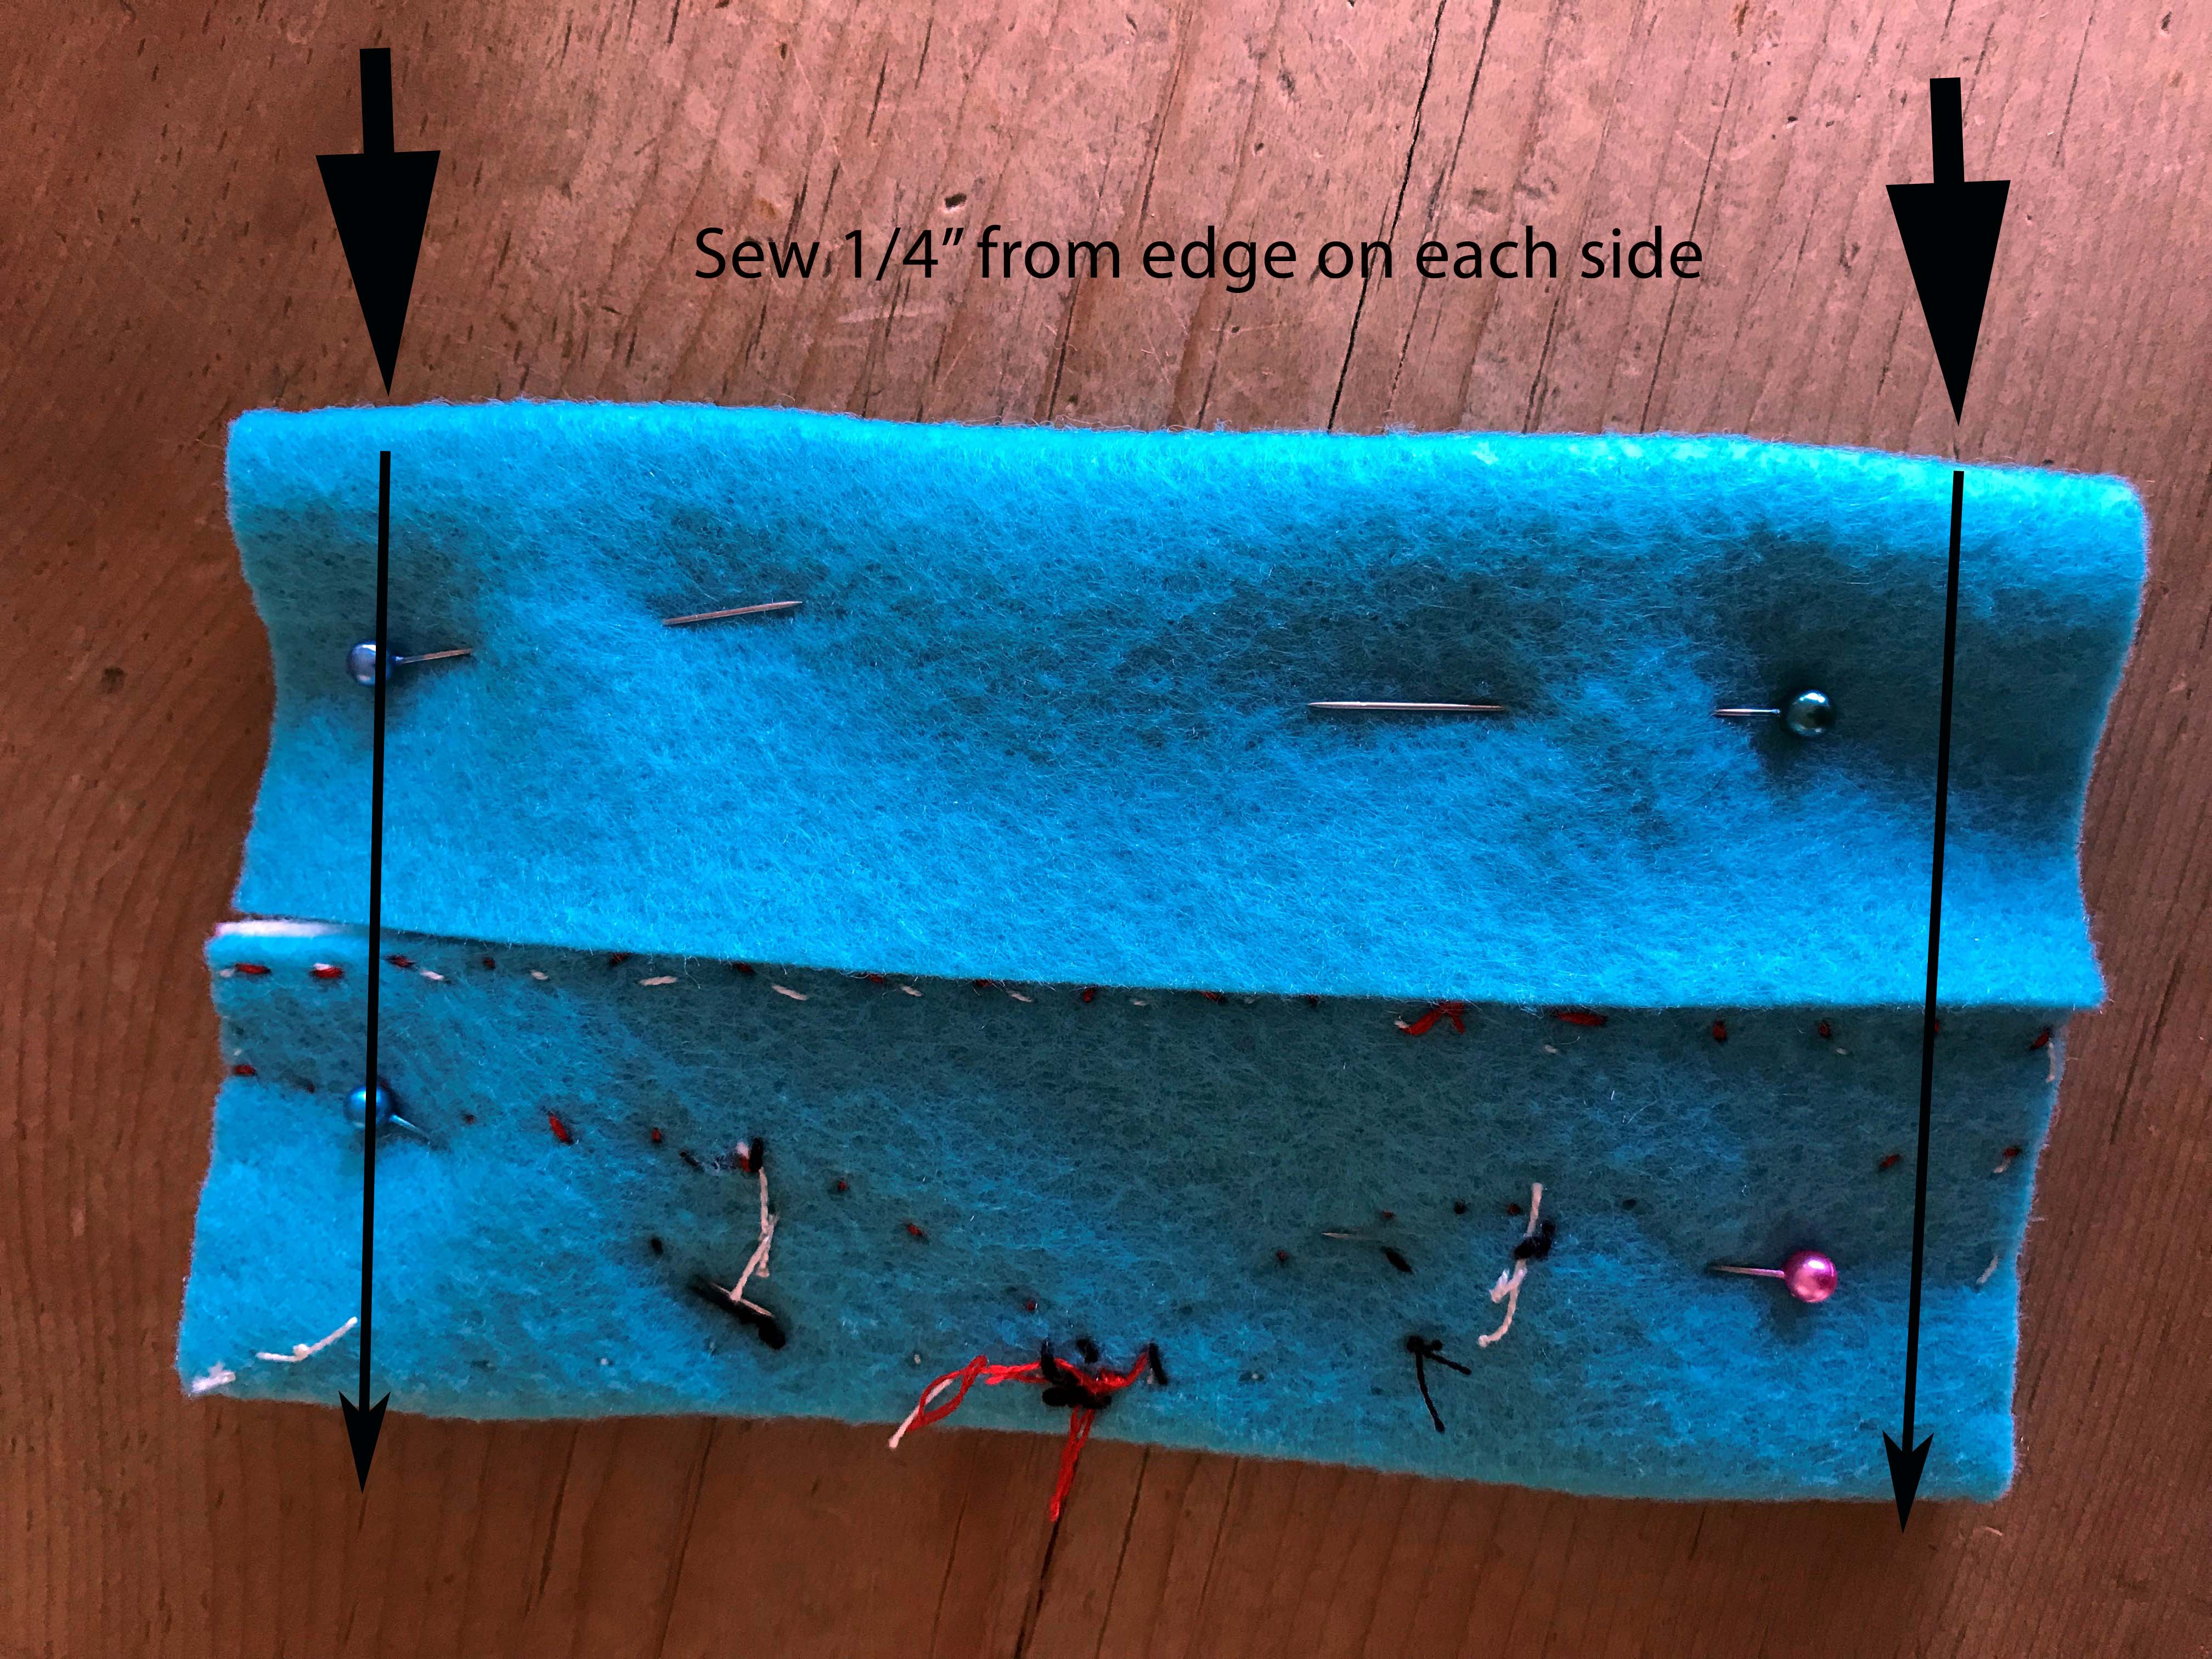
6. Fold the rectangle, with short ends lined-up against one another. The fox face should be facing in. Pin in place and stitch ¼ inch in from edge.
7. Turn tissue holder right side out. Place travel tissues inside.
You can now find an expanded color line of Kunin® Classicfelt; Kunin® Premiumfelt and Corduroy non-wovens fabrics in cut by the yard at your local Walmart; please inquire as to what is available in your area.
About Designer Laura Bray
Laura Bray lives in the Pacific Northwest with her husband, their daughter, and a guinea pig named Oreo. She loves to create beautiful and functional projects with felt. To see more of her felt creations, visit her blog at www.laurabraydesigns.com. She also collects felt craft projects on her Pinterest board at https://www.pinterest.com/laurabraydesigns/felt-crafts/