I am so pleased to have the talented designer Alison Osborn guest post with the Kunin classroom this week. You can follow her on Instagram at https://www.instagram.com/alisoninspires/.
Alison shows how to use felt and embroidery hoops to create these adorable Halloween decorative wall art! Let’s meet Alison!
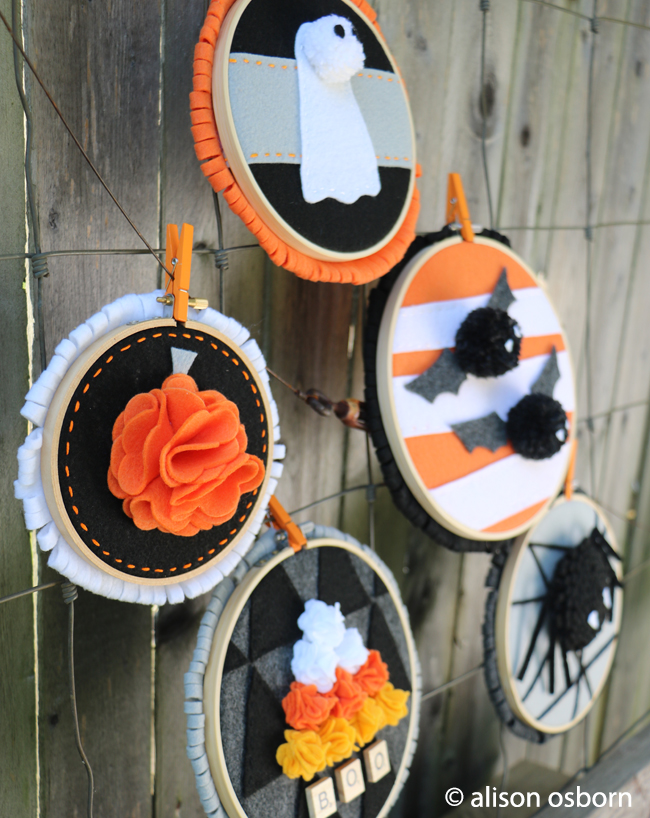
Hi, Alison Osborn here, Halloween is one of my favorite holidays for decorating. Today I’d like to share this fun felt project using embroidery hoops and Kunin Classic felts. These festive hoops can be used as banners, wall décor or even as seasonal gifts.
Supplies:
- 9″ x 12″ craft cuts of Kunin Classicfelt™ in Orange, Gold, Black, White, Smoke, and Charcoal
- Yarn for pom-poms and for web in Black, Charcoal and White
- Various size embroidery hoops
- Embroidery thread, needle and pins
- Glue gun and scissors
- Pom-Pom maker
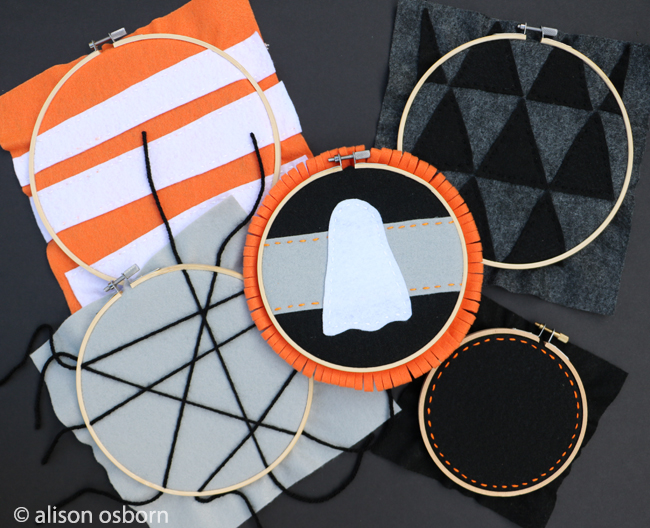
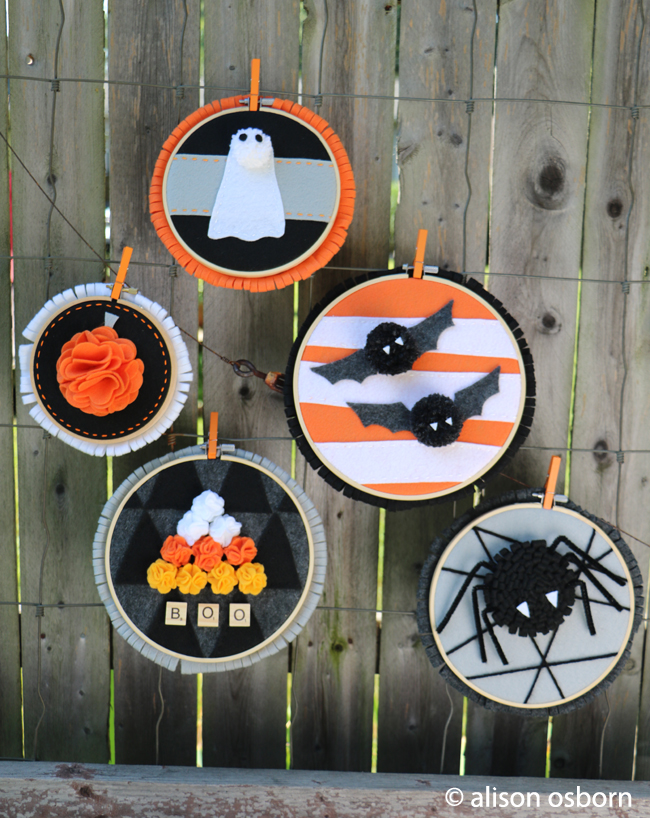
To start, I sized and placed a different color felt into each of the hoops. On a few of the hoops I cut out additional felt pieces and stitched them on as patterns. For some I just stitched a border with embroidery thread. For the spider web, I used black yarn and placed it in various directions over the felt when placing it into the hoop.
Each object or character is made out of a felt flower or a pom-pom.
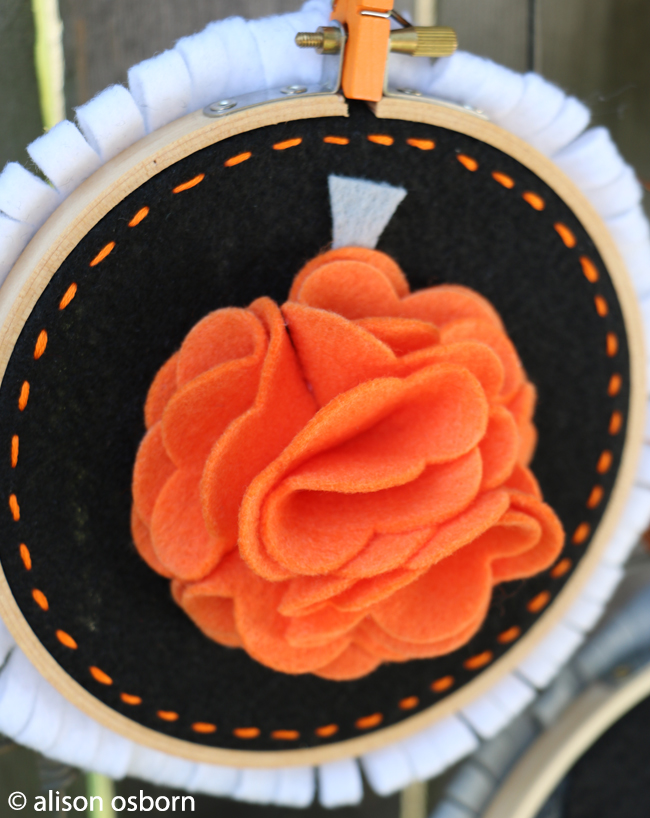
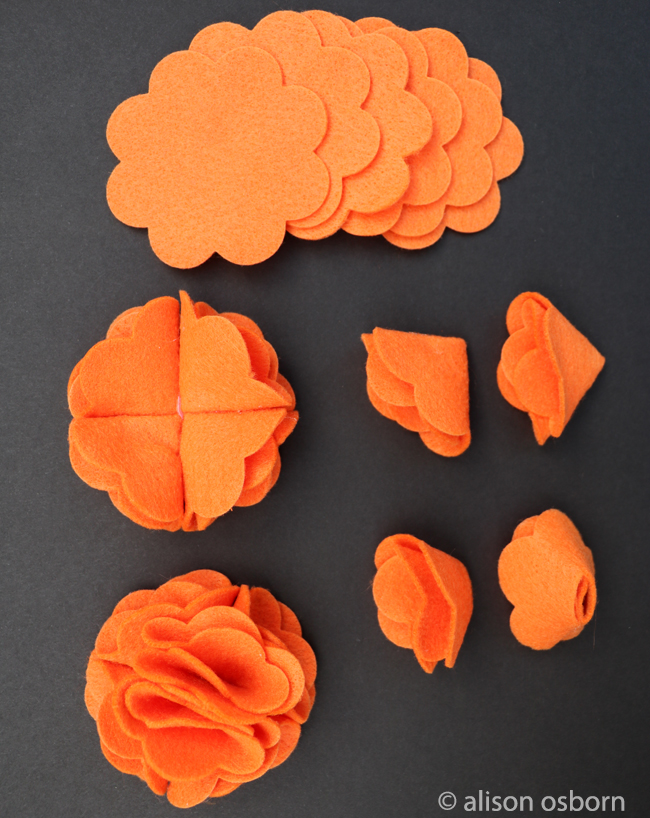
For the Pumpkin, I show a graphic of the steps below. I used my Sizzix Flower Layers 12 Bigz Die to cut out 6 flower shapes. I then folded each shape in half and then in half again, securing the two sides together with hot glue. I did this to all 6 flower shapes. Once done, I glued four folded shape petals together for the base of the flower. I cut off the tips of the two remaining petals and glued them onto the center of the base. I then glued the entire orange flower to the center of the hoop and cut out a Smoke felt stem for the top of the pumpkin.
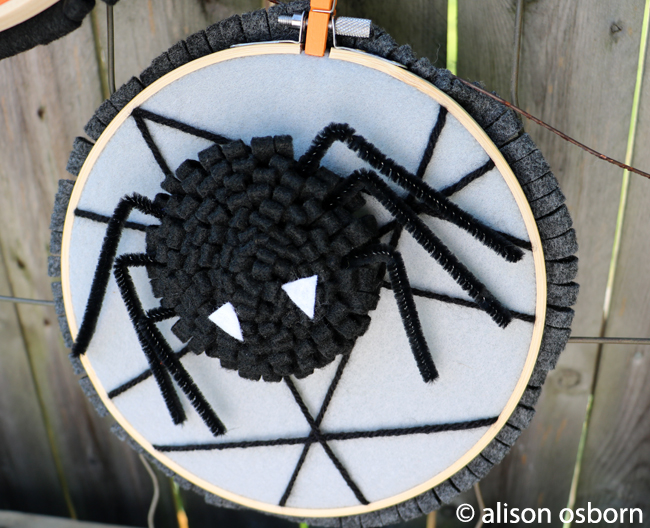
For the spider I made a loopy felt flower as the body. I show a graphic these steps below. To make this I cut a 1 ½ in. strip of felt, folded it in half and secured it with glue. Then I fringed the looped edge with scissors. Next, starting at one end, I rolled the felt, securing it with glue, as needed. For this spider I used two strips of felt. I attached the spider onto the felt background with hot glue. I then cut out white felt fangs for the face and used pipe cleaners for legs.
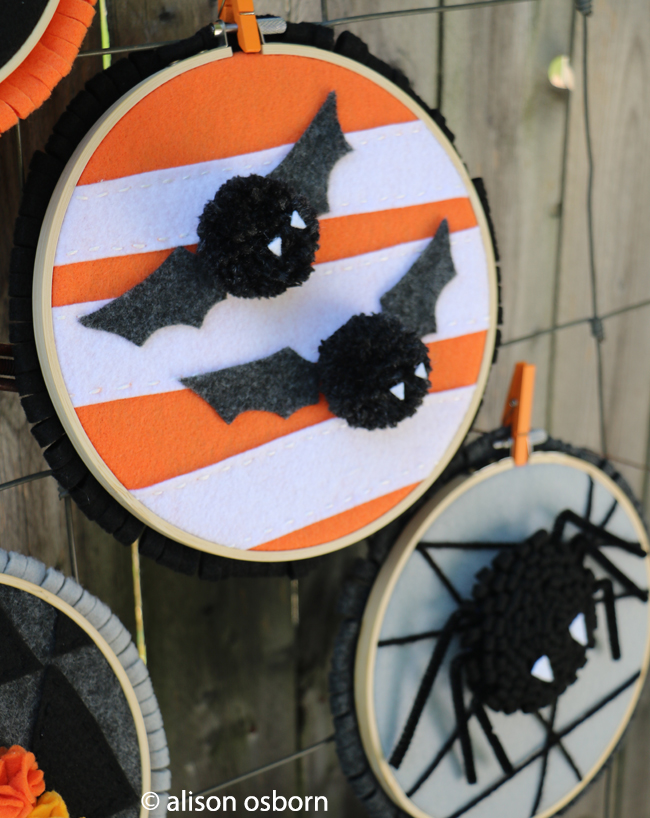
For the bats I used scrap paper to sketch out a wing template. I used the template to cut out the four wings. I then made two Charcoal grey pom-poms with a small pom-pom maker that you can find at your local craft store. I stitched the pom-poms onto the felt background and attached the wings with hot glue. I cut out white felt fangs, and glued them to the pom-poms.
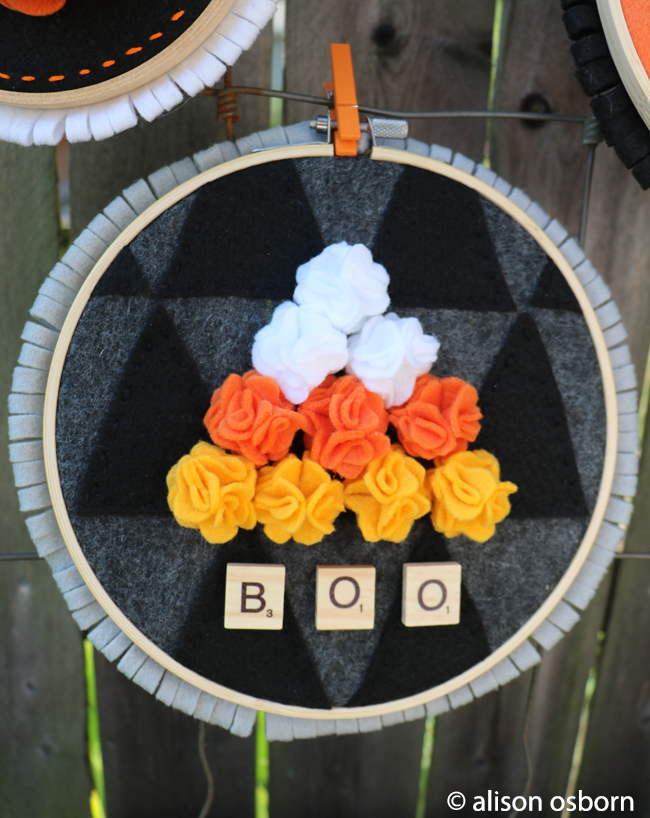
The candy corn is the same technique as the pumpkin but on a much smaller scale. I made 10 miniature felt flowers and attached them to the felt with hot glue. I also added some wooden alphabet letters for a finishing touch.
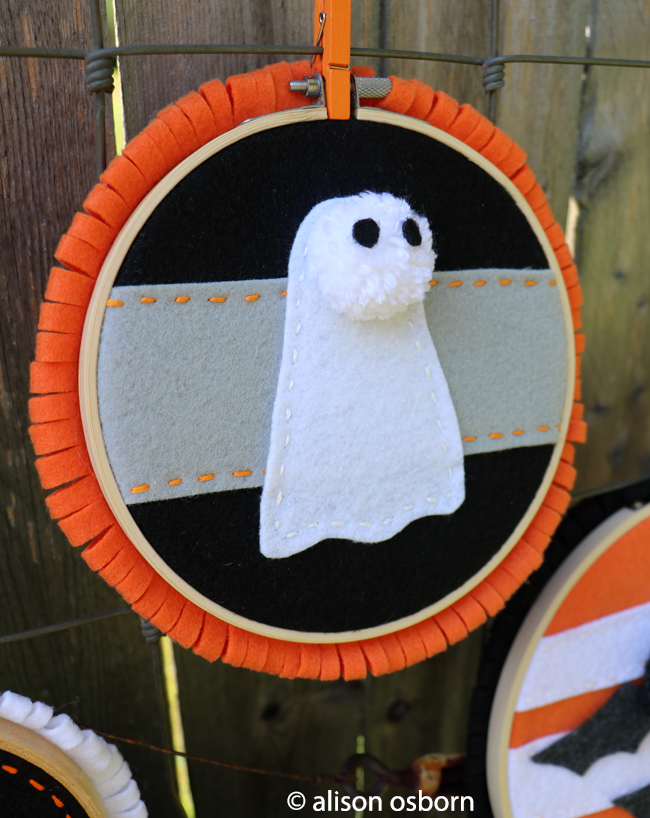
Finally, for the ghost, I again used scrap paper to sketch a ghost-shaped template from which I cut out the shape. I then made a small white pom-pom for the head and stitched it on using embroidery thread. I glued on two cute eyes cut from black felt.
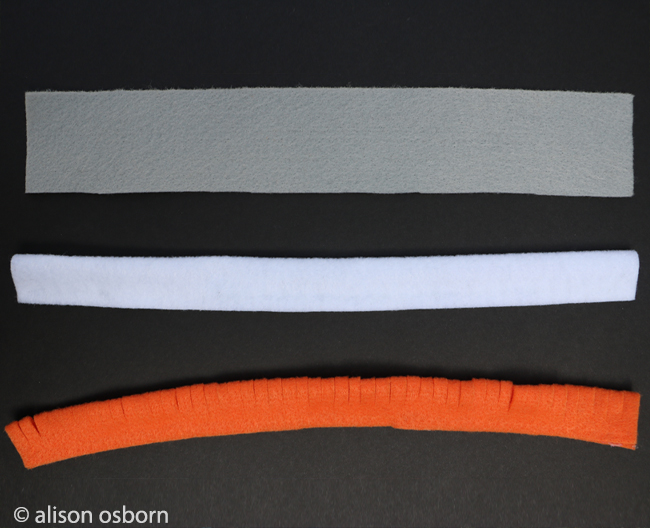
Lastly I prepared the felt the same way I did for the spider, gluing and fringing 1 ½ in. felt strips. I glued the fringe to the back to frame each hoop.
You can now find an expanded color line of Kunin Eco-fi Classicfelt; Eco-fiPlus™ Premiumfelt and ShaggiChic non-wovens fabrics in cut by the yard at your local Walmart; please inquire as to what is available in your area.
I had so much fun making these. I hope you enjoyed this project as well. Happy Halloween crafting!

These are so cute! I love them.
These hoops are adorable! The dimensional elements add to their charm! Thank you for sharing Alison!