
by Laura Bray
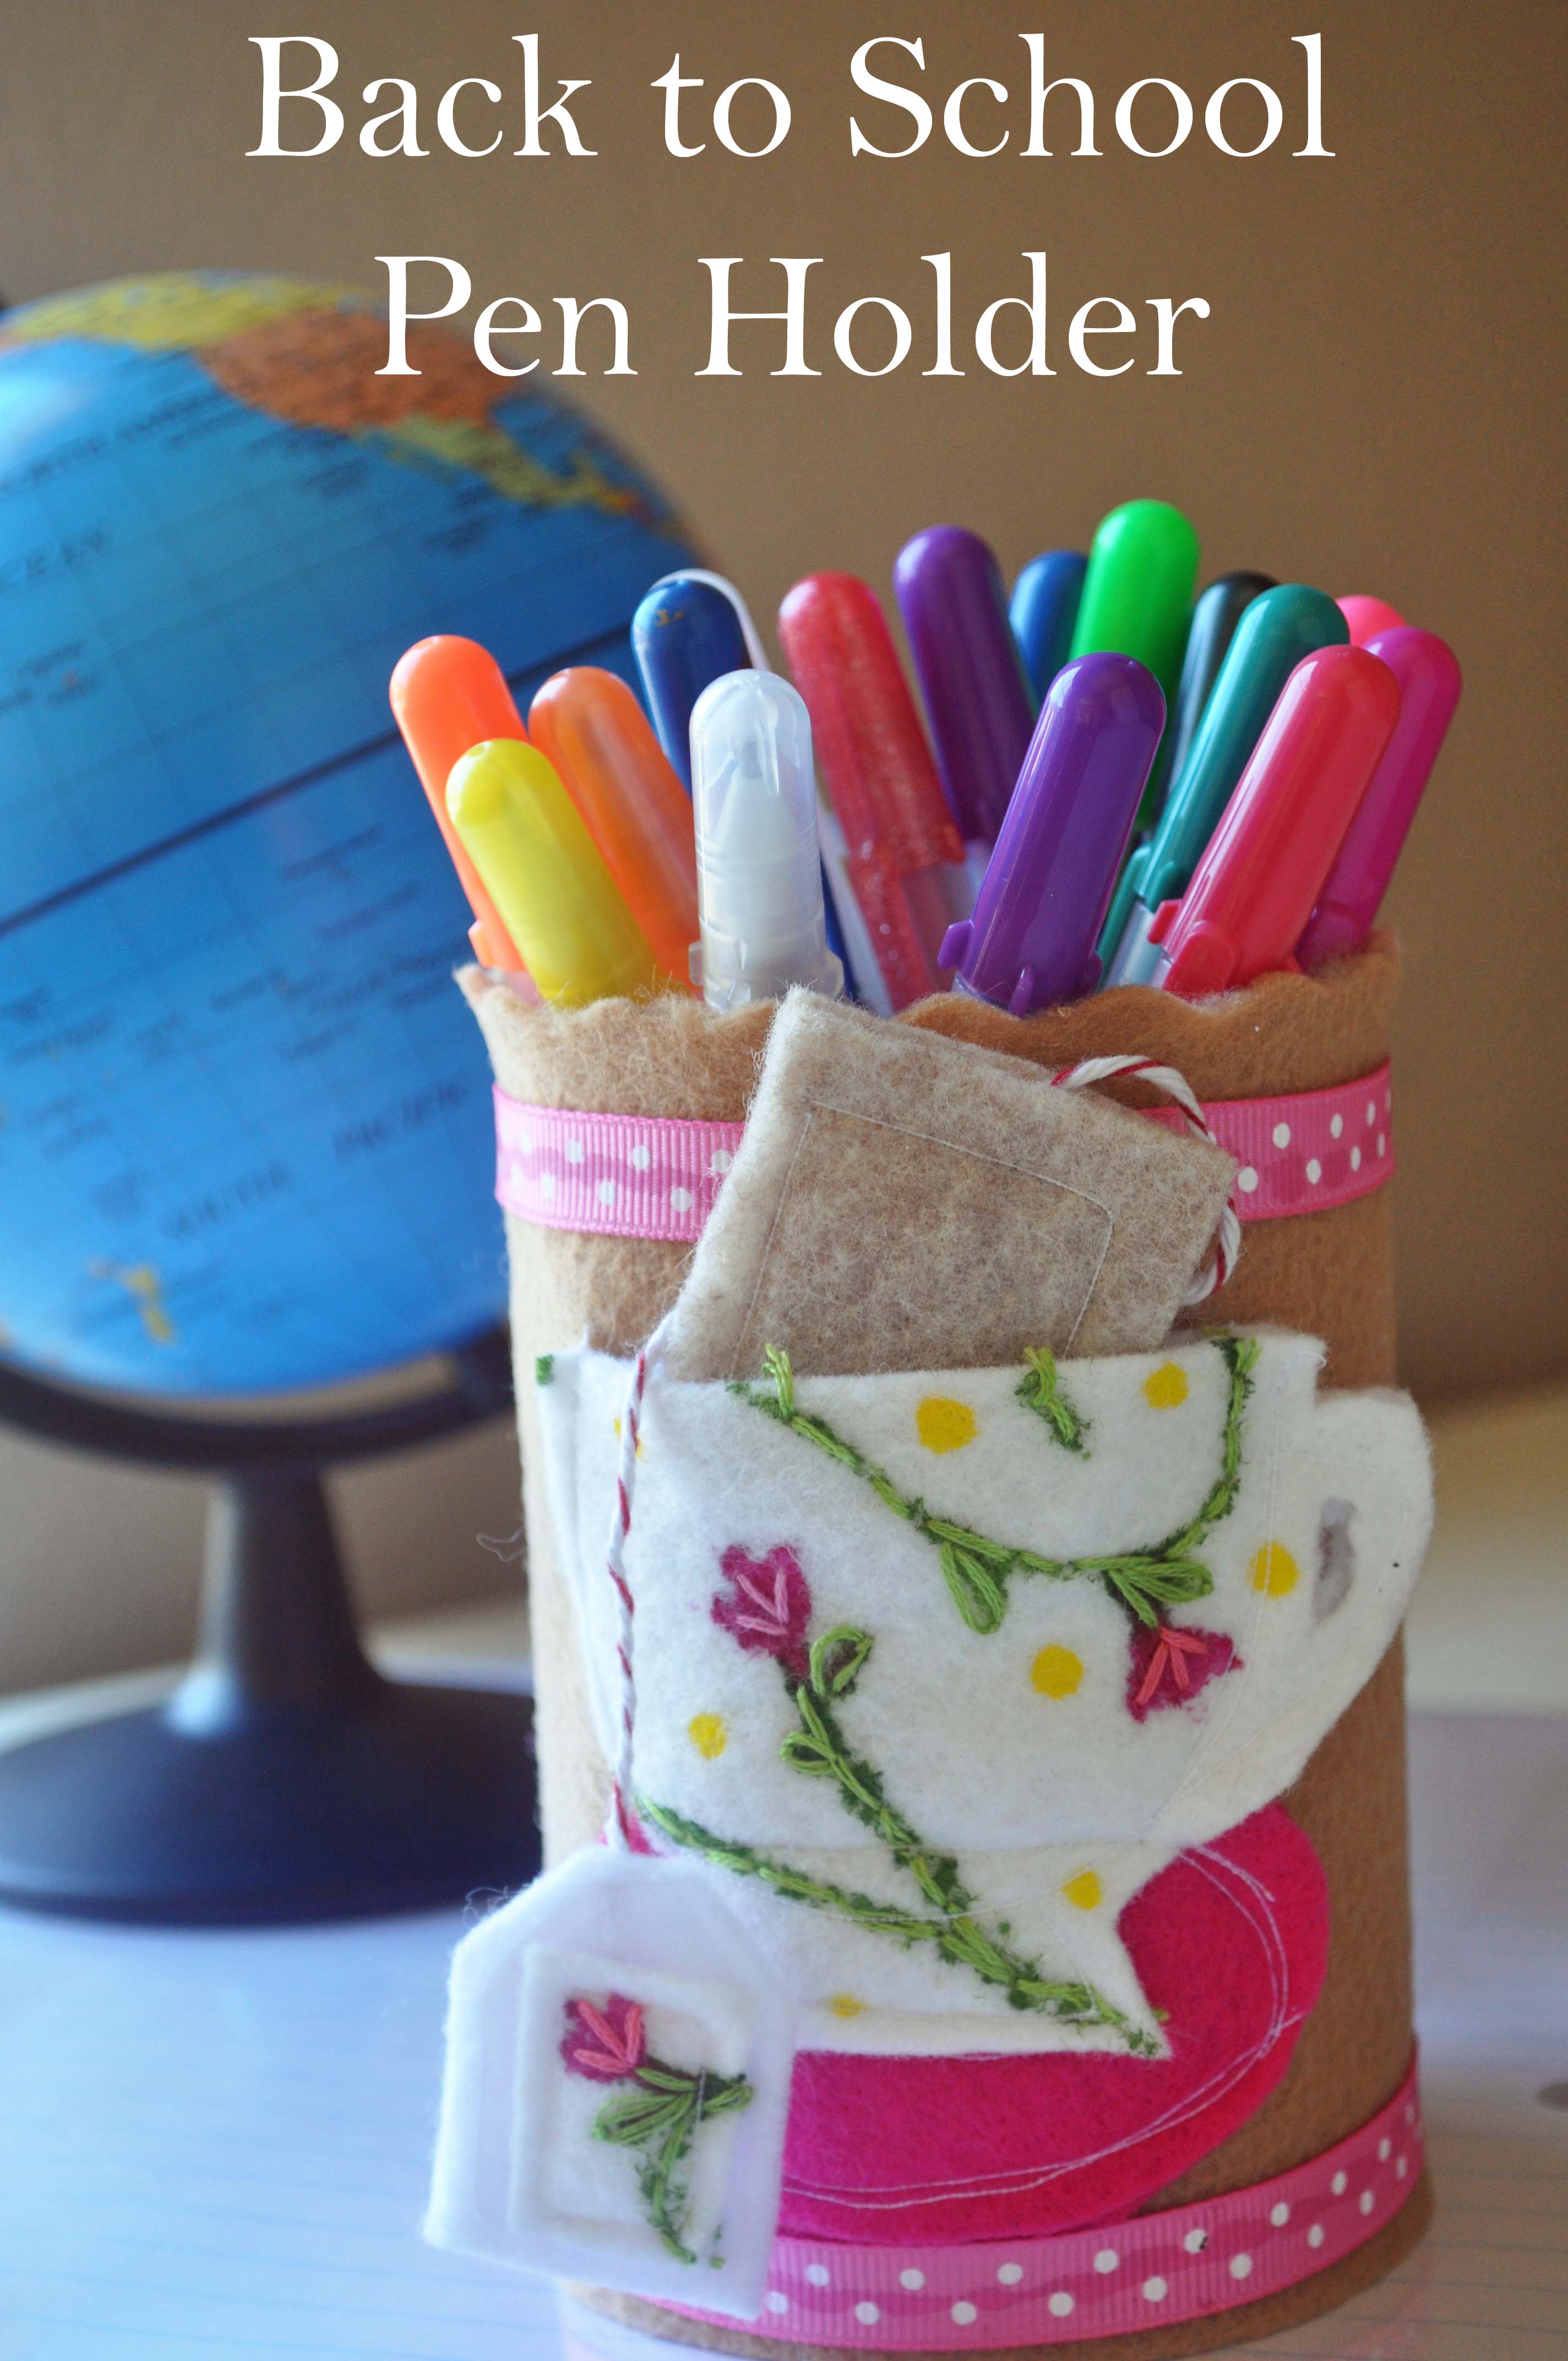
Make homework a little more pleasant with this sweet felt, pen holder. It’s so easy to customize the design to your student’s favorite interests.
Supplies:
- Kunin Rainbow Classicfelt™ in any color combinations.
- Can-rinsed and dried
- Ribbon
- Craft Glue
Instructions:
- Wash and dry an empty soup can. (Actually, most cans will work.) Make sure that you used a can opener that created a clean edge. You don’t want any sharp or jagged edges scratching your student! If you see any sharp spots, file them down carefully. Be sure not to cut yourself and wear safety googles to prevent scratching your eyes.
- Use the can as a pattern and cut a piece of felt to the height of the can. The length should reach around the can exactly, with the edges meeting. Overlap will cause an unsightly bump on the back of the can.
- Decide on how you will embellish the pen holder. I cut a tea cup shape out of felt. I also made a removable tea bag. If you aren’t feeling confident in your design skills, use a die cut machine to cut some shapes out of felt.
- I recommend gluing or sewing your design elements onto the base strip BEFORE you glue it onto the can. Attach your design to the center of the strip so that when you glue the base onto the can, the design is on the front and the back edges face the back of your pen holder.
- Once you are happy with your design, glue the base strip onto the can.
- Add ribbon embellishments to the top and bottom of the can.

This is so sweet Laura! Thank you for sharing!
This is super cute Laura!