
Create a fun Halloween Spooky Chandelier to hang over your dining room table this year! This ghostly project is sure to delight all your guests.

Decorations are quick’n EZ when you have a Cricut® Maker. You can make an unlimited supply of felt shapes for an abundance of creative and crafty ideas. So much easier than having to cut with scissors or craft knife and a definite time saver!
Skill Level for this project: Beginner +
Time to complete: 2 ½ hours
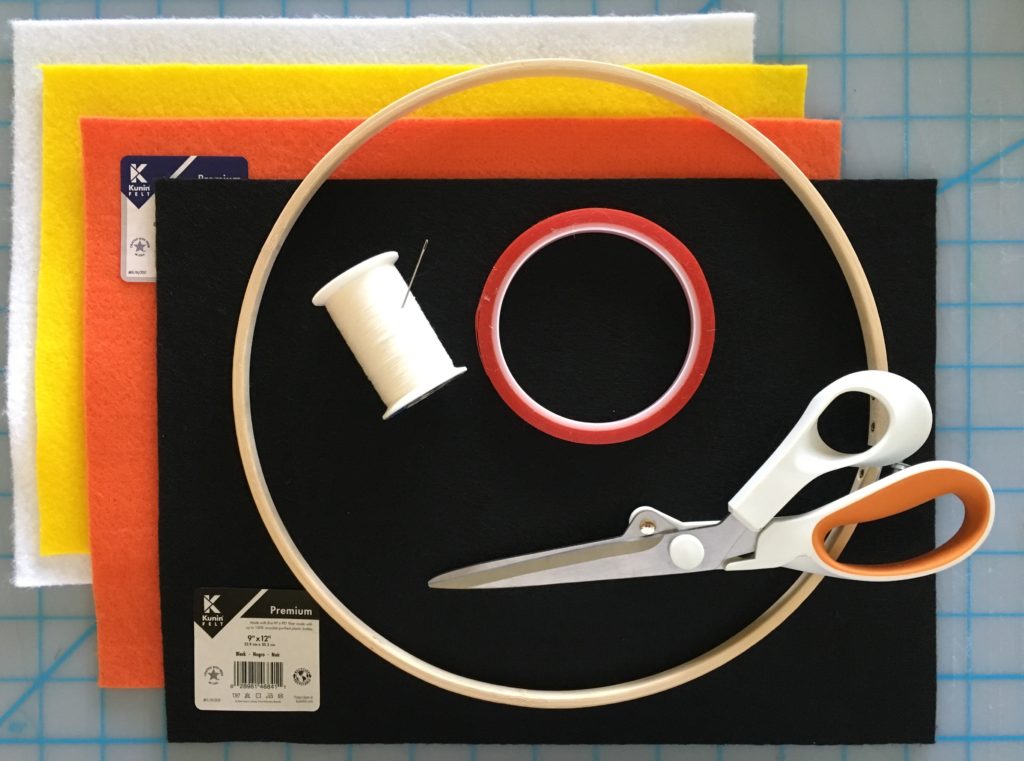
YOU WILL NEED:
- Kunin® Premium™ 9” x 12” Craft Cuts – Black, Orange & Yellow
- Kunin® FriendlyGlitter™ (or Premium Felt) 9” x 12” – White
- Cricut® Maker™ and Rotary blade
- Embroidery Hoop – 10”
- Needle and thread
- Double sided adhesive
- Tacky glue
- Split ring – 1”
PATTERNS:
Jack O’Lanterns
https://design.cricut.com/#/landing/user-project/173046588
Pumpkin Border
https://design.cricut.com/#/landing/user-project/173036385
Ghosts
https://design.cricut.com/#/landing/user-project/172007743
Bat
https://design.cricut.com/#/design/173844652/projects/user-project/173844652
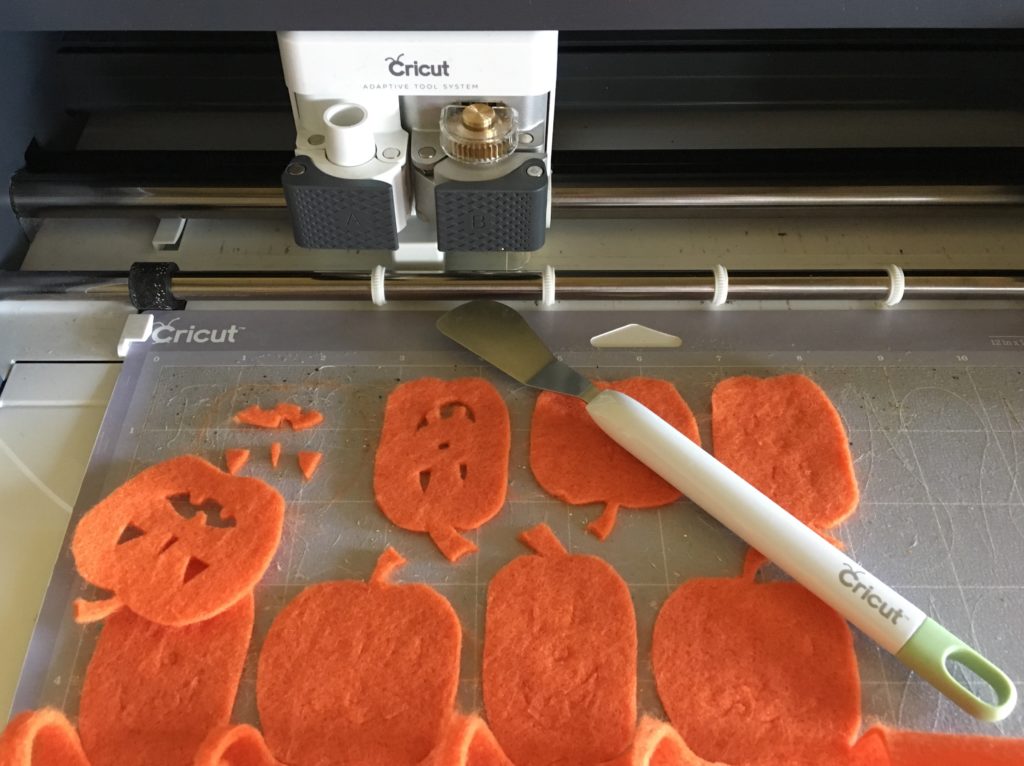
STEP ONE – Cut Shapes for the Halloween Spooky Chandelier
1. Sign in to Cricut Design Space then, using the above links, cut the felt shapes as follows:
Pumpkin Border from yellow felt
Ghosts from white, glitter felt
Bats from black felt
Jack O’Lanterns from orange felt (cut last)
2. Use the rotary blade to cut. You will need to insert “Felt” in the “Browse all Materials” tab, then select “Felt Acrylic”. Select “More” in the pressure tab on the next step.
3. After cutting is complete, pull the felt surrounding the shapes from the mat, then using the spatula tool, carefully remove each shape. When cutting the Jack O’Lanterns, the eyes, nose and mouth shapes will remain on the mat. Use these tiny pieces to create a face for the bat.
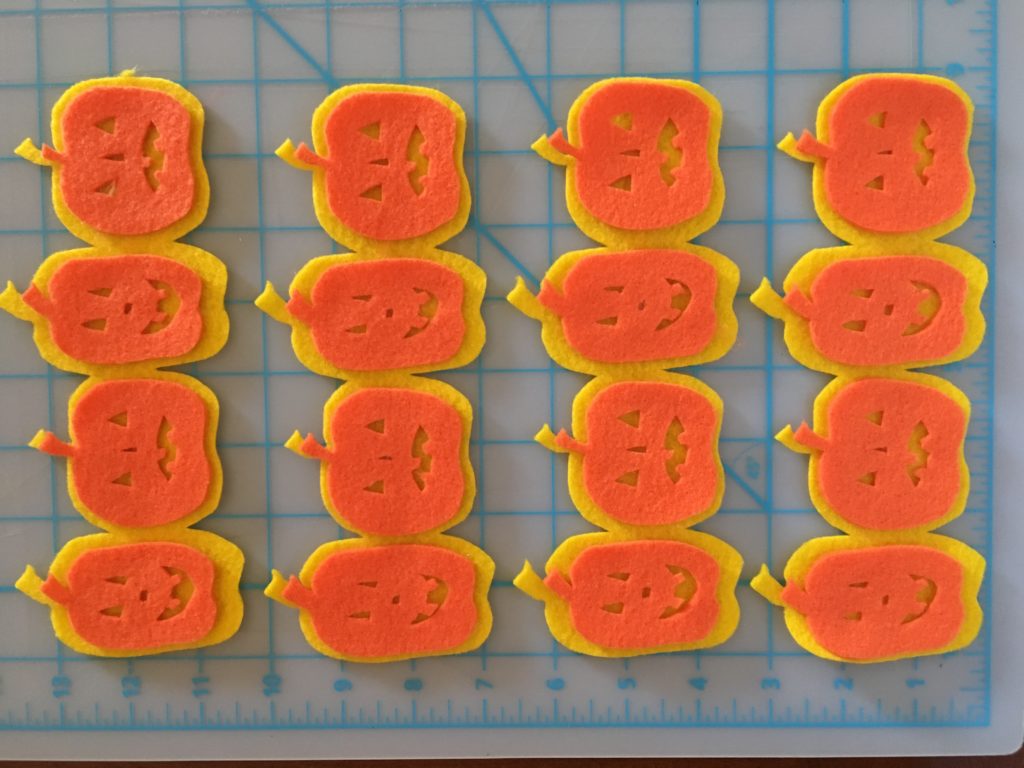
STEP TWO
Glue the individual Jack O’Lantern shapes on top of the border pieces.
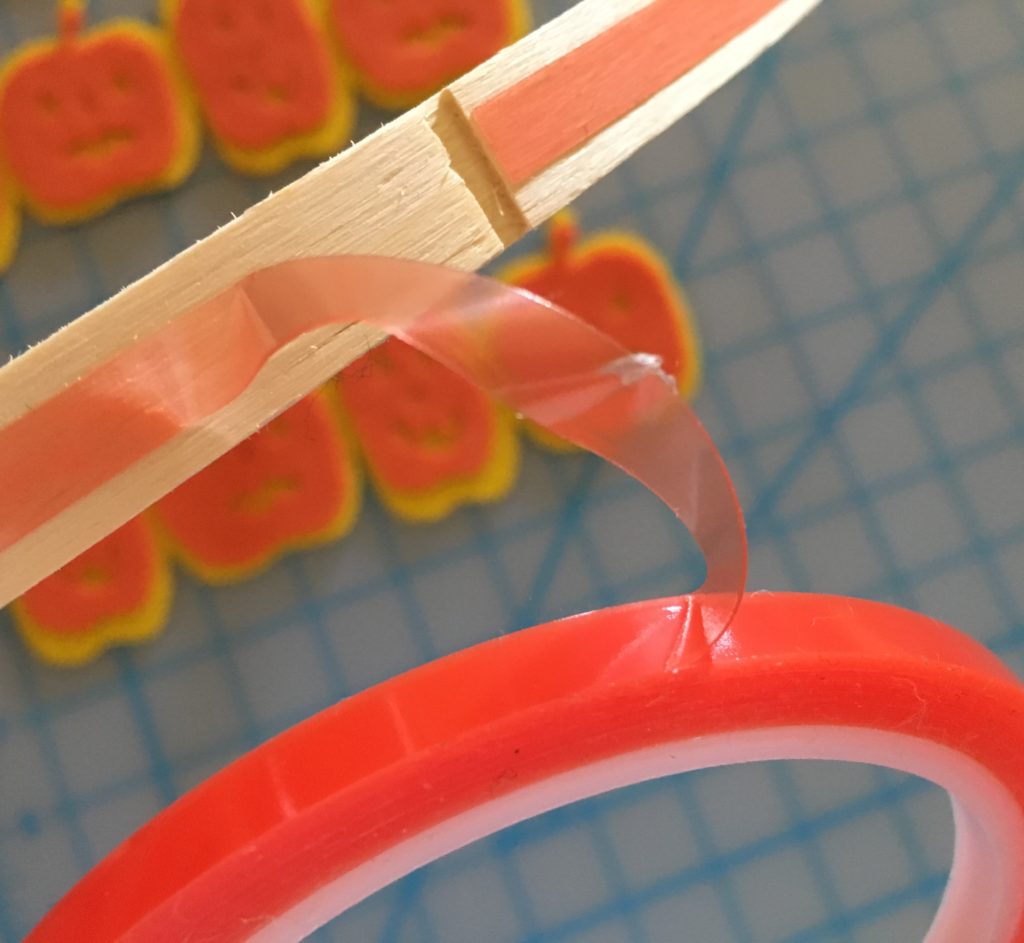
STEP THREE
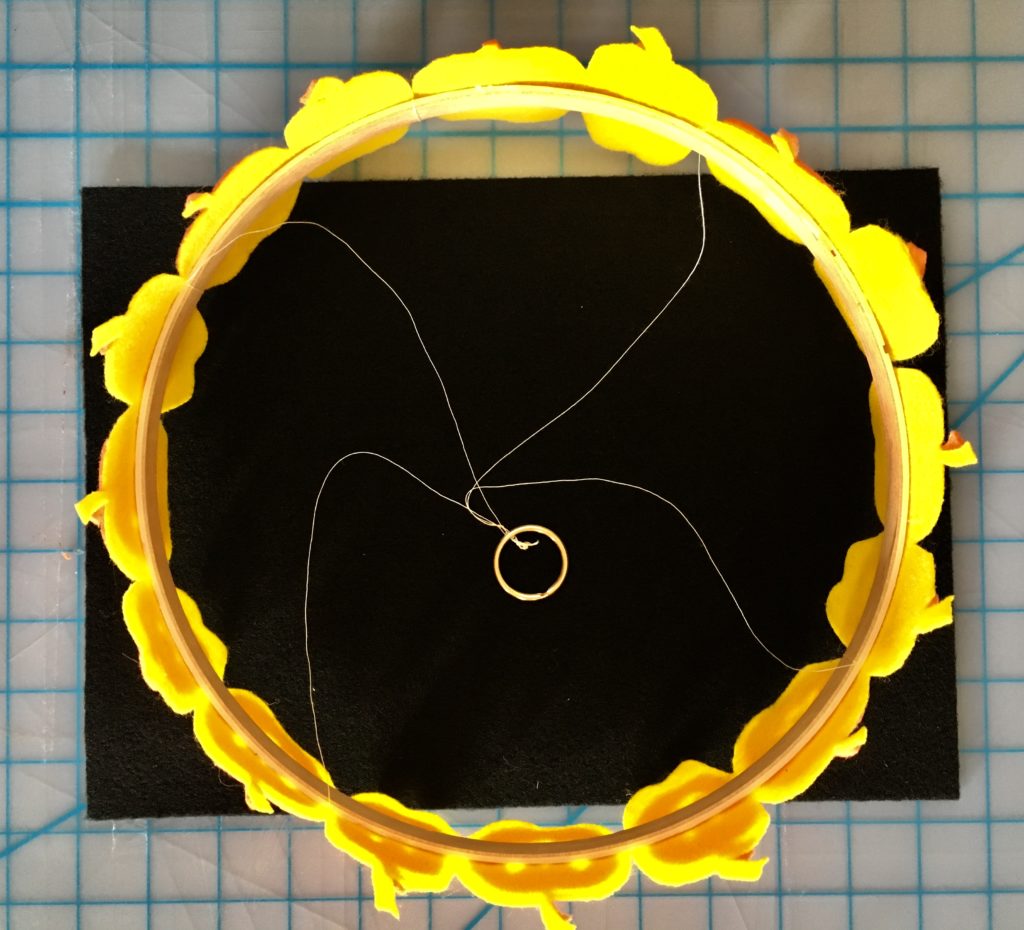
Separate the embroidery hoop rings then place double sided tape around the outer edge of the inner hoop. Press the border pieces in place, end to end around the outer edge of the hoop. Set the outer hoop aside to be used for another project.
Note: The diameter of the 10” ring is 32”, so each border section is 8” long. Not all hoop rings are created equal however, so you may need to make minor adjustments.
STEP FOUR – Create a hanger for the Halloween Spooky Chandelier:
Cut 4 pieces of thread about 18” in length. Tie one end of the thread around the hoop between each of the four border sections. Pull the opposite ends together then pull the ends into the split in the ring. The ring will hold the threads in place while you adjust the length of each one to make sure the hoop hangs straight. Knot the ends together, add a drop of tacky glue to the knot then let dry. Trim the ends of the thread when the glue is dry.
STEP FIVE
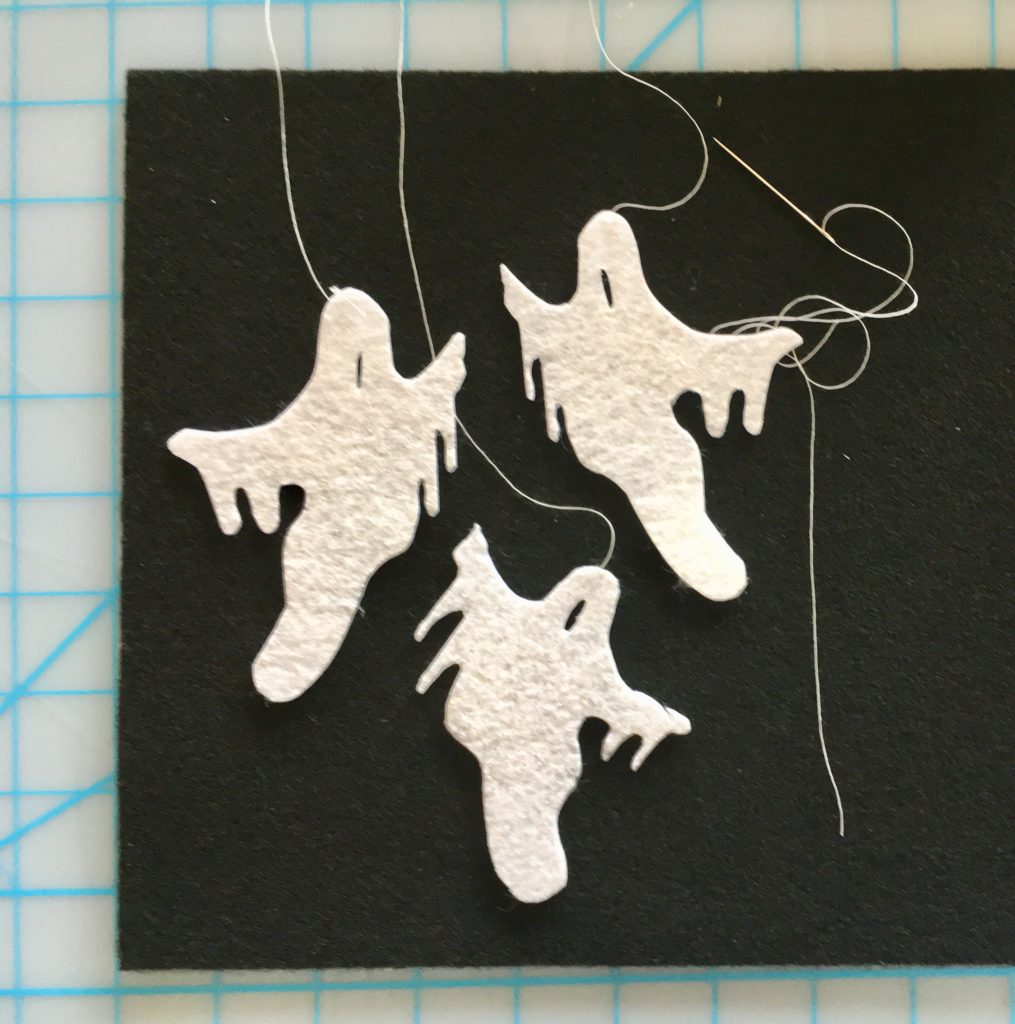
Thread about a 12” piece of thread through the top of each ghost shape.
STEP SIX
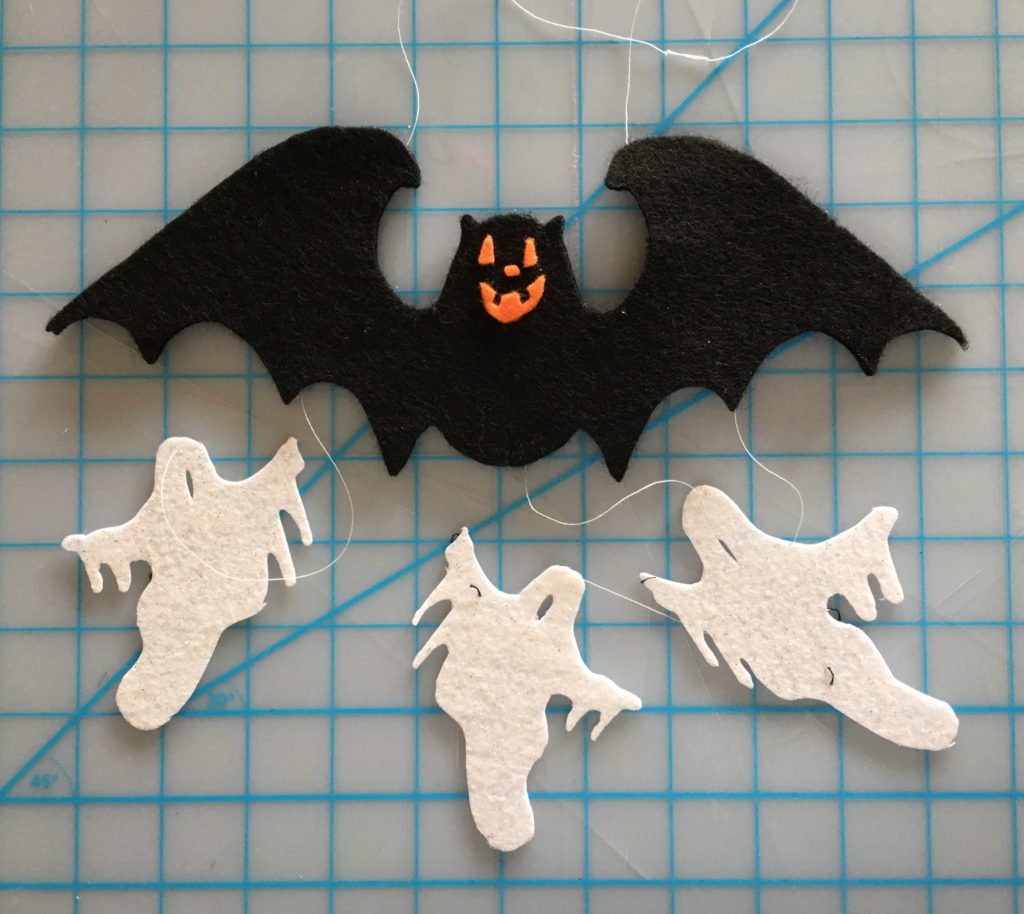
Cover one side of one bat shape with tacky glue. TIP: I find it easier to spread the glue on the felt surface with a craft stick. Lay the opposite ends of the thread from 3 of the ghost shapes across the top of the bat. With edges aligned, place the second bat on top, sandwiching the threads between the 2 bat shapes. Adjust the length of each piece of thread, so the ghosts will hang at different levels. Trim the ends even with the top edge of the bat. Place the ends of 2 additional pieces of thread between the tips of the bat’s wings at the top. These will be used to hang the bat to the Halloween Spooky Chandelier when the glue is dry. Glue the eyes, nose and mouth shapes (from the Jack O’Lanterns) to both sides of the bat’s head to finish.
STEP SEVEN
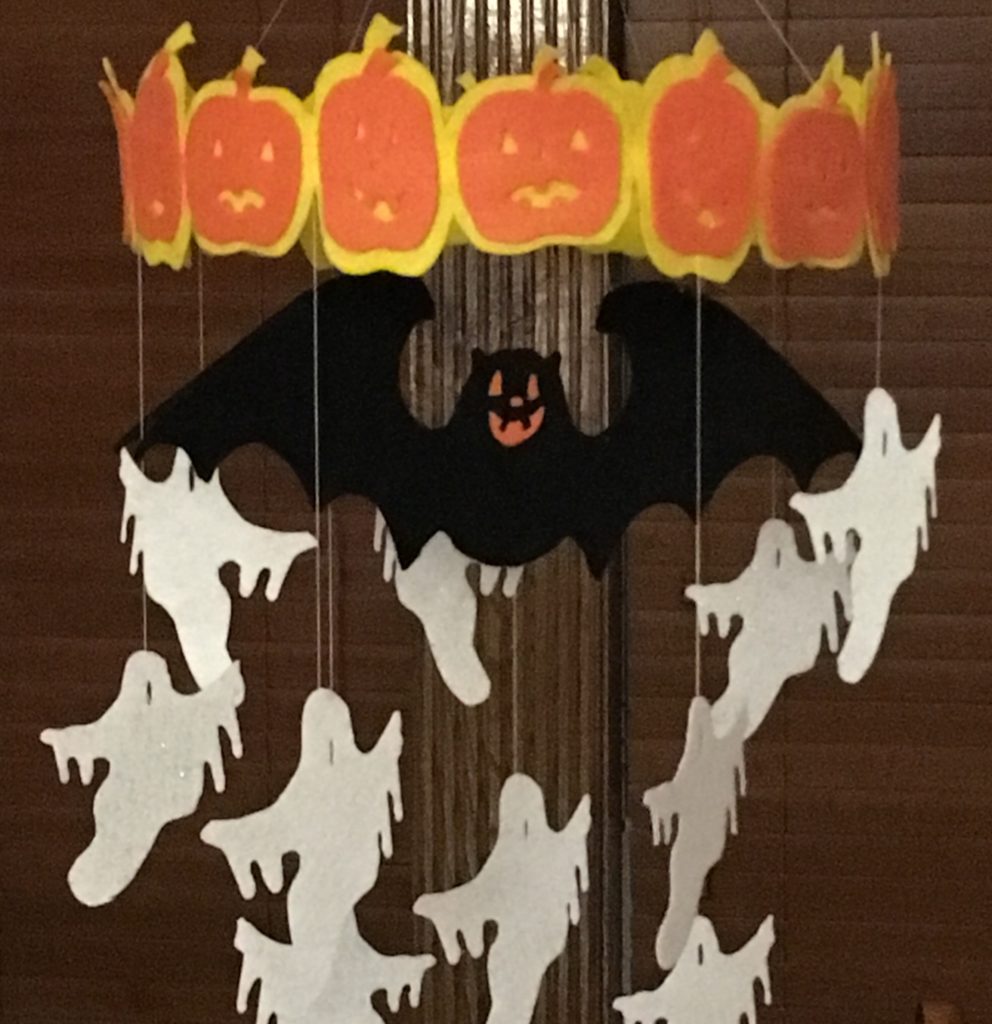
Making sure that the threads at the top of the bat are secure, pull the ends up through the center of the hoop. With one end through the center of the ring, knot both ends together. The bat, with the ghosts will hang from the ring at the center of the chandelier. Adjust the length of the threads as needed, so it hangs just below the lower edge of the chandelier ring.
My Halloween Spooky Chandelier hangs from the light fixture above the dining room table… I wonder where you plan to hang yours!
HAPPY HALLOWEEN!
You can now find an expanded color line of Kunin® Classic felt and Kunin® Premium felt non-wovens fabrics in cut by the yard at your local Walmart; please inquire as to what is available in your area.
Follow us on Facebook, Instagram and Pinterest for daily creative inspiration and crafty projects! Hashtag #createwithkunin
You can find more Cricut® Maker™ projects on Julie’s blog, Life in the Craft Lane @ http://juliemcguffee.blogspot.com
Project saved as private error message when trying to access in Design Space.
Hi Anne,
It is a problem within the space that they are resolving. Sorry for the inconvenience.