
It’s Spring! Time to think Easter bonnets, head bands and flowers!
Decorations are quick’n EZ when you have a Cricut® Maker. It gives you the ability to make an unlimited supply of both simple and intricate felt shapes for an abundance of creative and crafty projects.
Skill Level for this project: Beginner
Time to complete: 2-3 hours
YOU WILL NEED:
- Kunin® Classic™ 9” x 12” Craft Cuts – 1 each Lemon Frost, Baby Pink, Baby Blue & Bright Lilac
- Kunin® Premium 9” x 12” Craft Cuts – 1 each White & Olive
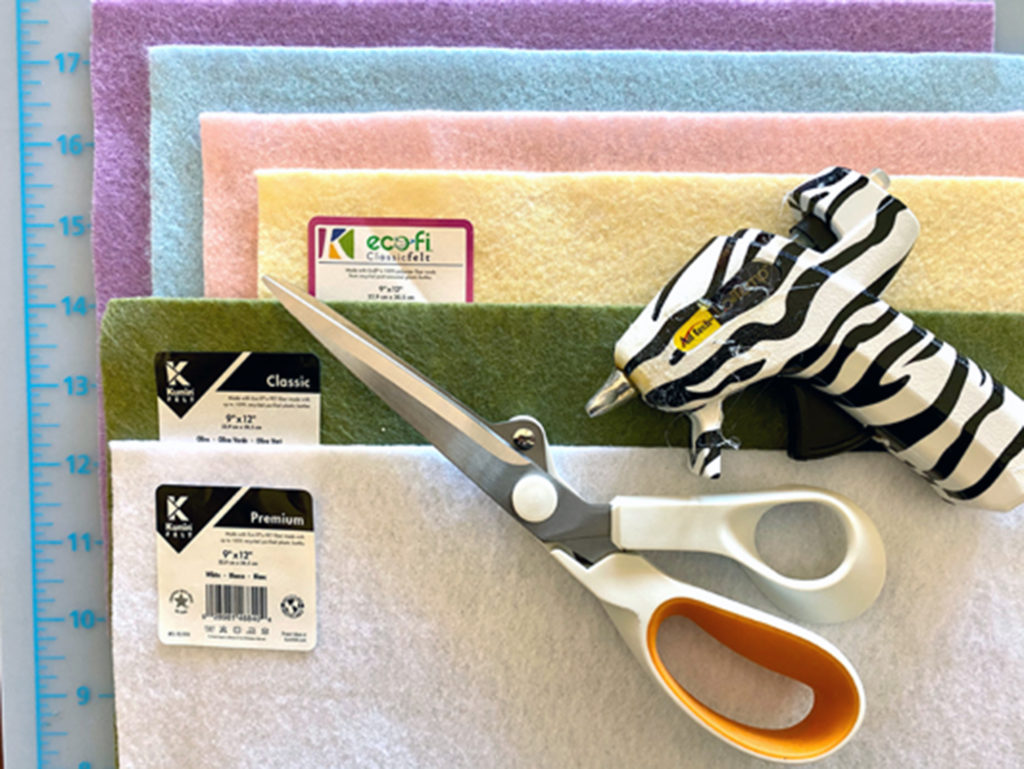
- Cricut® Maker™ with Rotary blade
- Glue gun & lo-temp glue sticks
- Scissors
- Headband
- Small cable ties (4”)
- Quilt pins
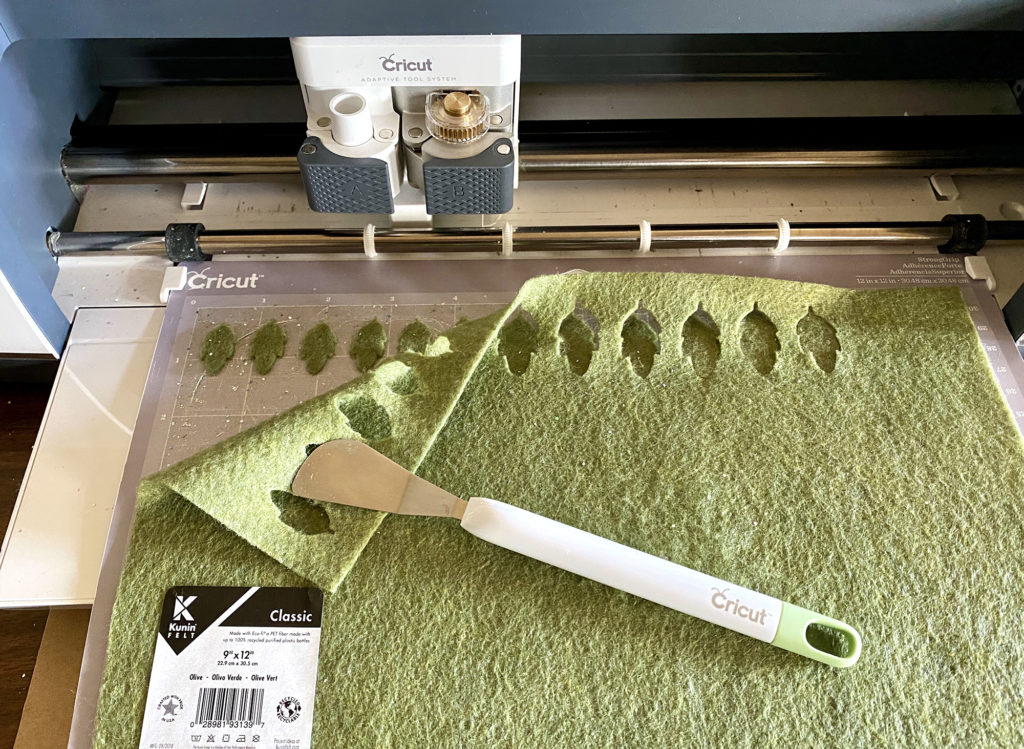
STEP ONE – Cut* the following pieces of felt:
- 1” Baby blue circles: 7-8
- 1” Olive Leaves: 3-6

*Use a Cricut Maker to cut multiples of these shapes for this project and other projects. These shapes however, can be easily cut with scissors.
STEP TWO – Make the bow
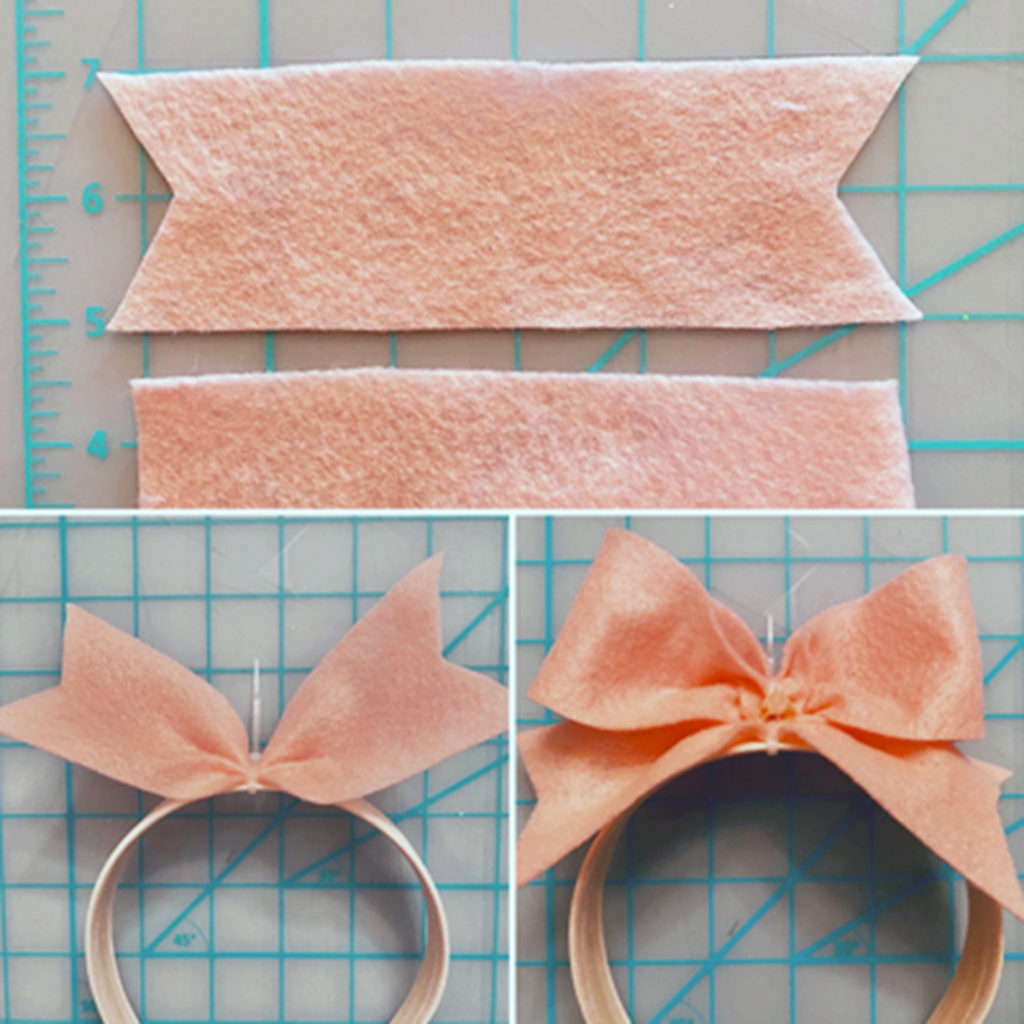
1. Cut one 2” x 6” and one 2” x 12” rectangles of pink felt. Notch each end of the 6” piece as shown then finger gather at the center. Place at the top of the headband then secure with a cable tie. Spread the folds evenly on top of the head band so it lays almost flat.
2. Overlap then glue the ends of the long piece of felt to form a circle. Flatten then finger gather at the center. Secure with a cable tie then glue to the top of the head band toward the back edge. The flowers will be glued in front.
STEP THREE – Make the flowers*.
*Each flower uses a different technique. Make one of each, or 3 of the same in different colors.
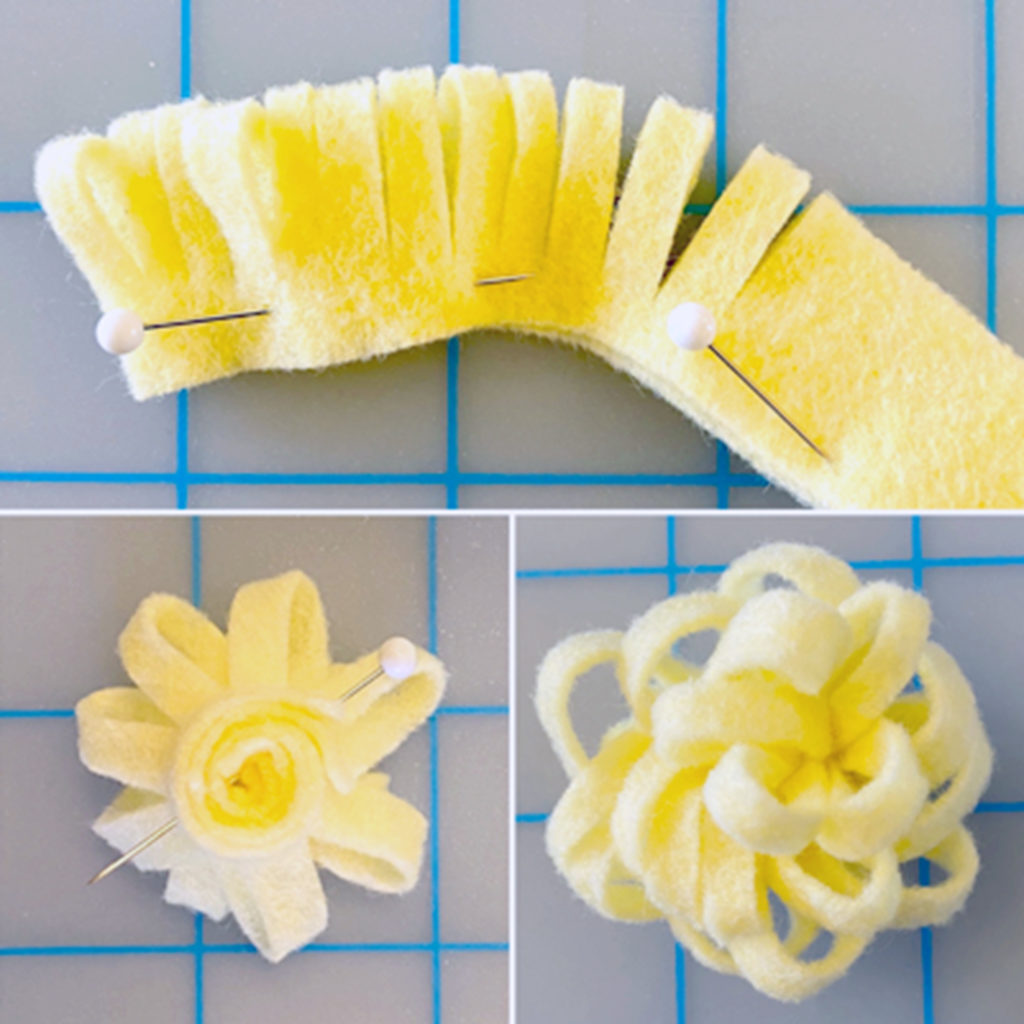
1. Dahlia: Cut a 2” x 6” strip of yellow felt. Fold in half lengthwise. Pin, or hold firmly while making cuts, 1/8” apart from the folded edge to within ¼” of the bottom edge. Do not unfold. Roll up the piece then spread glue across the bottom to hold the roll in place. Fluff the loops to create the flower.
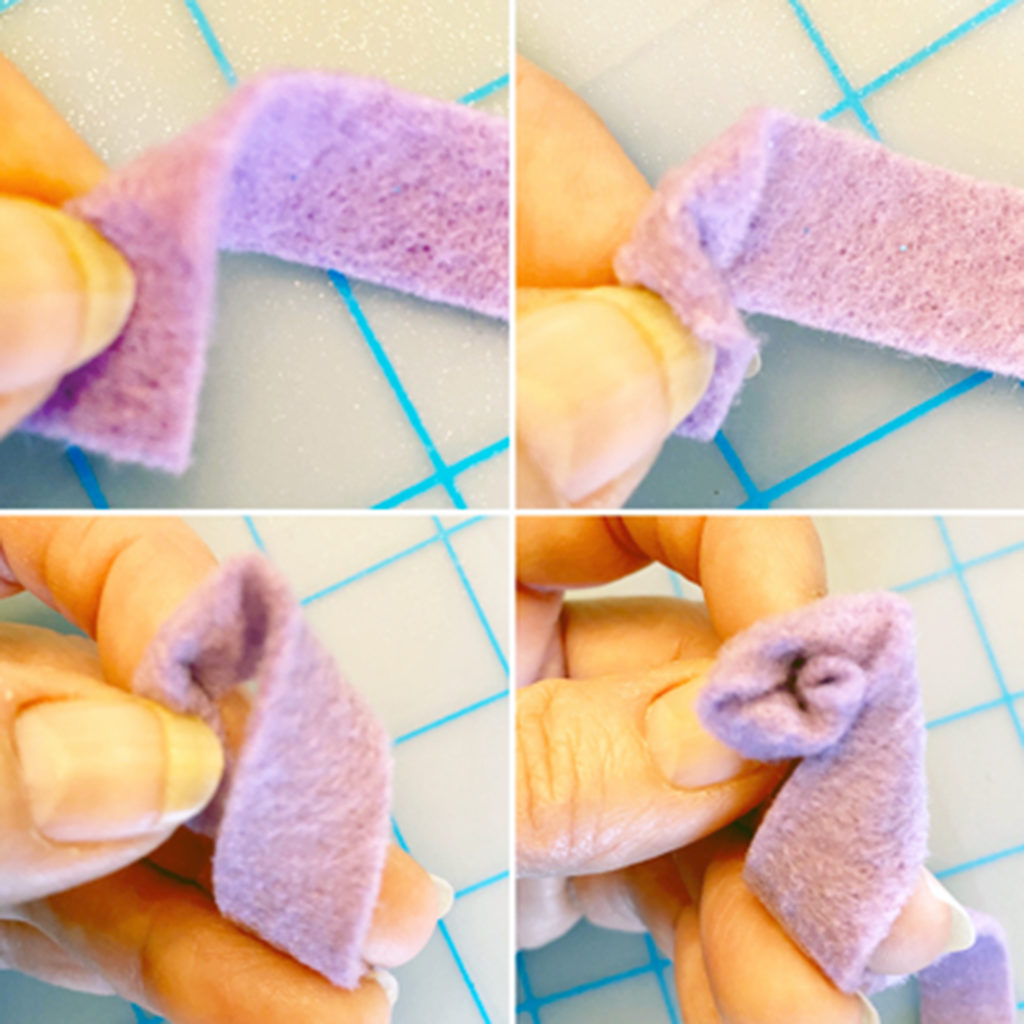
2. “Ribbon” rose: Cut a 12” x ½” strip of lilac felt. Fold 1” of one end over at right angles then roll the fold over to create the center. Hold the 1” tab firmly in one hand. Fold the longer end over and down then pull around the center. Continue folding and wrapping around the center and your rose will quickly grow. Glue the end to the back of the rose.
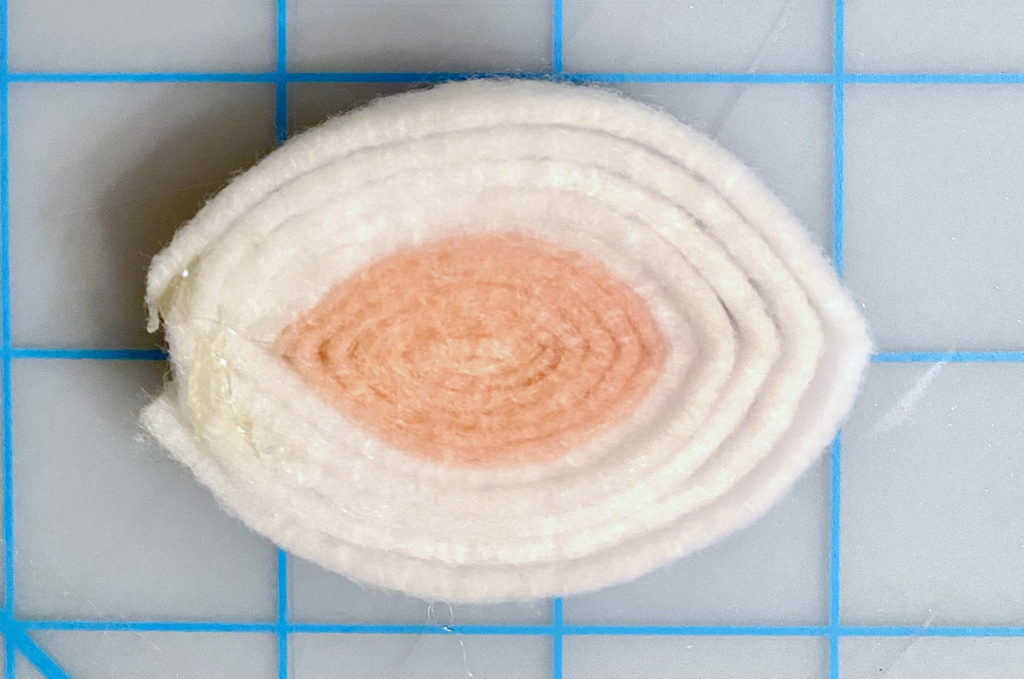
3. Blue rose: Tightly roll then glue one blue circle to create the center. Glue additional circles around the base of the center piece, overlapping each one slightly to form the rose. Add circles until the rose is the size needed.
STEP FOUR – Make the ears.
1. Cut 2, ½” X 12” strips of pink felt. Roll then glue the end to secure. Pinch the roll at each end to make it less like a circle.
2. Glue one end of the white strip to the pink roll then wrap around. Glue the opposite end to finish. Add additional strips as needed. Firmly pinch the finished “ear” at the top to create the tip.
Note: You may find it easier to maintain the shape by adding short strips, one at a time around the pink, starting and ending at the base.
STEP FIVE
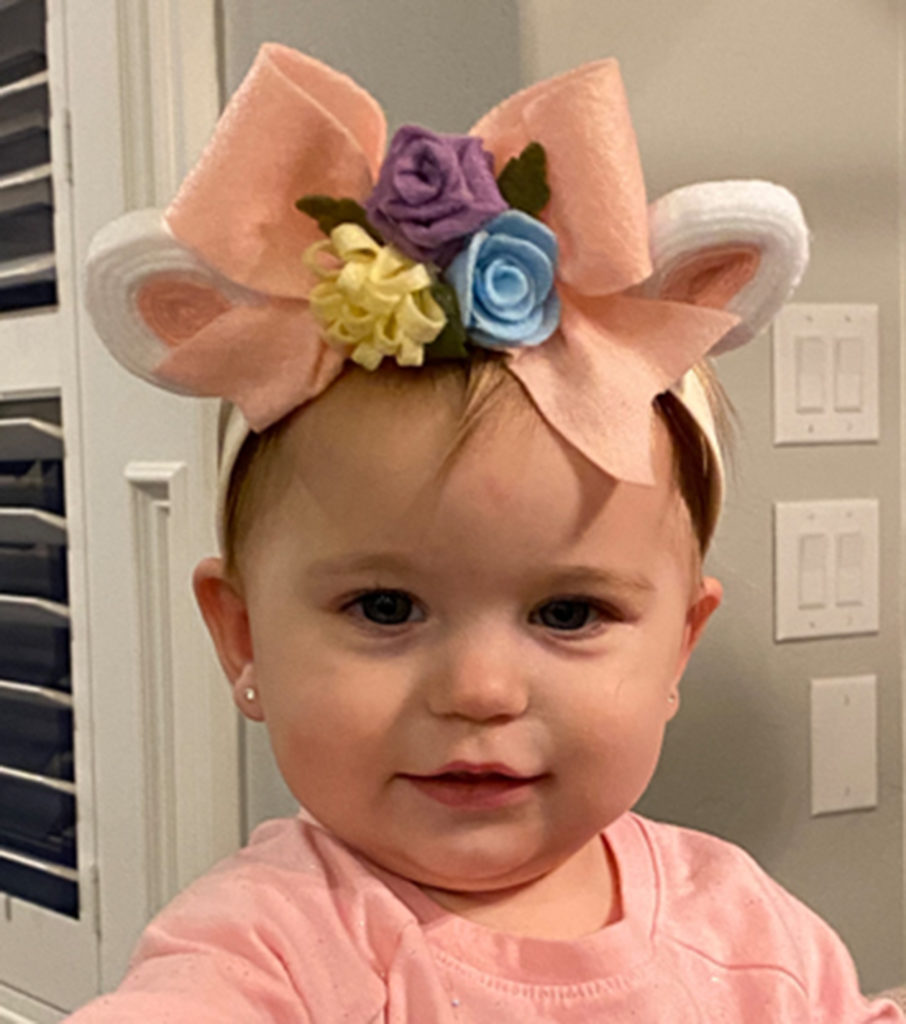
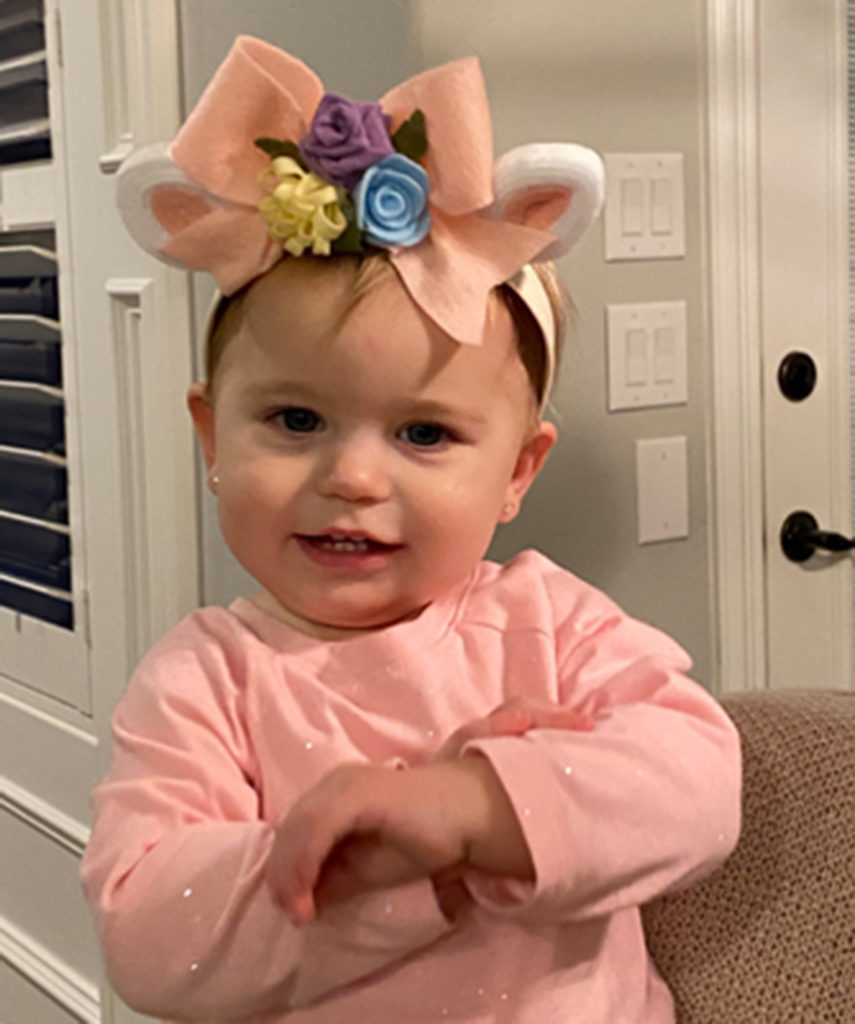
Glue the flowers to the top of the head band in front of the bow loops, the leaves between the flowers and the ears at each side of the bow. Your little princess will now be ready to celebrate Spring in style wearing her Spring Flowers Headband.
You can now find an expanded color line of Kunin® Classic felt and Kunin® Premium felt non-wovens fabrics in cut by the yard at your local Walmart; please inquire as to what is available in your area. Online find our complete collection at Fabric.com.
Follow us on Facebook, Instagram and Pinterest for daily creative inspiration and crafty projects! Hashtag #createwithkunin
You can find more Cricut® Maker™ projects and inspiration using these techniques on Julie’s blog, Life in the Craft Lane @ http://juliemcguffee.blogspot.com