By Laura Bray

These Fall, felt pumpkins are so versatile. You can use them in your Fall, Halloween, and Thanksgiving décor. They can be used on wreaths, in centerpieces, or as small gifts-the possibilities are endless!
Supplies:
- 9″ x 12″ craft cuts of Kunin Classicfelt™: Gold
- 12” x 18” craft cuts of Kunin Premiumfelt™: Sandstone and Olive
- Needle and thread that matches felt colors
- Craft stuffing
- Hot glue and glue gun
Instructions:
1. Trace around a dessert plate to create a circle shape on the felt. Cut out the circle.
2. Sew a running stitch around the edge of the felt circle, leaving a small amount of thread hanging out from the starting and finishing points. Gently pull the thread ends, just enough for the circle to create a cup. Fill with stuffing.
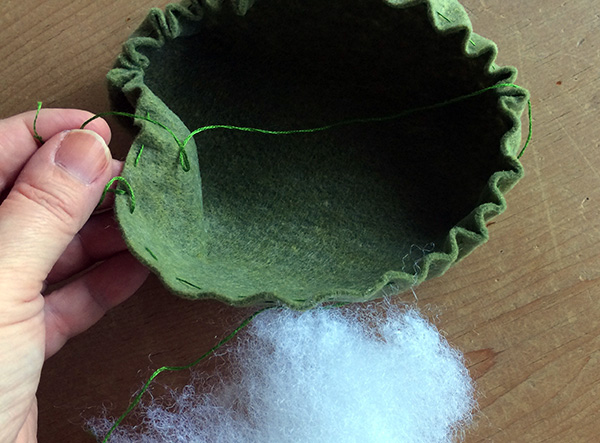
3. Once you have filled the felt circle with stuffing, pull the ends of the thread tight and knot closed.
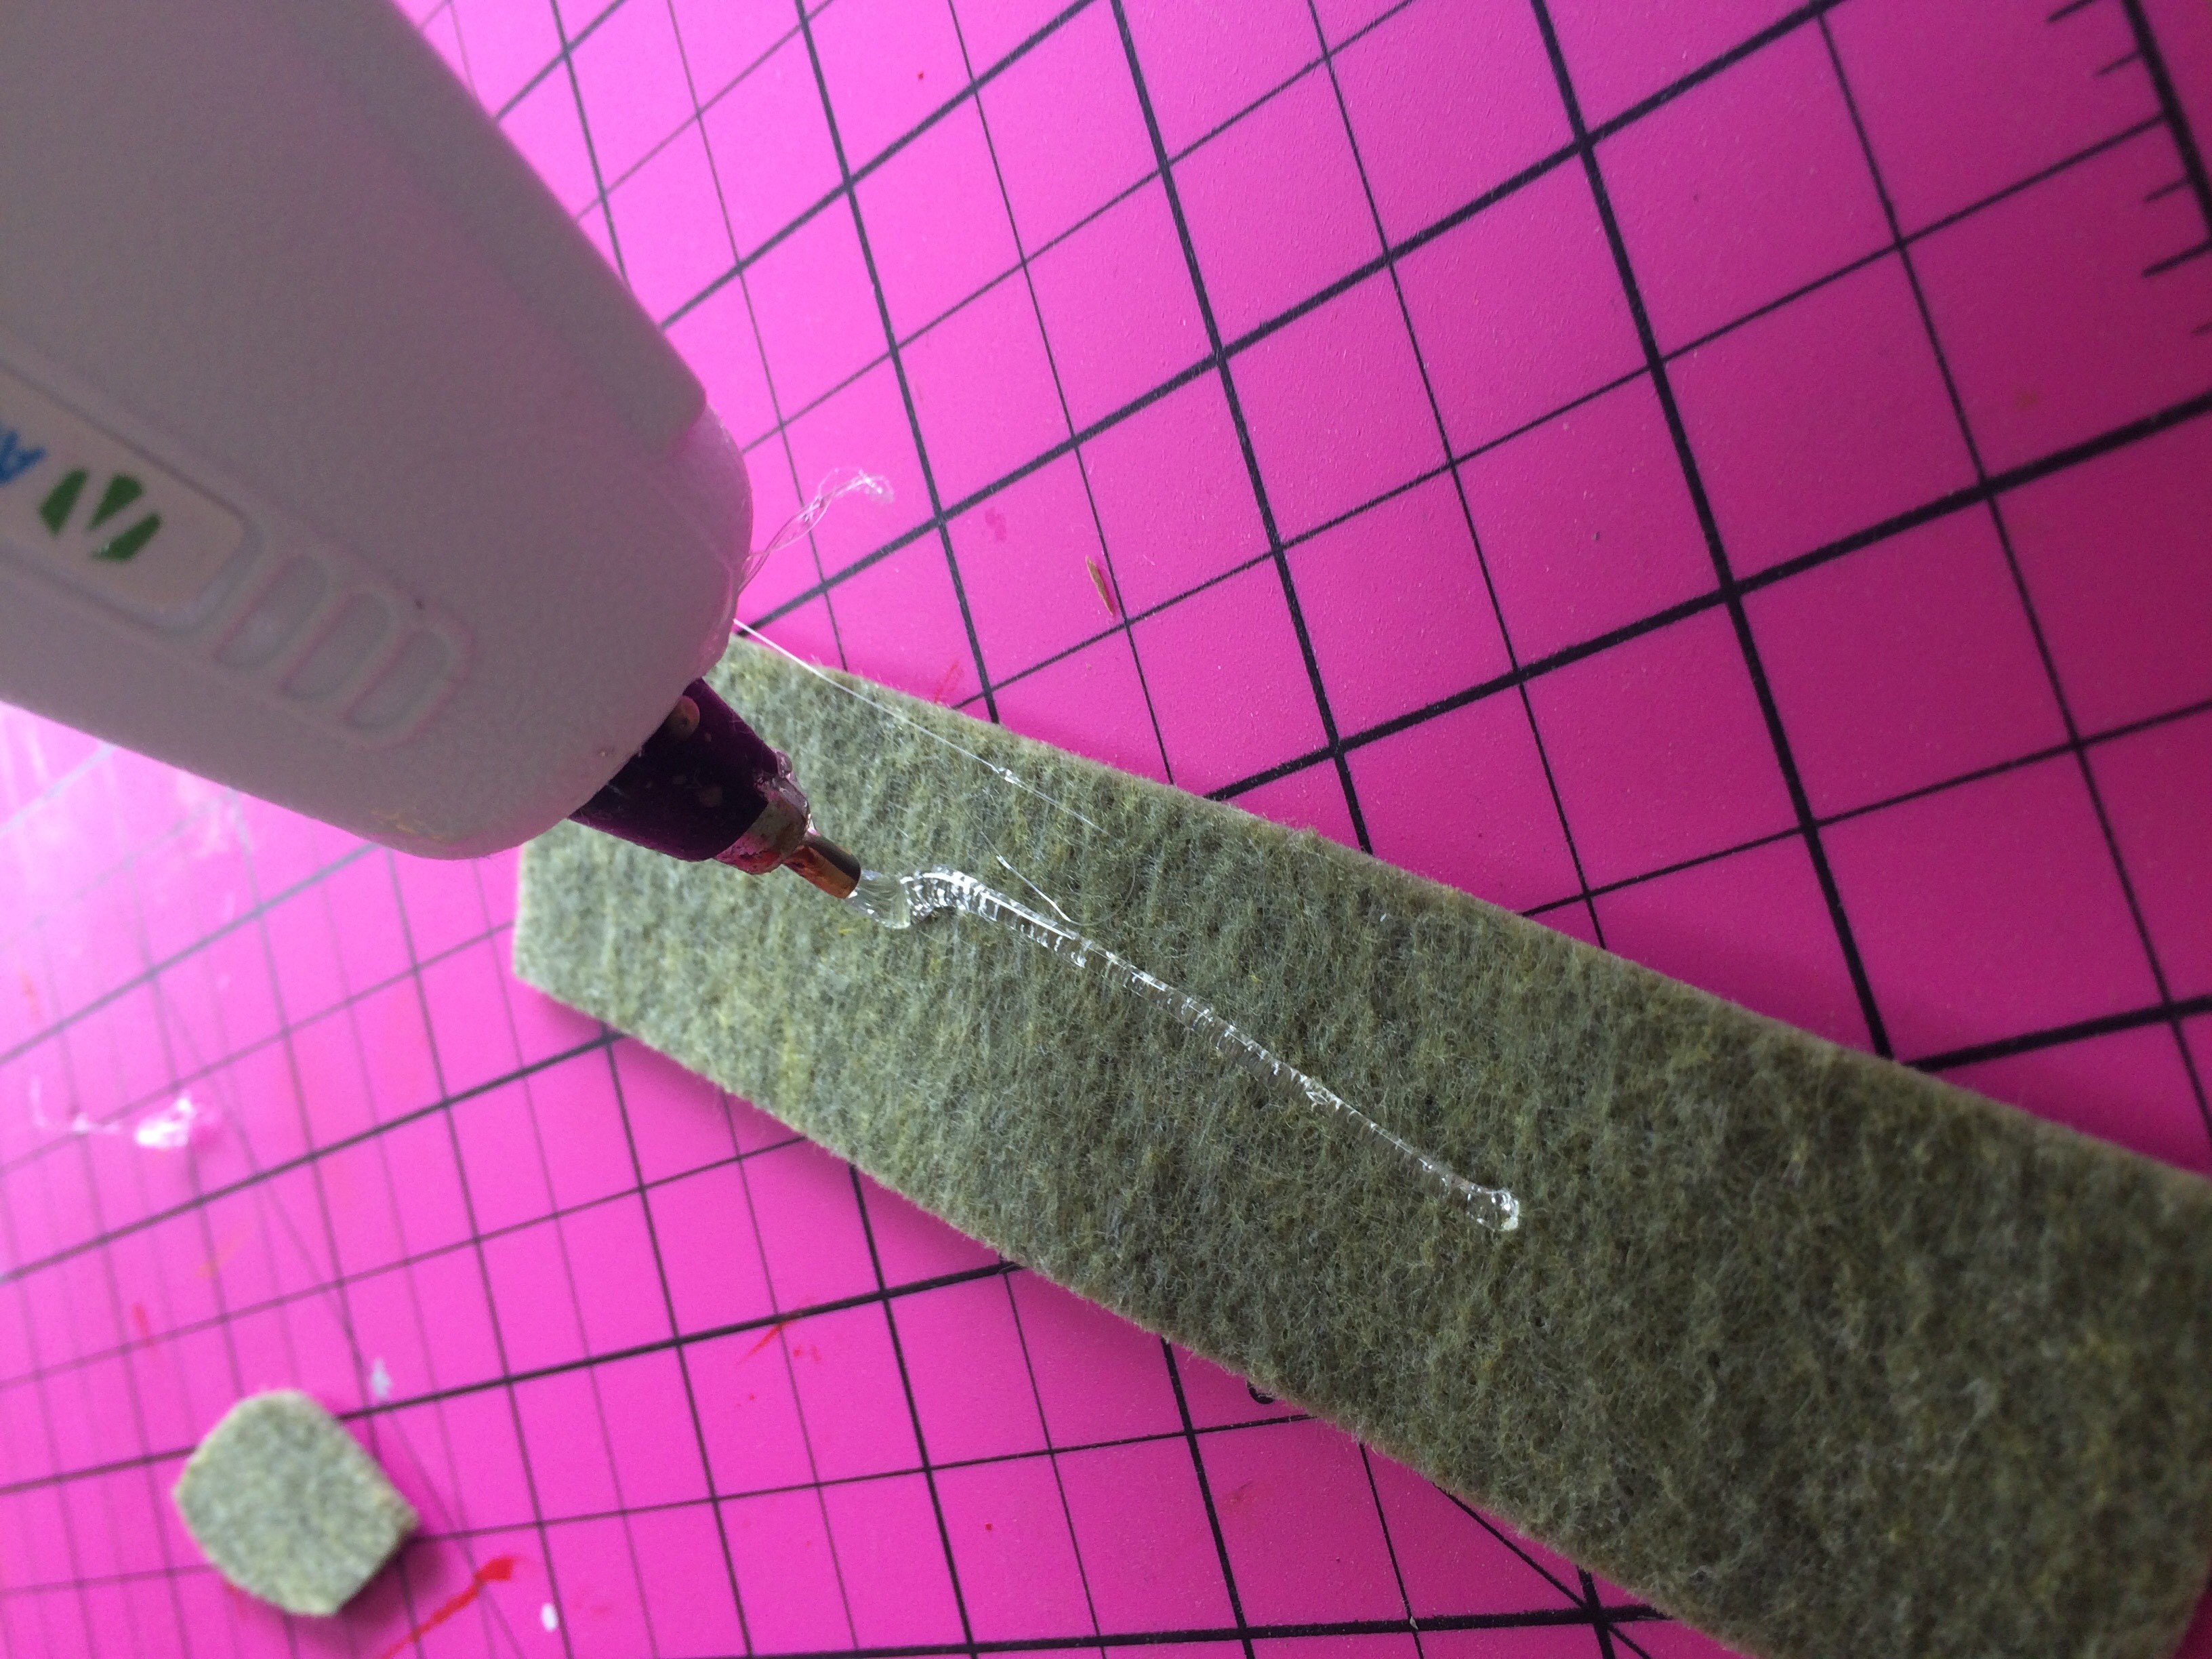
4. Cut a 1” x 7” strip of felt in the color you want your pumpkin stems to be. Place hot glue on one side of the strip and roll it up into a stem-shape.
5. Hot glue the end of the stem and place in the top, center of your felt pumpkin
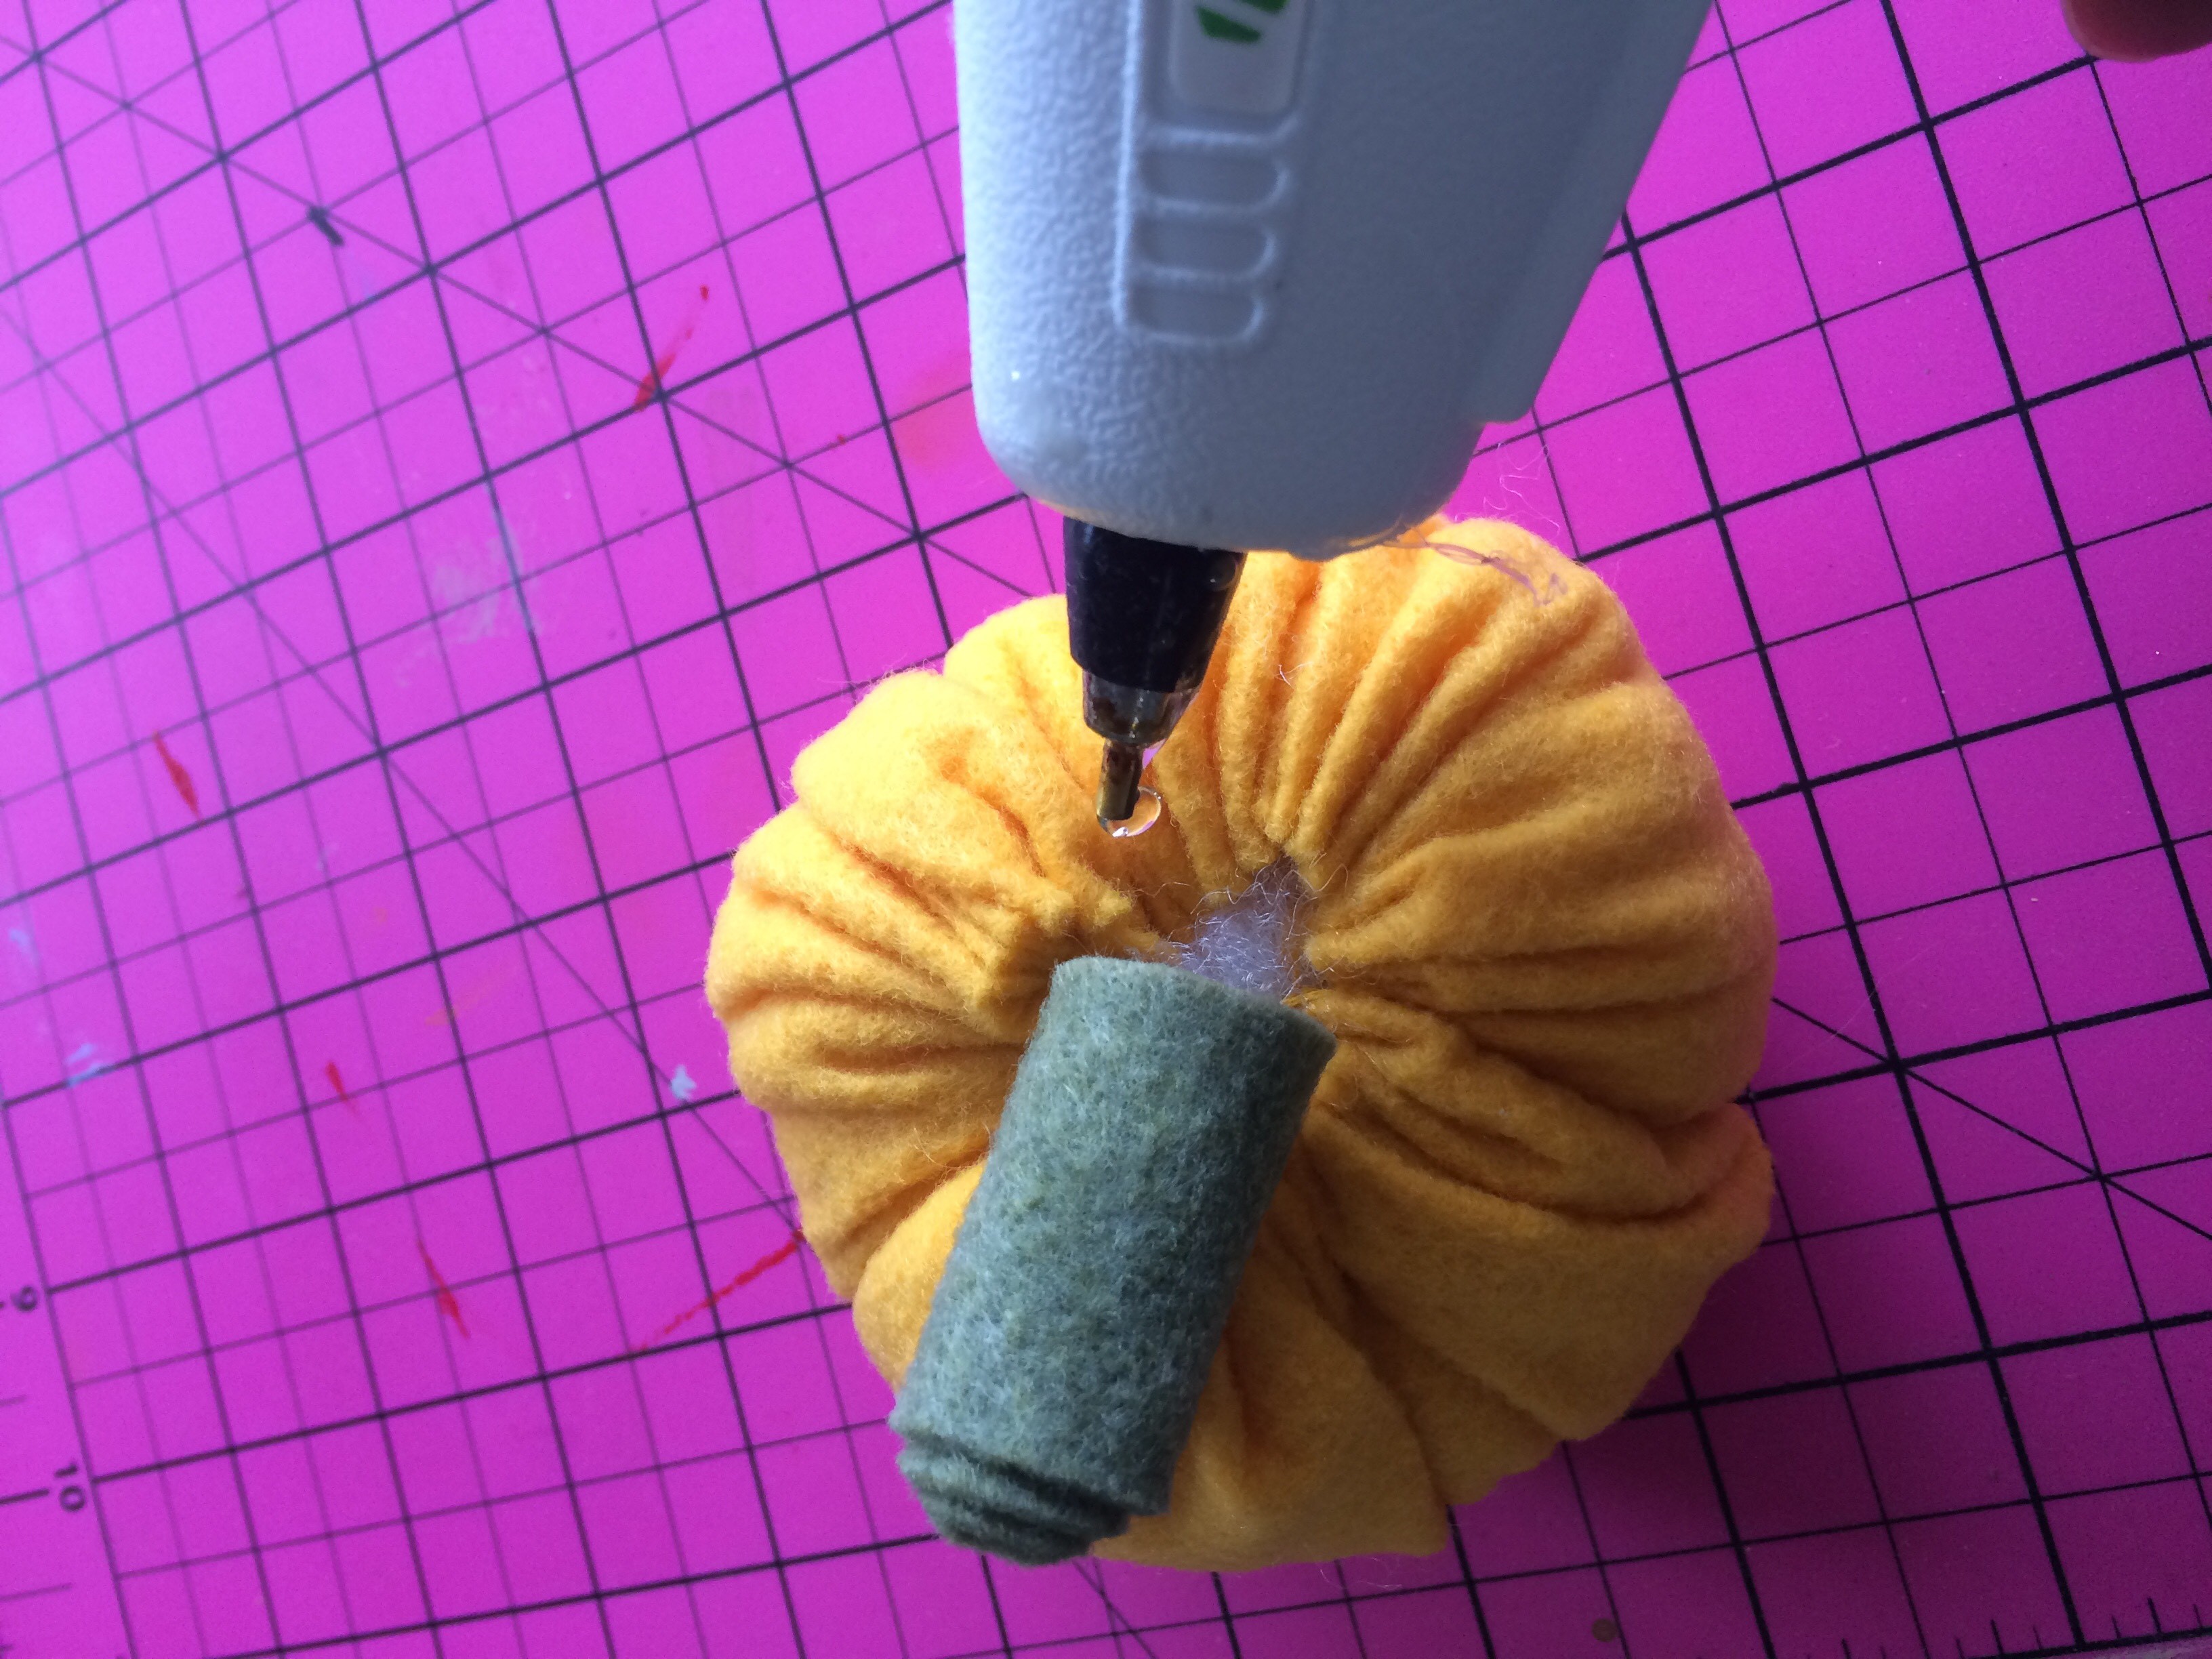
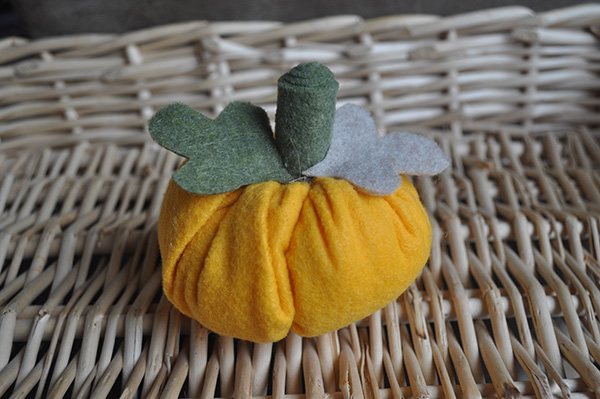
6. For extra cuteness, cut some leaves from felt and hot glue them around the stem. I just cut some leaves freehand.
You can now find an expanded color line of Kunin® Classicfelt; Kunin® Premiumfelt and ShaggiChic non-wovens fabrics in cut by the yard at your local Walmart; please inquire as to what is available in your area.
About Designer Laura Bray
Laura Bray lives in the Pacific Northwest with her husband, their daughter, and a guinea pig named Oreo. She loves to create beautiful and functional projects with felt. To see more of her craft projects, visit her blog at www.laurabraydesigns.com.